How to Grow Parsley Organically — Flat-Leaf and Curly Varieties
Parsley is one of those herbs that most gardeners take for granted — a sprig on a restaurant plate, an afterthought in the spice rack. Grow it yourself and you'll discover something entirely different: thick, deeply fragrant bunches with flavor that bears almost no resemblance to the dried stuff. Flat-leaf Italian parsley is bold enough to carry a salsa verde or chimichurri on its own. Curly parsley is pleasantly mild, visually striking, and holds up as a garnish without wilting. Root parsley (Hamburg type) gives you an edible taproot that tastes like a cross between parsley and celery root — an underused kitchen gem.
The one thing that trips up new growers is germination. Parsley has a well-earned reputation for being painfully slow to sprout — three to six weeks is normal, and many beginners assume their seeds have failed and sow again, ending up with a crowded bed. Understand that timeline going in, use the right pre-soak technique, and you'll sidestep the frustration entirely.
This guide covers everything: variety selection, soil preparation and living soil biology, planting timing, watering, an organic feeding schedule tuned specifically for parsley's heavier nitrogen needs, pest management (including how to handle swallowtail caterpillars ethically), and harvesting for maximum regrowth. Whether you're growing in a raised bed, an in-ground garden, or containers, by the end you'll have a system that produces lush, continuous harvests all season.
Choosing the Right Varieties
Three main types of parsley are worth knowing before you buy seeds.
Flat-Leaf (Italian) Parsley
The culinary workhorse. Flat-leaf varieties like 'Giant of Italy,' 'Titan,' and 'Italian Dark Green' have flat, deeply serrated leaves with an intense, full flavor. They're the pick for cooking — the flavor survives heat better than curly types and the leaves chop easily. If you're growing parsley to actually eat in quantity, this is your variety.
Curly Parsley
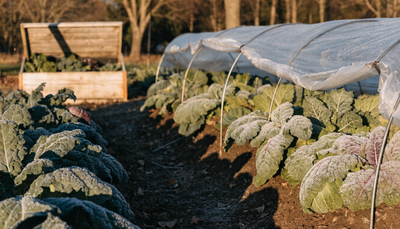
Varieties like 'Forest Green' and 'Extra Curled Dwarf' form compact mounds of tightly ruffled, bright green foliage. Flavor is milder and slightly more bitter than flat-leaf. It's slower to bolt in marginal heat and exceptionally decorative in borders or containers. Great for edible landscaping and garnishing.
Hamburg (Root) Parsley
Less common but worth growing if you want something unusual. Hamburg parsley produces edible leaves similar to flat-leaf types, but the real prize is the thick white taproot — harvested in late fall after frost, it's used in soups, stews, and roasted root vegetable medleys. Treat it like a carrot in the garden: deep, loose soil, long season (90–100 days), minimal disturbance once established.
Understanding the Biennial Lifecycle
Parsley is technically a biennial — it grows vegetatively in year one, overwinters, then flowers and sets seed in year two before dying. In most home gardens, it's treated as an annual: sown each spring, harvested through summer and fall, and composted before or after the first hard freeze. In mild climates (USDA zones 7–10), it often overwinters and provides early spring growth before bolting. If you live somewhere mild, consider leaving a plant or two in the ground — you'll get a head start on spring harvests before it shoots to flower.
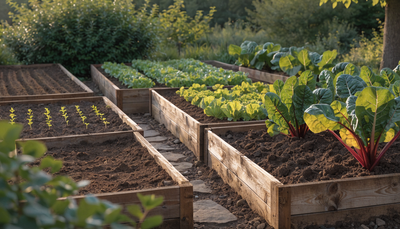
Soil Preparation
Parsley is more of a feeder than most herbs. While thyme and oregano prefer lean soil, parsley rewards you with deeper green leaves and denser growth when it has access to genuine nutrients — nitrogen especially. Start with good soil structure and you set the stage for everything that follows.
The ideal parsley bed has:
- Good drainage — parsley hates waterlogged roots, which cause rot fast
- Consistent moisture retention — it needs reliable moisture between waterings
- Moderate to high organic matter
- A pH of 6.0–7.0, ideally around 6.5
Work in 3–4 inches of finished compost before planting. If your soil is heavy clay, add perlite or coarse sand along with the compost. Sandy soils benefit from more compost and a worm casting amendment to increase water retention.
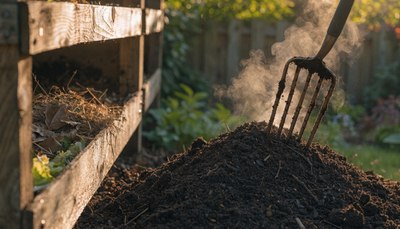
Building Living Soil
Parsley's deep taproot and dense root system benefit enormously from active soil biology. Mycorrhizal fungi extend the root zone, helping the plant access water and micronutrients well beyond where roots physically reach. Beneficial bacteria break down organic matter into plant-available nitrogen — exactly what parsley needs most.
Before transplanting or at the time of direct sowing, inoculate your soil with Growganica Gold Microbes. Apply it into the planting hole or sprinkle across the soil surface and water in. Microbes work particularly well in amended, compost-rich soil — give them the organic matter to work with and they'll build a self-sustaining nutrient cycle that benefits your parsley all season without constant inputs.
Pair the microbial inoculant with a seaweed drench using Kelp It Real at transplant time or after sowing. Kelp contains natural cytokinins that stimulate root cell division, helping parsley establish its deep taproot faster. This is especially useful in spring when soil temperatures are still cool and root development can be sluggish.
Planting: Timing and Technique
When to Plant
Parsley is cold-tolerant but not cold-loving at germination. Direct sow outdoors two to three weeks before your last expected frost date — the soil should be at least 50°F for reasonable germination, with 65–70°F being optimal. Starting seeds indoors 8–10 weeks before transplant date is common, but note that parsley's taproot makes it sensitive to transplant shock if seedlings are allowed to get too large in small cells.
For fall growing in warmer climates, direct sow in late summer (8–10 weeks before first frost). Parsley in fall often outperforms spring-grown plants — cooler temperatures produce more aromatic oils and richer color.
The Germination Challenge — and How to Beat It
Parsley seeds contain compounds that inhibit germination, which is why they're so notoriously slow. The standard workaround is a pre-soak: place seeds in warm water for 24 hours before sowing. Some growers go further and rinse the seeds through a fine strainer under warm running water for a minute before the soak — this helps flush germination inhibitors from the seed coat. After soaking, sow immediately while seeds are still moist.
Even with pre-soaking, expect 2–4 weeks for germination under good conditions. At lower soil temperatures, 5–6 weeks is normal. Sow a few extra seeds per spot and thin to the strongest plant rather than expecting 100% germination.
Sowing Depth and Spacing
Sow seeds ¼ inch deep. Parsley needs light to germinate, so don't bury seeds deeply — press them lightly into moist soil, cover with a thin layer of vermiculite or very fine compost, and keep consistently moist until germination. Space plants 6–8 inches apart for compact curly types, 8–12 inches for flat-leaf varieties which grow larger. Hamburg parsley needs 6 inches in-row but appreciates 12-inch centers.
Container Growing
Parsley grows excellently in containers. Use pots at least 10 inches deep to accommodate the taproot — shallower containers cause the root to hit the bottom early, stressing the plant and triggering premature bolting. Fill with a quality potting mix amended with compost and a slow-release organic fertilizer. Self-watering containers are ideal since parsley likes consistent moisture.
Watering
Parsley likes consistent moisture — not waterlogged, not bone dry. Inconsistent watering is one of the main causes of yellowing leaves and early bolting. The goal is soil that stays evenly moist about 2 inches down at all times.
In garden beds, water deeply 1–2 times per week depending on your climate and rainfall. Let the top inch of soil dry slightly between waterings, but never let the soil dry out completely. A 2-inch layer of mulch (straw, wood chips, or shredded leaves) dramatically reduces watering frequency and prevents the surface cracking that compacts soil around the crown.
In containers, check soil moisture daily in warm weather — containers dry out far faster than beds. Stick a finger 2 inches into the mix; water when it feels barely moist or dry. Water until it drains freely from the bottom, then don't water again until the test tells you to.
Avoid overhead watering late in the day, which leaves foliage wet overnight and invites fungal issues. Early morning is ideal — foliage dries quickly and roots receive water during the cooler part of the day.
Organic Fertilizing Schedule
Parsley is a notably heavier feeder than most culinary herbs. It has high nitrogen demands to fuel that constant production of dense, dark green foliage. An organic feeding program with three distinct phases will keep it lush all season.
Phase 1: Establishment (Weeks 1–4 After Transplant or First True Leaves)
During establishment, focus on root development and early vegetative growth. Apply Growganica Gold Veg at half the standard label rate every 10–14 days. Gold Veg's nitrogen-forward formulation supports the early flush of leaf growth without pushing the plant too hard before it's established. Continue weekly seaweed drenches with Kelp It Real — at establishment, kelp's natural plant hormones accelerate root anchoring and stress recovery after transplanting.
Phase 2: Active Growth (Weeks 4–12)
Once parsley hits its stride — a full rosette of leaves, strong upright stems, steady new growth from the center — move to full-rate applications of Gold Veg every 10 days. This is the phase where parsley really responds to nutrition: well-fed plants produce noticeably larger leaves, deeper color, and more stems per crown. You should be harvesting regularly now, which itself stimulates new growth — the feeding keeps pace with the harvest.
At this stage, add Growganica Vitamin Sea to your rotation, alternating it with Gold Veg applications. Vitamin Sea's magnesium content is particularly valuable for parsley — magnesium is the central atom in every chlorophyll molecule, and deficiency shows up first as yellowing between the leaf veins on older leaves. Parsley's signature deep, almost blue-green color comes in large part from chlorophyll density. Adequate magnesium keeps that color vibrant and signals photosynthetic efficiency across the whole plant.
Phase 3: Season Extension (Weeks 12+ or Late Summer)
As the season lengthens and temperatures rise, parsley will begin to slow. Continue Gold Veg applications every two weeks and keep up the Kelp It Real foliar or soil drenches, which help moderate heat stress. In fall, taper feeding as temperatures cool and the plant shifts toward slower growth. If overwintering in a mild climate, a light application of Gold Veg in late winter as temperatures warm will wake the plant up for early spring production before it bolts to flower.
Pest and Disease Management
The Swallowtail Caterpillar — Grow Extra, Share Freely
If you find plump, brightly striped caterpillars on your parsley — green with yellow dots and black stripes — those are black swallowtail butterfly larvae (and possibly anise swallowtail in the western US). They're beautiful, they're native, and they will absolutely strip a plant in a few days.
The organic-first answer here isn't pesticide — it's abundance. Grow a dedicated "swallowtail patch" of extra parsley, fennel, or dill specifically to host caterpillars. Let them eat their fill on those plants and harvest freely from the rest. It's one of the most satisfying garden trades: a few sacrificed plants buy you the sight of a swallowtail butterfly in your garden weeks later. If your planting is small and you can't spare any to caterpillars, hand-relocate them to a wild patch of Queen Anne's lace (their native host) rather than spraying.
Aphids
Aphids cluster on new growth and the undersides of leaves. In most cases, a strong spray of water from the hose dislodges them effectively. For persistent infestations, insecticidal soap spray (diluted per label) works without harming beneficials after drying. Encourage ladybugs, lacewings, and parasitic wasps by keeping flowering plants nearby.
Leaf Miners
Leaf miners leave pale, winding trails through leaves. The larvae are inside the leaf tissue, so contact sprays are ineffective. Remove and destroy affected leaves as soon as you see damage. Row cover prevents the fly from laying eggs in the first place — particularly useful in spring when populations peak.
Root Rot and Crown Rot
Both result from overwatering or poorly drained soil. The fix is usually cultural: improve drainage, reduce watering frequency, and ensure the crown isn't buried under mulch. A healthy, biologically active soil (see the microbes section above) is the best disease-suppression tool — diverse soil biology competes with and suppresses pathogenic fungi.
Powdery Mildew
Rare on parsley but can occur in humid, low-airflow conditions in late summer. Improve air circulation by thinning dense plantings, water at the base rather than overhead, and remove affected leaves promptly.
Harvesting
Parsley is a cut-and-come-again herb — the more you harvest, the more it produces. The key is harvesting from the outside in, cutting older outer stems at the base rather than snipping from the top of the plant. The center of the crown is where new growth originates; leave it intact and harvest the outer stems and it will regenerate continuously.
When to Start Harvesting
Begin harvesting once the plant has at least 8–10 stems and looks vigorous. Don't start too early — a young plant needs leaf area to photosynthesize and build root reserves. Once established, harvest regularly: light, frequent harvests produce more total yield than occasional heavy cuts.
How to Harvest
Use clean scissors or a knife. Cut stems at the base, as close to the crown as possible. Never remove more than one-third of the plant at a time. If a plant bolts (sends up a tall central flower stalk), cut the stalk immediately to delay the process — a bolted plant won't revert to full leaf production, but you can extend it by a week or two.
Storing Fresh Parsley
The best way to store cut parsley is like cut flowers: trim the stem ends, place them in a glass of water (an inch or two), and store loosely covered with a plastic bag in the refrigerator. This method keeps parsley fresh for up to two weeks. Alternatively, wrap dry parsley loosely in a slightly damp paper towel, place in a sealed bag, and refrigerate — good for 5–7 days.
For longer storage, blanch briefly (15 seconds in boiling water, immediately into ice water), dry thoroughly, and freeze in zip bags. Frozen parsley works perfectly in cooked applications. You can also dry it in a low oven (200°F) or a dehydrator, though dried parsley loses significant flavor compared to frozen.
Common Problems and Troubleshooting
Seeds Didn't Germinate After Three Weeks
This is the most common complaint with parsley, and usually not a problem at all — it just needs more time. Keep the soil consistently moist (not wet) and give it 4–6 weeks. If you didn't pre-soak seeds, try again with a 24-hour soak. Ensure soil temperature is at least 60°F; cold soil dramatically slows germination. Very old seeds germinate poorly — fresh seed from the current season performs best.
Yellowing Lower Leaves
Normal to some extent on older outer leaves, but widespread yellowing usually indicates nitrogen deficiency, magnesium deficiency, or overwatering. Nitrogen deficiency causes uniform yellowing across older leaves — feed with Gold Veg. Magnesium deficiency shows as yellowing between veins (interveinal chlorosis) on mid-aged leaves — supplement with Vitamin Sea. Overwatering yellows lower leaves with a more wilted, mushy appearance — reduce watering and improve drainage.
Plant Bolted Early
Heat is the primary trigger for bolting. Parsley will bolt when temperatures consistently exceed 80–85°F. In hot climates, grow parsley in a site with afternoon shade. Start seeds early enough that plants have a full spring harvest before summer heat arrives. In fall, sow 8–10 weeks before first frost for a cool-weather crop that resists bolting. Once bolted, harvest any remaining leaves and compost the plant.
Pale, Washed-Out Color
Parsley should be a deep, saturated green. Pale or light green growth usually means insufficient light or inadequate nutrition — specifically nitrogen and magnesium. Ensure at least 6 hours of direct sun daily. Step up Gold Veg feeding frequency and add Vitamin Sea to your rotation for the magnesium boost.
Stunted Growth with Healthy Color
Stunting with good color often points to root restriction (in containers: repot into something deeper), compacted soil, or phosphorus deficiency. In new beds, verify soil pH — parsley outside the 6.0–7.0 range will lock out nutrients regardless of what you apply.
Continue Growing
Parsley pairs brilliantly with a kitchen garden full of flavor and variety. These guides will help you build out a complete growing system:
- How to Grow Mint Organically — The Complete Care Guide — another prolific cut-and-come-again herb with a long season
- How to Grow Kale Organically — Complete Beginner's Guide — a nitrogen-hungry leafy green that shares parsley's feeding preferences
- How to Grow Onions Organically — From Sets to Harvest — classic kitchen garden staple with complementary soil needs
- How to Grow Beets Organically — Root to Greens Growing Guide — another cool-season crop that benefits from rich, biologically active soil