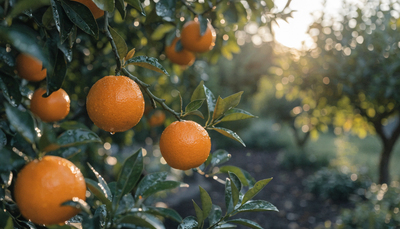
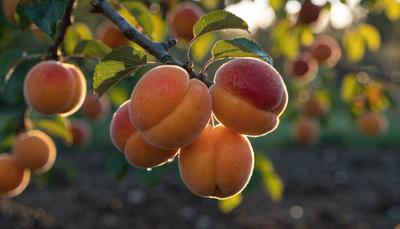
A tree-ripened organic plum tastes nothing like the firm, flavorless fruit trucked to the supermarket — it's dripping-sweet, complex, and grown without a single synthetic spray. Grow your own and you get that flavor while building living soil, feeding pollinators, and planting a tree that pays you back for decades.
Plums are among the most forgiving stone fruits to grow, and among the most rewarding to grow organically. A healthy tree in living soil shrugs off most of the pests and diseases that plague conventionally sprayed orchards, and once established it produces bushels of fruit every summer for 15 to 20 years. Whether it's a single semi-dwarf in a backyard corner or a small home orchard, this guide covers variety selection, soil biology, planting, feeding, pest control, and harvest.
Choosing the Right Plum Varieties
Your most important decision is which type of plum to grow — it determines your climate fit, your pollination needs, and what you'll do with the harvest.
European vs. Japanese vs. American Plums
European plums (Prunus domestica) are the classic oval, blue-to-purple plums — think prune plums and gages. They bloom later in spring (a big advantage where late frosts are common), tolerate cold well (roughly USDA zones 4–9), and many are self-fertile. Their dense, sweet flesh is ideal for fresh eating, canning, and drying into prunes.
Japanese plums (Prunus salicina) are the large, round, juicy plums with red, yellow, or crimson skin sold as dessert fruit. They bloom early — which makes them frost-sensitive — and thrive in warmer regions (roughly zones 5–9). Most Japanese types need a second variety nearby for cross-pollination.
American and hybrid plums (Prunus americana and crosses) are the toughest of the bunch, surviving into zones 3–4 where European and Japanese types would freeze out. They're the right call for the northern Plains and Upper Midwest.
One rule to remember: European and Japanese plums bloom at different times and generally won't pollinate each other. Pair European with European, Japanese with Japanese (or a compatible hybrid).
Best Varieties for Organic Growing
- Stanley — the workhorse European prune plum; reliably self-fertile, heavy-bearing, excellent for drying and canning.
- Italian Prune (Fellenberg) — deep purple, freestone, richly sweet; a favorite for fresh eating and prunes.
- Green Gage (Reine Claude) — a legendary dessert plum with honeyed, amber flesh; smaller yields but unmatched flavor.
- Mount Royal — a cold-hardy, self-fertile European blue plum for zone 4 gardeners.
- Damson — small, tart, intensely flavored; the jam-and-preserve plum, and remarkably disease-resistant.
- Santa Rosa — the most popular Japanese plum; partially self-fertile, widely adaptable, with aromatic reddish-purple fruit.
- Methley — self-fertile, low-chill Japanese type that fruits early and generously; great for the South.
- Shiro — a golden-yellow, juicy Japanese plum with heavy yields.
- Toka (Bubblegum plum) — an ultra-hardy American hybrid with distinctive spicy-sweet flavor, and an excellent pollinizer for other hybrids.
Also pay attention to rootstock, which controls tree size. Myrobalan produces a full-size (18–22 ft) tree; St. Julien A and Krymsk give you a manageable semi-dwarf (12–15 ft) that's easier to net, prune, and harvest. For most home gardens, semi-dwarf is the sweet spot.
Soil Preparation
Plums aren't fussy about soil fertility, but they are unforgiving about drainage. Get the soil right before planting and you'll head off most future problems.
Ideal Soil Conditions
Plums want a well-drained loam with a slightly acidic to neutral pH of about 6.0 to 6.8. They will not tolerate "wet feet" — waterlogged roots invite crown rot and bacterial canker. If you have heavy clay or a low spot that puddles after rain, plant on a raised mound or berm 12–18 inches high to lift the root zone above standing water. A quick percolation test tells you what you're working with: dig a hole a foot deep, fill it with water, and if it hasn't drained within a few hours, mound or amend.
Building Living Soil
Organic plum growing is really soil growing. The goal isn't to dump nutrients on the tree but to build a living underground ecosystem of bacteria, fungi, and earthworms that feeds the roots on demand. Mycorrhizal fungi in particular partner with plum roots, extending their reach for water and phosphorus far beyond the roots' own range.
Start by working 2–4 inches of finished compost into the planting area (not just the hole — a wide zone, since roots spread far beyond the canopy). Avoid fresh manure, which can burn roots and throw off your nitrogen balance. At planting, inoculate the root zone with Microbes to introduce beneficial bacteria and mycorrhizae right where the feeder roots will grow. Then top everything with 3–4 inches of wood-chip or bark mulch, kept a few inches back from the trunk. That mulch feeds fungi, holds moisture, and suppresses the grass that stunts young trees.
Planting: Timing and Technique
Plums are almost always planted as bare-root or containerized young trees rather than grown from seed — seedlings rarely come true to the parent and take many years to fruit. Buy a healthy one- or two-year-old tree from a reputable nursery.
Timing by Zone
The ideal planting window is late winter to early spring, while the tree is still dormant and the ground is workable. In mild-winter regions (zones 7–9), fall planting also works and gives roots a head start before summer heat. As a perennial, your plum will hold the same spot for decades, so choose a site with full sun (at least 6–8 hours) and good air circulation to dry foliage quickly after rain.
Transplanting
Dig a hole twice as wide as the root system but no deeper than the roots themselves. For bare-root trees, spread the roots over a small cone of soil at the bottom. Set the tree so the graft union sits 2–3 inches above the soil line — burying it lets the scion root and defeats the dwarfing rootstock. Backfill with the native soil you removed (don't over-amend the hole itself, which can create a "pot" that roots refuse to leave), water deeply to settle out air pockets, and mulch.
Spacing and Pollination
Space standard trees 18–22 feet apart, semi-dwarfs 12–15 feet, and dwarfs 8–10 feet. If you're growing a variety that needs cross-pollination, plant a compatible partner within about 50 feet so bees can move freely between them. Tight on space? Look for a self-fertile variety like Stanley, Methley, or Mount Royal, or plant two compatible types in a single large hole ("high-density" planting).
Companion Planting
A plum tree standing alone in mowed turf is a plum tree missing its support crew. Thoughtful companions build soil, feed beneficial insects, and deter pests without a single spray.
- Comfrey — a dynamic accumulator that pulls minerals up from deep in the subsoil; chop-and-drop the leaves as living mulch around the base.
- Clover and other legumes — a low-growing cover crop that fixes nitrogen and feeds the soil food web instead of competing with it like grass does.
- Alliums and daffodils — a ring of chives, garlic, or daffodil bulbs around the trunk helps deter borers, aphids, and browsing rodents (the pungent alliums repel insects; the toxic daffodil bulbs turn back voles and gophers).
- Yarrow, dill, fennel, and tansy — their tiny flowers draw in the parasitic wasps, lacewings, and hoverflies that hunt aphids and caterpillars.
- Nasturtium — a trap crop that lures aphids away from the fruit tree.
Keep the immediate 2–3 feet around the trunk clear to prevent crown rot and let young roots establish.
Watering Plums Organically
Consistent moisture is the difference between plump, juicy fruit and small, split, or dropped fruit.
Best Practices
Young trees in their first two seasons need the most attention — aim for about 1 inch of water per week, delivered deeply rather than in frequent shallow sips, which trains roots to grow down and makes an established tree far more drought-resilient. A drip line or soaker hose at the canopy edge keeps water off the foliage and fruit, which discourages fungal disease. Water most attentively during fruit swell, the few weeks before harvest when it's sizing up its crop; let your mulch even out the swings.
Signs of Problems
Wilting, curling, or yellowing leaves and premature fruit drop signal underwatering or, in poorly drained soil, the opposite. Overwatering shows up as yellowing lower leaves, a sour smell, or mushroom growth at the base — all signs the roots are suffocating.
Organic Fertilizing Schedule for Plums
Plums are moderate feeders, and in living soil they need far less input than a conventionally grown tree. Over-fertilizing — especially with nitrogen — pushes soft, sappy growth that aphids and disease love, and can delay fruiting. Feed the soil biology, and let it feed the tree. A quick word of reassurance before the schedule: you don't need all of these — Microbes, Veg, and Bloom are the core system; the rest are optional boosters for specific goals.
At Planting and Establishment
Inoculate the root zone with Microbes to colonize roots with mycorrhizae and beneficial bacteria — the foundation of the whole system. Drench newly planted and transplanted trees with Kelp It Real to ease transplant shock and drive early root growth; mix into water and pour over the root zone at planting and again a few weeks later.
Spring (Bud Break to Leaf-Out)
As buds swell, feed Veg around the drip line to fuel the flush of new leaves and shoot growth the tree needs to power its crop. Refresh Microbes once the soil warms to keep the biology active. Work both lightly into the top inch of soil under the mulch and water in.
Bloom and Fruit Set
As flowers open and fruit begins to form, switch to Bloom to support flowering and fruiting with phosphorus and potassium rather than growth-pushing nitrogen. For growers chasing bigger, denser harvests, add Incredible Bulk at fruit set as a bloom-and-fruit booster to size up the crop.
Fruit Development (Early to Mid Summer)
Keep Bloom going through fruit swell, and spray or drench Kelp It Real every few weeks — its natural growth hormones and micronutrients improve stress tolerance during summer heat and support fruit quality.
After Harvest and Fall
Stop nitrogen feeding by late summer so the tree can harden off for winter — a late push of soft growth is vulnerable to frost. A final light application of Microbes and a fresh top-up of compost in fall keeps the soil food web fed through the dormant season and sets up next spring.
Organic Pest Control
The best pest control is a healthy tree, clean orchard sanitation, and the beneficial insects your companions attract. When you must intervene, reach for the gentlest effective tool.
- Plum curculio — the number-one plum pest east of the Rockies. This small weevil cuts a distinctive crescent-shaped scar into young fruit. Control it with kaolin clay sprayed at petal fall (it coats fruit in a gritty film the weevil won't feed on), and by spreading a sheet and shaking the tree in early morning to knock the adults off, then destroying them.
- Aphids (including leaf-curl plum aphid) — cluster on new growth and curl leaves. A strong jet of water, insecticidal soap, or neem oil handles them, and the lacewings and ladybugs from your flowering companions usually keep them in check.
- Oriental fruit moth — larvae tunnel into shoot tips and fruit. Use pheromone traps to monitor, and mating-disruption dispensers or targeted spinosad sprays timed to trap counts.
- Peachtree borer — larvae bore into the trunk near the soil line, leaving gummy, sawdust-flecked ooze. Keep the trunk base clear and healthy; pheromone traps and beneficial nematodes drenched into the soil control them organically.
- San Jose scale — tiny bumps on bark and fruit. A dormant horticultural oil spray in late winter smothers overwintering scale (and aphid and mite eggs) — the single most valuable spray in the organic plum calendar.
- Japanese beetles — skeletonize leaves in summer. Hand-pick into soapy water in the cool morning; avoid the pheromone lure traps, which draw in more beetles than they catch.
Common Diseases and Organic Solutions
- Black knot — the signature plum disease: rough, black, warty swellings that girdle branches. There's no spray cure; the fix is vigilant pruning. Cut out knots 4–6 inches below the swelling during dry dormant weather, sterilize your tools between cuts, and burn or bag the prunings. Choose resistant varieties (Damson and many Japanese types resist it well).
- Brown rot (Monilinia) — turns blossoms brown and rots fruit into shriveled, fuzzy "mummies." Sanitation is everything: remove every mummified fruit from the tree and ground, prune for airflow, and apply organic sulfur at bloom and again as fruit ripens in wet seasons.
- Bacterial canker and bacterial spot — sunken, oozing cankers on bark and spots on leaves and fruit. Prune only in dry summer weather (never wet winter), keep trees vigorous, and apply copper spray at leaf fall and bud break.
- Plum pockets (Taphrina) — swollen, hollow, distorted fruit. A single dormant copper or sulfur spray before bud break prevents it.
- Silver leaf — a silvery sheen on foliage caused by a fungus entering through wounds. Prune in dry summer weather so cuts heal fast, and remove infected wood promptly.
Harvesting Plums
When to Harvest
Unlike some fruit you pick early to ripen indoors, plums develop their best flavor and sugar on the tree. Watch for full color development (the variety's mature shade), a slight softening when you gently squeeze, and a dusty "bloom" — the natural waxy coating — on the skin. A ripe plum releases from the spur with a gentle twist and lift. The truest test is taste: pick one, and if it's sweet and juicy, the rest are ready. A whole tree ripens over a couple of weeks, so plan to pick it over 2–3 times. If you grow European prune plums for drying, let them hang until they're deeply sweet and starting to wrinkle slightly.
Storage and Extending the Harvest
Fully ripe plums keep only 3–5 days at room temperature; slightly firm ones store in the refrigerator for 2–4 weeks and finish ripening at room temp when you want them. For a lasting harvest, plums freeze beautifully (halved and pitted), dry into prunes in a dehydrator, and make outstanding jam, butter, and canned fruit — a single mature tree easily out-produces what one family can eat fresh.
Common Problems and Troubleshooting
Why is my plum tree not producing fruit?
The usual culprits are pollination and age. Young trees simply need time — most plums don't bear until their third or fourth year. If a mature tree flowers heavily but sets no fruit, it likely needs a compatible pollinizer nearby, or a late frost killed the blossoms. Too much nitrogen (or heavy shade) also pushes leaves at the expense of fruit.
Why is my fruit dropping before it ripens?
Some drop is natural — the "June drop," when the tree sheds excess fruit it can't support. Heavier drop points to inconsistent watering, plum curculio damage, or general stress. Water evenly during fruit swell, and check dropped fruit for the curculio's crescent scar.
Why are my plums cracking and splitting?
Fruit splits when a dry spell is followed by heavy water or rain and the flesh swells faster than the skin can stretch. The fix is steady soil moisture — deep, consistent watering and a good mulch layer to buffer the swings.
Frequently Asked Questions
How long until a plum tree bears fruit?
Most plum trees begin producing in their third or fourth year after planting, with full crops by years five to six. Dwarf and semi-dwarf trees on size-controlling rootstock often fruit a year sooner than full-size trees.
Do I need two plum trees to get fruit?
It depends on the variety. Many European plums (Stanley, Mount Royal) are self-fertile and fruit alone. Most Japanese plums need a second compatible variety nearby for cross-pollination. Even self-fertile types usually crop more heavily with a partner.
When and how should I prune a plum tree?
Prune in dry summer weather, not wet winter, to minimize silver leaf and bacterial canker infection. Train Japanese plums to an open-center (vase) shape for light and airflow, and European plums to a modified central leader. Always remove dead, crossing, and inward-growing wood.
Should I thin the fruit on my plum tree?
Yes. When fruit is dime-sized, thin to leave one plum every 4–6 inches along the branch. Thinning gives you larger, sweeter fruit, prevents limbs from breaking under the load, and reduces the tendency to bear heavily one year and barely the next.