How to Grow Sunflowers Organically — From Giant Heads to Cut Flowers
Few plants command a garden the way sunflowers do. A single Helianthus annuus can climb past ten feet, turn its massive head to track the morning sun, and produce hundreds of seeds packed with protein and fat — all in a single season. But sunflowers are also one of the most versatile crops you can grow organically: harvest the seed heads for eating and bird feeding, cut the branching varieties for weeks of striking arrangements, or simply plant a row along a fence and let the pollinators — bees, butterflies, goldfinches — work through it all summer.
The key to growing spectacular sunflowers organically is understanding what they actually need, because the conventional advice is often vague. Sunflowers don't need coddling, but they do have strong preferences: deep well-drained soil, full sun, and potassium in quantity when stems are elongating and heads are filling. Skip the potassium and you get weak necks that can't hold the weight of a mature head. Skip the soil biology and nutrient uptake stalls exactly when the plant needs it most.
This guide covers everything from choosing varieties suited to your goals, to building the soil biology that makes organic fertilizing actually work, to the specific harvest techniques that differ between seed production and cut-flower growing. Whether you're planting a single row of Mammoths or a cutting garden packed with multi-headed varieties, these are the methods that consistently produce results.
Choosing the Right Varieties
Variety selection matters more with sunflowers than most people realize, because the different types are grown very differently and harvested on completely different timelines.
Giant Single-Head Types
Mammoth Grey Stripe and Russian Giant are the classic seed-production varieties. Plants reach 8–12 feet with single heads 10–14 inches across, loaded with large, easy-to-shell seeds. These are the varieties to grow if you want roasted seeds for eating or winter bird feed. One caveat: their height makes them wind-vulnerable on exposed sites — plant them where a fence or hedge breaks the worst gusts, or use a stake once the head starts filling.
Titan pushes even bigger, with heads regularly exceeding 14 inches in good conditions. It's spectacular but needs excellent soil and consistent fertility to reach its potential.
Branching Cut-Flower Types
Autumn Beauty produces an explosion of medium-sized flowers in bronze, gold, rust, and burgundy — one plant can yield 15–20 stems over a 6-week window. Moulin Rouge is a deep, nearly-black burgundy single and one of the most requested cut flowers at farm stands. Velvet Queen sits in the same moody color range. ProCut series varieties (ProCut Orange, ProCut Gold Bi) are pollenless, which keeps vases clean and extends vase life dramatically — important if you're selling.
Branching types are deadheaded regularly to push new stem production, while single-head types are left to mature fully.
Dwarf and Container Varieties
Teddy Bear (fluffy, double-petalled, 2 feet) and Sunspot (full-sized head on a 2-foot plant) work well in containers or at the front of borders. Little Becka is a compact bicolor that works in pots. For containers, the limiting factor is root depth — use containers at least 12 inches deep and keep up with watering, as small containers dry fast in summer heat.
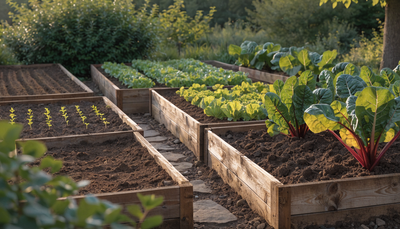
Soil Preparation
Sunflowers are heavy feeders with deep taproots that can push 4–6 feet into the soil. The more freely those roots can explore, the more the plant can feed itself. Compacted or waterlogged soil stunts root development early and the plant never fully recovers.
Till or fork the bed to at least 12 inches, removing rocks and breaking up clods. Sunflowers prefer a neutral to slightly acidic pH — 6.0 to 7.5 is the workable range. If your soil is heavy clay, work in compost generously (2–4 inches incorporated) to improve drainage. Sandy soils benefit from the same addition to improve water and nutrient retention.
Building Living Soil
Organic nutrients only become available to plants through biological activity — bacteria, fungi, and other soil organisms break complex molecules down into plant-accessible forms. In bare, tilled soil, that microbial community is sparse. Inoculating early gives sunflowers access to nutrition from the moment roots start exploring.
Mix Growganica Gold Microbes into the top 4–6 inches of soil at planting time, following the label rate. The mycorrhizal fungi in the blend form networks around sunflower roots that dramatically expand effective root surface area — particularly useful for phosphorus uptake, which is critical for early root and stem development. Pair this with Kelp It Real worked into the soil before planting. Kelp provides natural cytokinins and trace minerals that promote cell division and root proliferation, giving seedlings a noticeably more vigorous start.
Apply 2–3 inches of compost to the surface after planting and water it in. This feeds the microbial community you've established and keeps moisture consistent during germination.
Planting: Timing and Technique
Direct sow only. Sunflowers have a long, brittle taproot that develops within days of germination, and it doesn't survive transplanting intact. Any disruption causes wilting, stunting, or death. Sow directly into the ground where plants will grow.
Sow after all frost risk has passed and soil temperature has reached at least 50°F — 60–70°F is ideal and will produce germination in 7–10 days. In most of the US, this means late April through early June. Succession sow every 2–3 weeks through mid-June for a continuous cutting harvest.
Depth: Plant seeds 1 inch deep. Shallower seeds are vulnerable to drying out; deeper seeds take longer to emerge.
Spacing: For giant single-head types, space 18–24 inches apart. Branching varieties can be planted closer — 9–12 inches — which encourages taller, straighter stems with smaller (more marketable) heads. For cutting gardens, close spacing also reduces side-branch competition and produces a vase-ready stem length naturally.
Allelopathy — a note on neighbors: Sunflowers release allelopathic compounds from their roots, leaves, and decomposing plant matter that can inhibit germination and growth of certain nearby plants — notably potatoes, beans, and fennel. They're also allelopathic to some weeds, which is a benefit. Avoid intercropping with sensitive species, and rotate beds annually so decomposing sunflower residue doesn't affect fall/spring plantings of susceptible crops.
Bird pressure on germinating seeds can be significant. Lay mesh or row cover lightly over the bed for the first 2 weeks until plants are a few inches tall and less attractive to birds.
Watering
Sunflowers are drought-tolerant once established, but they need consistent moisture during two critical windows: germination through the first 4 weeks, and the bud-formation-through-seed-fill stage when the plant is putting enormous resources into head development.
During germination, keep the top inch of soil consistently moist — not saturated, but never bone dry. Once plants are 6 inches tall with a visible taproot, they can tolerate drying between waterings. Established plants should receive roughly 1 inch of water per week. In hot, dry climates or during heat waves, increase to 1.5 inches.
Water at the base, not overhead. Wet foliage promotes fungal diseases, and once heads start forming, water sitting in the developing florets can cause rot. Drip irrigation or soaker hoses are ideal for sunflower rows.
Overwatering is as damaging as drought. Sunflowers in constantly wet soil develop shallow root systems, become susceptible to stem rot, and underperform on head size. If your soil stays wet for more than a day after watering, improve drainage before planting.
Organic Fertilizing Schedule
Sunflowers are long-season plants with distinct nutritional demands at each growth stage. Matching fertilizer type to plant stage is how you get both maximum stem height and maximum head size from organic inputs.
Phase 1: Establishment (Weeks 1–4)
Focus on root development and early vegetative structure. At this stage, nitrogen drives leaf and stem tissue production and phosphorus supports root expansion. If you incorporated microbes and kelp at planting, your soil biology is already working. For an additional boost, apply Growganica Gold Veg as a soil drench at half the standard rate, starting two weeks after germination. Gold Veg's nitrogen-forward formula with balanced micronutrients fuels the rapid early vegetative growth that sets the trajectory for head size — bigger plants at week 4 consistently produce bigger heads at week 12.
Phase 2: Stem Elongation and Bud Development (Weeks 4–8)
This is the most critical feeding window. Plants are adding 2–4 inches of height per week and channeling resources into developing the bud that becomes the head. Potassium demand spikes dramatically here — it governs cell wall strength, water regulation in stems, and ultimately determines whether a mature head can hold its own weight without lodging or snapping.
Switch to Growganica Gold Bloom as your main feed — the higher potassium ratio is exactly what stems and developing buds need. Apply every 10–14 days as a soil drench. At the same time, apply Incredible Bulk as a supplement — its potassium-rich, PK-boosting formula is specifically designed for this filling stage and makes a visible difference in stem thickness and head density. Plants fed with Incredible Bulk during stem elongation produce noticeably sturdier necks that hold heavy heads upright without staking.
Continue foliar applications of Kelp It Real every 7–10 days. Kelp's natural stress hormones help plants cope with heat and wind, and the trace mineral boost supports chlorophyll density and overall plant resilience.
Phase 3: Head Fill and Seed Development (Weeks 8–12)
For seed-production varieties, maintain the Gold Bloom + Incredible Bulk program through head development. Seeds continue filling for 3–4 weeks after the petals drop — don't cut feeding early. Reduce Incredible Bulk to every 14–21 days as the plant shifts from vegetative mode into terminal seed production. For cut-flower varieties, scale back feeding once blooms are being cut regularly and redirect energy toward side shoot development with lighter, more frequent kelp foliar sprays.
Pest and Disease Management
Sunflowers are generally robust, but a handful of problems show up reliably enough to plan for.
Aphids
Black bean aphids and sunflower aphids colonize stems and the undersides of leaves, particularly during hot dry spells. Light infestations are tolerable — ladybirds and lacewings generally control them. Heavy infestations distort new growth and can reduce head size. Knock aphids off with a strong water spray, or apply insecticidal soap targeting the undersides of leaves. Avoid broad-spectrum sprays that kill beneficial insects.
Slugs and Snails
They target seedlings in the first 2–3 weeks, chewing through stems at soil level. Iron phosphate slug bait (safe for wildlife and pets) applied around the planting area at germination provides effective control without harming the soil biology you've built.
Downy Mildew
A fungal-like pathogen producing pale yellow patches on upper leaf surfaces with gray-purple sporulation below. Favored by cool, wet conditions. Prevent with good plant spacing (improves airflow), avoiding overhead irrigation, and not crowding plants. Remove and bag affected leaves promptly — don't compost them.
Sclerotinia Stem Rot
White, cottony fungal growth at the stem base, typically appearing mid-season in humid conditions or on overwatered plants. Infected plants wilt suddenly and collapse. Remove affected plants immediately and don't compost. Rotate sunflowers to new beds each year.
Sunflower Moths
Larvae tunnel into developing seed heads and consume seeds from inside. Look for frass (insect excrement) on heads and entry holes. Bacillus thuringiensis (Bt) applied when moths are first detected offers organic control — timing with adult flight is important, so scout from bud stage onward.
Harvesting
Harvesting for Cut Flowers
Cut stems when the outer ring of petals is just beginning to lift away from the face of the head — the "disco ball" stage where petals are extended but the head hasn't fully opened. At this stage, vase life is 7–12 days. Harvest in the early morning, cut stems at a sharp angle with clean secateurs, and get them into water immediately. Strip all foliage that would sit below the waterline in the vase.
For branching varieties, cut the central stem first to trigger aggressive lateral branching. Subsequent harvests from side shoots will be smaller-headed but equally usable as cut flowers.
Harvesting for Seeds
Leave heads on the plant until petals have completely dropped and the back of the head has turned from green to yellow-brown. The seeds will be plump and the seed coats fully developed — typically 30–45 days after the petals drop. At this point, you have two options:
- Field dry: Leave heads on the plant until fully dry. Cover with a paper bag or mesh tied around the head to catch seeds as they drop and to protect from birds. This is the simplest method.
- Cut and hang: Cut heads with 12–18 inches of stem and hang upside down in a dry, well-ventilated space (a shed or garage). Allow 4–6 weeks to fully dry before threshing.
To thresh, rub two heads face-to-face over a bucket — seeds dislodge easily. Winnow by pouring from one container to another outdoors in a light breeze to separate seeds from chaff.
Common Problems and Troubleshooting
Plants Leaning or Falling Over
The most common cause is insufficient potassium during stem elongation. Weak cell walls can't support heavy heads. Ensure you're applying potassium-rich organic fertilizers (Gold Bloom, Incredible Bulk) during weeks 4–8. Secondary cause: over-rich nitrogen without matching potassium, which drives lush but structurally weak stem tissue. Stake affected plants and adjust feeding for the rest of the season.
Small or Hollow Seed Heads
Usually caused by poor pollination (insufficient bee activity or weather disrupting pollination) or inadequate feeding during head fill. Sunflowers are primarily cross-pollinated by bees — grow multiple plants together and avoid applying any sprays during bloom hours. If bee activity is low, hand-pollinate by transferring pollen between heads with a soft brush.
Yellowing Lower Leaves
Normal to some degree as plants age — lower leaves shade out and die back. Early or rapid yellowing often indicates nitrogen deficiency or overwatering-related root issues. Check soil drainage and review your feeding schedule. A foliar application of Gold Veg at half strength will address nitrogen deficiency quickly.
Failure to Germinate
Most commonly caused by planting in cold soil (below 50°F), overwatering causing seed rot, or bird predation. Check soil temperature before sowing, reduce watering frequency during germination, and use mesh or row cover to exclude birds.
Heads Not Facing the Sun
Young sunflowers do track the sun (heliotropism), but mature heads — once pollinated and setting seed — stop tracking and typically face east. This is completely normal. If your plants are shading each other and all facing the same direction, simply accept it — or plant subsequent batches to face different directions by varying row orientation.
Continue Growing
Ready to expand your organic garden? These guides cover crops that complement a sunflower planting — either as companion crops in the same season or as follow-on plantings in beds sunflowers have vacated.
- How to Grow Pumpkins Organically — From Seed to Harvest — Another large, potassium-hungry crop that thrives in the same bed conditions sunflowers prefer.
- How to Grow Beets Organically — Root to Greens Growing Guide — A cool-season follow-on crop to plant in cleared sunflower beds in late summer.
- How to Grow Kale Organically — Complete Beginner's Guide — Another fall-planted crop that uses the fertility boost left by decomposing sunflower roots.
- How to Grow Raspberries Organically — Complete Bramble Guide — A perennial fruit that benefits from the same potassium-forward organic program that produces the best sunflower stems.