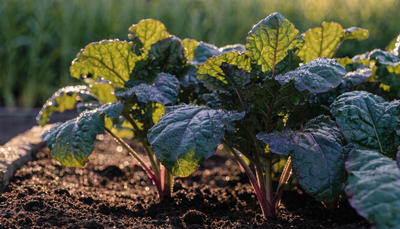
Few vegetables reward patience like Brussels sprouts, and growing them organically turns a long season into buttery, frost-sweetened sprouts that taste nothing like the bitter grocery-store version you were warned about as a kid. Skipping synthetic inputs builds the living soil that makes these heavy feeders thrive across a marathon 90-to-110-day season.
Brussels sprouts (Brassica oleracea var. gemmifera) are a cool-season member of the cabbage family with a reputation for being fussy. The truth is simpler: they need rich soil, steady moisture, a long runway, and cold weather at the finish line. Give them those four things and they're remarkably forgiving. This guide walks you through every stage, from picking the right cultivar to twisting off frost-kissed sprouts in late fall.
Choosing the Right Brussels Sprouts Varieties
Brussels sprouts are grown as an annual across a single long season, so the most important number on the seed packet is days to maturity. Because they taste best finishing in cold weather, you're timing your variety to mature right around your first fall frost — short-season growers should lean toward faster hybrids, while a long, cool autumn lets you indulge the slower heirlooms.
Hybrid vs. Heirloom
Modern F1 hybrids were bred for uniform sprout size, disease resistance, and reliable "set" (the way sprouts form up the stalk) — the easiest path to a clean harvest. Open-pollinated heirlooms give you seed-saving ability and old-fashioned flavor, but tend toward uneven sprout size and demand a longer, more forgiving season.
Best Varieties for Organic Growing
- Long Island Improved — The classic open-pollinated heirloom (~90–100 days). Compact plants, heavy yields, and the go-to for seed savers.
- Jade Cross — A dependable early hybrid (~90 days) with good heat tolerance and sturdy, wind-resistant stalks — a strong pick for first-timers.
- Churchill — Fast (~90 days), widely adaptable, and productive across a range of climates. Excellent for shorter seasons.
- Diablo — A high-yielding late hybrid (~110 days) that shrugs off cold and holds well on the stalk into hard frost.
- Nautic and Dagan — Disease-tolerant hybrids prized for smooth, uniform sprouts and strong resistance to leaf disease in wet climates.
- Red Rubine and Falstaff — Striking purple-red heirloom types. Slightly lower-yielding but gorgeous, nutty, and a standout on the plate.
Soil Preparation
Brussels sprouts are among the hungriest vegetables in the garden, spending months building a tall stalk and dozens of sprouts and pulling that mass straight out of your soil. The organic grower's job is to keep the soil ahead of that demand — not by dumping in fast salts, but by feeding the biology that feeds the plant.
Ideal Soil Conditions
Aim for deep, fertile, well-drained loam with plenty of organic matter. The target pH is 6.5 to 7.0, and staying on the higher end of that range does double duty: it makes nutrients available and it discourages clubroot, the most serious brassica soil disease. If a soil test shows you below 6.5, work in a little garden lime the season before planting. Because sprouts grow tall and top-heavy, they also need firm soil to anchor their roots.
Building Living Soil
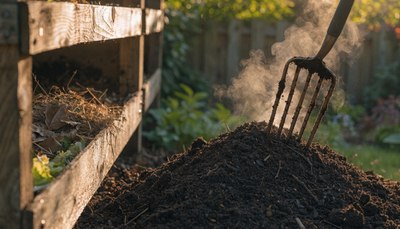
Weeks before you transplant, work 2 to 3 inches of finished compost or well-aged manure into the top 8 to 10 inches of the bed. This isn't just fertilizer — it's habitat. Compost feeds the bacteria, fungi, and earthworms that convert organic matter into the steady drip of nitrogen a long-season crop needs, while building soil structure and root partnerships that improve nutrient and water uptake.
To give that underground workforce a head start, inoculate at planting with Microbes, a living-soil root inoculant that colonizes the root zone and turns the organic matter you added into plant-available nutrition. Think of compost as the pantry and Microbes as the kitchen staff. A generous layer of leaf mulch or straw over the finished bed keeps that biology cool, moist, and active all season.
Planting: Timing & Technique
Timing is everything with Brussels sprouts. Get the calendar right and the rest of the season is downhill. The universal rule: count backward from your first fall frost date. In most regions, Brussels sprouts are a fall crop, sown in mid-to-late summer so they mature into the cooling days of autumn — because frost is what makes them sweet.
Starting Seeds Indoors
Start seeds indoors about 6 to 8 weeks before your intended transplant date. Sow ¼ to ½ inch deep in cell trays of quality potting mix, keep them at 65–75°F, and give them bright light once they germinate (usually within a week). For a fall harvest, that means sowing in early-to-mid summer. Gardeners with mild, cool summers can also plant in spring, starting seeds 6 to 8 weeks before the last spring frost, though fall crops almost always taste better. Harden off seedlings over 7 to 10 days before they go outside.
Transplanting
Move seedlings into the garden when they're 4 to 6 inches tall with a few true leaves. Set them slightly deeper than they grew in the tray — up to the first set of leaves — to encourage a stronger root system and sturdier stalk, then water in well. In hot late-summer weather, transplant in the evening and shade young plants for a few days to ease the shock. Direct sowing works in long-season climates, but transplants give far more control over timing.
Spacing
Give these big plants room: space them 18 to 24 inches apart, with rows 30 to 36 inches apart. Crowding means poor air circulation (an invitation to disease) and small, loose sprouts. The generous spacing also lets you scout for pests and mound soil around the base of tall plants later in the season.
Companion Planting
Thoughtful neighbors protect Brussels sprouts and improve the whole bed — the best companions either repel brassica pests or lure them away.
- Aromatic herbs — Dill, thyme, rosemary, sage, and mint confuse the moths and beetles that hunt by scent. Dill also attracts the parasitic wasps that prey on cabbageworms.
- Alliums — Onions and garlic mask the cabbage smell that draws pests in.
- Nasturtium — A classic trap crop that pulls aphids off your sprouts and onto itself.
- Marigolds and calendula — Draw in hoverflies and other beneficial predators.
- Beets, celery, and low-growing greens — Good space-fillers that don't compete heavily for the same nutrients.
Avoid planting Brussels sprouts near other brassicas (broccoli, cabbage, kale, cauliflower) — they share every pest and disease, so grouping them concentrates the problem. Traditional lore also keeps strawberries and pole beans at a distance from the cabbage family, so give them their own corner of the garden.
Watering Brussels Sprouts Organically
A steady water supply is the difference between firm, tight sprouts and loose, leafy ones. With a long season and a big frame to support, Brussels sprouts can't tolerate drought stress.
Best Practices
Provide about 1 to 1.5 inches of water per week, including rainfall, and more during hot spells. Water deeply and less often rather than in shallow daily sips — deep watering drives roots down and builds drought resilience. Water at the base with a soaker hose or drip line to keep foliage dry, which dramatically reduces fungal and bacterial leaf disease. A 2-to-3-inch mulch of straw or shredded leaves conserves moisture, moderates soil temperature, and suppresses competing weeds.
Signs of Problems
Wilting in the heat of the day that recovers by evening is normal; wilting that persists into the cool morning signals real drought or a root problem. Yellowing lower leaves often point to inconsistent watering or a nitrogen shortfall. Leaves that stay yellow in waterlogged soil mean poor drainage — brassicas hate wet feet, which invites root rot.
Organic Fertilizing Schedule for Brussels Sprouts
Brussels sprouts feed for months, so think of fertilizing as a steady rhythm matched to what the plant is doing — first building a leafy frame, then setting sprouts up the stalk. Organic feeding works with your soil biology instead of force-feeding the plant, giving you dense, flavorful sprouts rather than soft, watery growth.
You don't need all of these — Microbes, Veg, and Bloom are the core system; the rest are optional boosters for specific goals.
At Transplant: Establish the Roots
Start every plant with Microbes worked into the planting hole. How to use: sprinkle into each hole at transplant so the inoculant colonizes the root zone from day one, unlocking the nutrients in your compost all season long. This is the foundation the rest of the program is built on.
Vegetative Stage: Build the Frame
For the first 6 to 8 weeks after transplanting, the plant is all about leaves and stalk — and that means nitrogen. Feed with Veg every 2 to 3 weeks. How to use: apply around the base per label rate to fuel vigorous leafy growth and a tall, sturdy stalk that can carry a full load of sprouts. Pair it with Kelp It Real as a foliar spray. How to use: dilute and mist the leaves every couple of weeks to push leafy growth and buffer the plant against transplant shock and heat stress.
Sprout Formation: Shift to Filling
Once sprouts begin forming in the leaf axils up the stalk (typically 8 to 10 weeks in), transition to Bloom. How to use: feed every 2 to 3 weeks in place of Veg to support firm, tight, well-filled sprouts rather than more soft leafy growth. This is also when calcium matters most: add King Krustacean. How to use: work into the soil around the base to supply steady calcium for dense sprouts while its chitin content stimulates pest-fighting soil microbes — natural armor during the vulnerable sprout-set window.
Cool-Down to Harvest
As temperatures drop and sprouts mature, ease off feeding. A final light dose of Bloom early in the cool-down is plenty; over-feeding late, especially with nitrogen, produces loose sprouts and delays the sweetening that cold weather brings. From here, let the frost do the work.
Organic Pest Control
Brassicas are a magnet for a well-known cast of pests. The good news: nearly all of them are manageable organically with vigilance and a few reliable tools.
- Imported cabbageworm & cabbage looper — Velvety green caterpillars that chew ragged holes in leaves. The white and gray moths flitting around the bed are the adults. Control with Bacillus thuringiensis (Bt), a naturally occurring bacterium that targets caterpillars without harming beneficial insects.
- Cabbage aphids — Gray-green, waxy clusters on new growth and inside sprouts. Blast them off with a strong spray of water and follow up with insecticidal soap; encourage ladybugs and lacewings.
- Cabbage root maggot — Larvae that tunnel into roots, causing sudden wilting. Prevent with cardboard or felt collars around the stem base and floating row covers over young plants.
- Flea beetles — Tiny jumping beetles that pepper leaves with pinholes, worst on young transplants. Row covers early in the season are the best defense.
- Harlequin bugs — Shield-shaped orange-and-black bugs that cause stippled, blotchy leaves; handpick them and destroy their barrel-shaped egg clusters.
Prevention beats treatment: floating row covers from transplant until the weather cools exclude most moths and beetles at once. Scout leaf undersides weekly, rotate brassicas to a new bed each year, and clean up spent debris in fall to break pest cycles.
Common Diseases and Organic Solutions
Most Brussels sprout diseases are prevented rather than cured, and the levers are the same ones that make good soil: rotation, airflow, and resistant varieties.
- Clubroot — A soilborne disease that swells and deforms roots, causing stunting and wilting. It thrives in acidic, wet soil, so keep pH at 6.8–7.0, improve drainage, and practice a strict multi-year rotation away from all brassicas.
- Black rot — A bacterial disease showing V-shaped yellow lesions at leaf margins with blackened veins. Remove infected plants, avoid overhead watering, and never work among wet plants (you'll spread it).
- Downy mildew — Yellow patches on top of leaves with fuzzy gray growth underneath, favored by cool, damp conditions. Space plants for airflow and keep foliage dry.
- Alternaria leaf spot — Dark concentric-ringed spots on leaves. Remove affected foliage and rotate crops; it overwinters on debris.
- White mold (Sclerotinia) — Cottony white growth and soft, watery stem rot. Improve drainage and airflow, and remove infected plants promptly.
The through-line: healthy living soil, good spacing, dry leaves, clean fall cleanup, and a rotation that keeps brassicas out of the same ground for at least three years.
Harvesting Brussels Sprouts
This is the payoff — and timing it around cold weather is what separates a great sprout from a bitter one. A light frost converts the plant's starches to sugars, mellowing that cabbagey edge into something sweet and nutty.
When to Harvest
Sprouts mature from the bottom of the stalk upward. Start picking when the lowest sprouts are firm, tight, and about 1 to 1.5 inches across — roughly the size of a large marble. Snap off the leaf below each sprout, then twist or cut it free; working bottom-up over several weeks lets the upper sprouts keep sizing. For the sweetest flavor, wait until after your first few frosts — light freezes only improve the crop.
For a concentrated harvest, try "topping": about 3 to 4 weeks before you want to pick everything at once, cut off the growing tip at the top of the plant. This redirects its energy from growing taller into filling out the existing sprouts uniformly.
Storage and Extending the Harvest
Loose sprouts keep for a week or two in the refrigerator, and hold considerably longer left on the intact stalk in a cold cellar or garage. In many climates the plant is hardy well below freezing, so you can leave it standing in the garden and harvest fresh into early winter — a covering of snow won't hurt it. For long-term storage, blanch the sprouts briefly and freeze them.
Common Problems and Troubleshooting
Why are my Brussels sprouts loose and leafy instead of tight?
"Blown" open sprouts are the number-one complaint, and the usual culprits are heat, excess nitrogen late in the season, and loose soil. Brussels sprouts firm up in cool weather, so plants pushed hard with nitrogen while it's still warm produce soft, cabbage-like rosettes. Ease off feeding as sprouts form, keep moisture steady, and firm the soil around the base so the top-heavy plant stays anchored.
Why isn't my plant forming any sprouts?
Almost always a timing or heat problem. Brussels sprouts need a long season and cool temperatures to trigger sprout formation — plants that spent their whole life in summer heat, or that were planted too late to mature before winter, may never set. Next season, count backward from your frost date more generously and aim for maturity in cool fall weather.
Why are my sprouts bitter?
Bitterness comes from harvesting before cold weather has sweetened the crop, often compounded by heat and drought stress during growth. Wait for a couple of frosts before your first big pick and keep water consistent all season.
Frequently Asked Questions
How long do Brussels sprouts take to grow?
Most varieties need 90 to 110 days from transplant to first harvest, and the picking window stretches across several more weeks as you work up the stalk. Plan on Brussels sprouts occupying their bed for the better part of a season — they're a commitment, not a quick crop.
Can I grow Brussels sprouts in containers?
Yes, though you need a big pot — at least 5 gallons per plant, and larger is better. Container plants dry out faster, so watch moisture closely and feed a bit more often, since nutrients wash out with frequent watering. Full sun and a sturdy, tip-resistant pot are essential.
Do Brussels sprouts really taste better after frost?
They genuinely do. When temperatures drop, the plant converts stored starches into sugars as a natural antifreeze, mellowing the bitterness into a sweet, nutty flavor. It's the single biggest reason to grow them as a fall crop.
How much sun do Brussels sprouts need?
Full sun — at least 6 to 8 hours a day. More light means a stronger stalk and firmer sprouts. In regions with hot early falls, a little afternoon shade during the warmest weeks is fine, but a shady corner won't yield a full harvest.
Should I remove the lower leaves as the plant grows?
Removing a few of the largest lower leaves once sprouts start forming can improve airflow and let the plant direct energy into the sprouts. Don't strip it bare, though — the plant needs its foliage to photosynthesize. Take yellowing or damaged leaves first, and leave the healthy canopy up top intact.