Growing chives organically rewards you with a tidy clump of oniony green that returns year after year — no replanting, no chemicals, just fresh flavor a snip from your kitchen door. Do it in living soil and you get more resilient plants, more pollinators buzzing your garden, and a healthier patch of earth in the bargain.
Chives (Allium schoenoprasum) are one of the most forgiving perennial herbs you can grow. Hardy across USDA zones 3 through 9, they shrug off cold, come back reliably each spring, and ask for very little once established. Whether you're tucking a clump into a kitchen-window pot or edging a vegetable bed with their cheerful purple pompom blooms, this guide walks you through everything — from choosing the right variety to harvesting the last snip of the season, all the organic way.
Choosing the Right Chive Varieties
Most cooks reach for common chives, but the Allium family offers a couple of distinct flavors worth knowing. Common chives give you that mild, sweet onion note; garlic chives (Allium tuberosum) taste unmistakably of garlic and carry flat, strappy leaves instead of hollow tubes. Both are perennial, both are easy, and many gardens have room for each.
Common Chives vs. Garlic Chives
Common chives produce slender, hollow, tubular leaves 8 to 12 inches tall topped by lavender-purple globe flowers in late spring. Garlic chives (also called Chinese chives) send up flat, solid green blades and starry white flowers in late summer. Garlic chives spread more enthusiastically by seed, so deadhead them if you want to keep the clump contained.
Best Varieties for Organic Growing
- 'Grolau' — A Swiss selection bred for forcing indoors. Thick, dark leaves and strong regrowth make it the top pick for a winter windowsill.
- 'Staro' — A French cultivar with fat, sturdy stems that hold up beautifully to snipping and freezing. Excellent for kitchen production.
- 'Fine Leaf' — Delicate, thin blades and a milder flavor; the classic choice for garnishing and fines herbes.
- 'Profusion' — A sterile hybrid that blooms for months without setting seed, so it never becomes weedy. Ideal if you value the edible flowers and want no volunteer seedlings.
- 'Forescate' — Grown for its rosy-pink flowers; a lovely ornamental edge plant that's still fully edible.
- 'Geisha' — A reliable, vigorous garlic chive with broad leaves and clean garlic flavor.
For a first planting, 'Grolau' or 'Staro' covers most kitchen needs. Add garlic chives if you cook Asian dishes, and 'Profusion' if you want the pollinator blooms without the reseeding.
Soil Preparation
Chives aren't fussy, but they reward good soil with fatter clumps and richer flavor. Because you'll be eating the leaves raw and often, building fertility from biology rather than synthetic salts matters — it produces cleaner-tasting herbs and healthier roots.
Ideal Soil Conditions
Aim for a well-drained, loamy soil rich in organic matter, with a pH between 6.0 and 7.0 — slightly acidic to neutral. Chives will grow in heavier ground, but soggy roots invite rot, so work in compost to loosen clay and improve drainage. In containers, use a quality organic potting mix and make sure the pot has drainage holes; a 6-to-8-inch pot suits a starter clump.
Building Living Soil
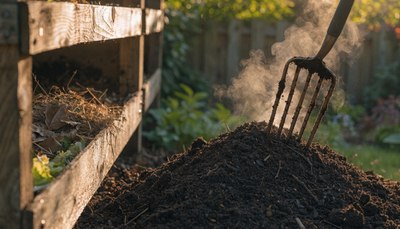
Before planting, mix 2 to 3 inches of finished compost into the top 6 inches of your bed. Compost feeds the fungi, bacteria, and earthworms that make nutrients available to roots — the engine of an organic garden. This soil food web converts organic matter into the steady, gentle nutrition chives thrive on, and it buffers pH naturally over time. Inoculating at planting with a living-soil product like Microbes jump-starts that biology, colonizing new roots with beneficial organisms so your chives establish faster and stand up better to stress. Skip the tiller if you can — chives are shallow-rooted and a no-dig, compost-topped bed keeps the microbial network intact.
Planting: Timing and Technique
Chives can be grown from seed, from nursery starts, or by dividing an existing clump. Seeds are cheap and rewarding but slow; division is the fastest route to a harvestable plant.
Starting Seeds Indoors
Sow chive seed indoors 8 to 10 weeks before your last expected spring frost. Press seeds barely below the surface of a moist seed-starting mix — they need darkness to germinate — and keep the soil around 60 to 70°F. Expect sprouts in 2 to 3 weeks; chive seed is slow and a little erratic, so don't give up early. Sow a pinch of seeds per cell, since the grassy seedlings look best (and transplant best) in small clusters rather than as lonely single blades.
Transplanting Outdoors
Harden off seedlings over a week, then transplant after all danger of frost has passed and the soil has warmed. Move nursery starts or divisions out at the same time. To divide an established plant, lift the whole clump in early spring, tease it into fist-sized sections each holding several bulblets, and replant immediately at the same depth. Dividing every 3 to 4 years keeps clumps vigorous and prevents the center from thinning out.
Spacing and Siting
Space clumps 6 to 12 inches apart. Chives love full sun — 6 or more hours a day gives the best flavor and sturdiest growth — but they tolerate light afternoon shade, which is handy in hot-summer regions. As a hardy perennial in zones 3 to 9, a well-sited clump will go dormant in winter and rebound on its own each spring, so choose a permanent spot where you won't disturb the roots.
Companion Planting
Chives earn their keep beyond the kitchen — their oniony aroma confuses and deters many pests, making them one of the garden's best companion plants. Their spring flowers also draw bees and other pollinators.
- Carrots — Chives help mask the scent that attracts carrot rust fly.
- Tomatoes — A classic pairing; chives are thought to discourage aphids and can improve the growing conditions nearby.
- Roses — Long planted at the feet of roses to repel aphids and reduce black spot pressure.
- Apples and other fruit — Interplanting near fruit trees is a traditional trick to discourage scab and borers.
- Brassicas — Cabbage, broccoli, and kale benefit from the pest-masking aroma.
The one group to keep chives away from is beans and peas — alliums are traditionally kept apart from legumes, so give them separate beds.
Watering Chives Organically
Chives like steady moisture but hate sitting in water. Their shallow roots dry out faster than deep-rooted crops, so consistency matters more than volume.
Best Practices
Provide about 1 inch of water per week, adjusting for rain and heat. Water deeply at the base rather than sprinkling the foliage — wet leaves invite fungal problems, and morning watering lets any splash dry quickly. A thin mulch of compost or fine straw around the clump conserves moisture and feeds the soil as it breaks down. Container chives dry out fastest; check the top inch of soil and water when it feels dry.
Signs of Problems
Underwatering shows up as tip browning, floppy blades, and a stalled, thirsty-looking clump. Overwatering or poor drainage produces yellowing, mushy bases and, in the worst case, root and bulb rot. If leaves yellow from the base up and the soil stays soggy, ease off and improve drainage before reaching for any other fix.
Organic Fertilizing Schedule for Chives
Chives are light-to-moderate feeders grown almost entirely for their leaves, so the goal is steady, gentle nitrogen for lush green regrowth — not heavy blooming pushes. Feeding organically keeps flavor clean and roots healthy. You don't need all of these — Microbes, Veg, and Bloom are the core system; the rest are optional boosters for specific goals.
At Planting — Establish the Roots
Start every clump with Microbes, the living-soil foundation. How to use: mix into the planting hole or drench newly transplanted clumps to colonize young roots with beneficial biology that unlocks nutrients and speeds establishment.
Active Growth — Feed the Leaves
Once plants are actively pushing new blades, lean on Veg as your workhorse. How to use: apply every 2 to 3 weeks through the growing season to fuel the tender, dark-green leaf production you're harvesting. This is the single most important feed for a productive chive clump. After each hard harvest, a follow-up dose of Veg helps the plant bounce back quickly.
Flowering — Support the Blooms (Optional)
Chive flowers are edible and beloved by pollinators. If you're growing for those purple pompoms, switch to Bloom as buds form. How to use: apply as flower stalks emerge in late spring to support abundant, longer-lasting blooms. Many kitchen growers skip this and simply snip flower stalks off to keep energy in the leaves — both approaches are valid.
Optional Boosters
- Kelp It Real — How to use: apply as a foliar spray or soil drench every few weeks for lush growth and better resilience to heat, cold, and transplant stress. Especially useful for indoor and forced chives.
- Vitamin Sea — How to use: add occasionally to round out trace minerals and deepen the aromatic, oniony flavor that makes chives worth growing.
Organic Pest Control
Chives are among the most pest-resistant herbs — their sulfur compounds repel more insects than they attract — but a few troublemakers still show up, especially on stressed or crowded plants.
- Onion thrips — Tiny, slender insects that rasp leaves, leaving silvery streaks and stippling. Blast them off with a strong spray of water, encourage predatory insects, and treat persistent infestations with insecticidal soap or neem.
- Onion maggot — The larvae of a small fly tunnel into bulbs, causing wilting and rot. Rotate alliums, keep the bed clean of debris, and use floating row cover in spring to block the egg-laying flies.
- Aphids — Occasionally cluster on tender new growth; a water spray or insecticidal soap handles them, and the beneficials chives attract usually keep them in check.
Prevention first: healthy, well-spaced plants in living soil rarely suffer serious pest damage. Good airflow, crop rotation among alliums, and a diverse planting that welcomes ladybugs and lacewings are your best defenses.
Common Diseases and Organic Solutions
Nearly every chive disease traces back to excess moisture or crowding, so cultural fixes matter more than sprays.
- Downy mildew — Pale, fuzzy patches and yellowing in cool, damp weather. Improve airflow, water at the base only, and remove affected leaves promptly.
- Rust (Puccinia allii) — Orange pustules speckling the leaves. Cut back and destroy infected foliage, avoid overhead watering, and thin dense clumps to dry them out.
- White rot — A serious soilborne fungus that causes yellowing, collapse, and fluffy white growth at the base with tiny black specks. There's no organic cure; remove and destroy affected plants and rotate alliums out of that spot for years.
- Botrytis (gray mold) and damping-off — Botrytis brings gray fuzz on decaying leaves in humid spells; damping-off topples seedlings at the soil line. Both are managed by better drainage, airflow, and not overwatering — sow seed thinly and never let seedling mix stay soggy.
Harvesting Chives
Chives are a cut-and-come-again crop — the more you snip, the more they produce.
When to Harvest
Begin harvesting once clumps are established and at least 6 inches tall, usually a few months from seed or almost immediately from a mature division. Cut leaves with scissors 1 to 2 inches above the soil line, taking outer blades first. Never remove more than about one-third of the plant at once so it can regrow with vigor. Harvest in the morning for the best flavor, and snip regularly to keep tender new growth coming. The flowers are edible too — pick them just as they open to sprinkle over salads or steep into chive-blossom vinegar.
Storage and Extending the Harvest
Chives are best used fresh and lose much of their punch when dried, so freezing is the better preservation route. Chop and freeze them in a zip bag, or pack into ice cube trays with a little water or olive oil for ready-to-use portions. Fresh-cut chives keep about a week wrapped loosely in the refrigerator. To extend the season, pot up a division in fall, let it go dormant with a light frost, then bring it indoors to a sunny window — a forced clump (especially 'Grolau') will supply fresh snips through winter. See our indoor herb guide for the full forcing method.
Common Problems and Troubleshooting
Why are my chives turning yellow?
The usual culprit is too much water or poor drainage — yellowing from the base up with soggy soil points there. Ease off watering and improve drainage first. If the soil is fine, yellowing can signal a hungry plant late in the season; a dose of Veg restores deep green growth.
Why are my chives flopping over?
Floppy, splaying clumps usually mean too little light, an overgrown center, or nitrogen-starved soil. Move container plants to a brighter spot, divide clumps that have gotten dense and woody in the middle, and feed to firm up new growth. A little afternoon flop after a heavy harvest is normal and passes.
Why do my chives have no flavor?
Weak flavor comes from too much shade, overwatering, or overly rich fast-release feeding. Give them full sun, let the soil approach dryness between waterings, and build flavor with trace minerals from Vitamin Sea. Harvesting in the cool of the morning also concentrates the oniony punch.
Frequently Asked Questions
Do chives come back every year?
Yes. Chives are a hardy perennial in USDA zones 3 through 9. The foliage dies back in winter and the plant re-sprouts from its bulbs each spring, getting a little larger every year — divide it every few seasons to keep it productive.
Should I let my chives flower?
It's your call. The purple blooms are edible and excellent for pollinators, but flowering diverts some energy from leaf production and can make blades tougher afterward. If you grow mainly for the kitchen, snip flower stalks early; if you love the blossoms, let them open and feed with Bloom. Deadhead spent flowers to prevent unwanted reseeding, especially with garlic chives.
Can I grow chives indoors?
Absolutely — chives are one of the easiest herbs to grow on a windowsill. Give them a sunny south-facing window or a grow light, a pot with drainage, and steady moisture. A clump dug from the garden and chilled by a light frost before coming inside forces best. Regular Kelp It Real keeps indoor plants lush through the low-light months.
How often should I fertilize chives?
Feed with Veg every 2 to 3 weeks during active growth, and give a boost after each hard harvest to fuel regrowth. In healthy, compost-rich living soil, chives need little more than that. Start every new clump with Microbes to build the biology that does most of the feeding for you.
How long do chive plants live?
A single chive plant can thrive for many years — even decades — when divided periodically to keep the clump young. Left undivided, the center eventually crowds and thins, so lifting and splitting every 3 to 4 years effectively renews the plant indefinitely.