Growing collard greens organically rewards you with tender, frost-sweetened leaves that pack a garden's worth of nutrition into one hardy plant. This old-fashioned Southern staple is among the most forgiving crops you can grow — it shrugs off cold that flattens other vegetables, feeds you for months, and builds soil life rather than depleting it.
Collards are among the easiest vegetables to grow well organically — once you understand what they want, they'll outproduce almost anything in the cool-season garden. This guide walks through choosing varieties, building living soil, timing around frost, feeding, pest and disease control, and harvesting for months from a single planting.
Choosing the Right Collard Greens Varieties
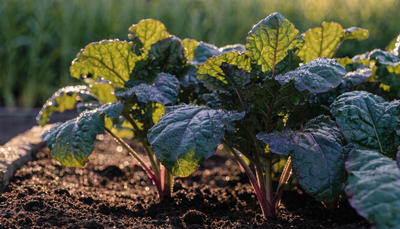
Collard greens (Brassica oleracea, Acephala group) are a non-heading member of the cabbage family — botanically the same species as kale, broccoli, and cabbage, but grown for their broad, smooth, blue-green leaves. Nearly all collards are open, loose-leaf types that form a rosette of large leaves on a thick central stem, though a few form loose heads.
Heirloom vs. Hybrid
Heirloom collards are open-pollinated, so you can save seed year after year, and they carry the deep, traditional flavor Southern cooks prize. Hybrids are bred for uniformity, faster maturity, and improved disease resistance — useful in tight timing windows or where disease pressure is heavy. Both grow beautifully in organic soil; the choice is heritage flavor and seed-saving versus speed and consistency.
Best Varieties for Organic Growing
- Georgia Southern — The classic heirloom, sometimes called "Creole." Big, cabbage-flavored, blue-green leaves on a tall, heat-tolerant, endlessly productive plant. A first choice for traditional flavor.
- Vates — A compact, cold-hardy standard that resists bolting. Its shorter stature suits raised beds and windy sites, and it holds up through hard frosts.
- Champion — An improved Vates type with excellent cold tolerance and slow bolting, prized for tender leaves that keep producing into winter.
- Morris Heading — A loose-heading heirloom with tender, mild leaves and a self-blanching center; a favorite where a milder, cabbage-like leaf is wanted.
- Flash — A fast, uniform hybrid (roughly 55 days) with strong regrowth after cutting, superb for repeated cut-and-come-again harvests.
- Top Bunch — A vigorous hybrid that produces quickly and resprouts fast, good for a short season or a late planting.
For beginners, Georgia Southern or Vates are hard to beat; if your window is short, choose a quick hybrid like Flash.
Soil Preparation
Collards are leafy, nitrogen-hungry plants, and their flavor and vigor trace straight back to the soil. Get the soil right and the crop nearly grows itself.
Ideal Soil Conditions
Collards thrive in deep, fertile, well-drained soil rich in organic matter. Aim for a pH of 6.0 to 6.8 — slightly acidic to neutral. This range keeps nutrients available and helps suppress clubroot, a stubborn brassica disease that worsens in acidic soil; if a test shows you below 6.0, work in a little garden lime a few weeks before planting. Loosen the bed at least 10 to 12 inches deep so the substantial root system can range widely for water and nutrients.
Building Living Soil
Organic growing is soil-first, not plant-first. Rather than feeding the plant directly with soluble salts, you feed the living community of bacteria and fungi in the soil, and that biology feeds your collards in a steady, drought-buffered way. Work 2 to 3 inches of finished compost or well-rotted manure into the top of the bed — it delivers slow-release nutrition, holds moisture, and seeds the soil with the microbial life that unlocks nutrients from organic matter.
The single biggest upgrade for organic collards is a thriving population of beneficial microbes at the roots. Mycorrhizal fungi and beneficial bacteria extend a plant's effective root reach many times over, deliver nutrients and moisture, and crowd out disease organisms. If your bed is new or heavily tilled, reintroducing a living inoculant at planting pays off all season — we cover how below.
Planting: Timing and Technique
Collards are a cool-season crop that actually tastes better after a frost — cold converts starches in the leaves to sugars, sweetening and mellowing them. Because of this, timing revolves around your frost dates, not hardiness zones. You can grow collards as both a spring and a fall crop, and in mild-winter regions they'll produce straight through the cold months.
Starting Seeds Indoors
For a spring crop, start seeds indoors about 4 to 6 weeks before your last expected frost. Sow ¼ to ½ inch deep in a quality organic seed-starting mix; seeds germinate readily at soil temperatures between 60°F and 85°F, often in 5 to 10 days. Give seedlings bright light to keep them stocky, and harden them off over about a week before setting them out. Because collards are cold-hardy, transplants can go out 2 to 3 weeks before your last frost date.
Direct Sowing and Transplanting
Collards transplant easily but also grow well from seed sown directly once soil has warmed to at least 45°F. For a fall and winter crop — often the best-tasting one — direct sow or transplant about 6 to 10 weeks before your first fall frost, so plants size up as the weather cools. Avoid establishing them in peak summer heat, when they turn tough and bolt quickly. Set transplants slightly deeper than they grew in their cells to anchor the tall stems.
Spacing
Give each plant room to reach full size: space collards 18 to 24 inches apart, in rows 30 to 36 inches apart. Generous spacing grows bigger plants and keeps air moving through the canopy to prevent leaf diseases. For tender baby leaves, sow thickly and harvest young, thinning as you go — the thinnings are delicious.
Companion Planting
Thoughtful neighbors help collards fend off pests and make better use of space. Because collards are brassica-family pest magnets, companions that repel insects or act as decoys are especially valuable.
- Aromatic herbs — Dill, rosemary, sage, thyme, and mint (keep mint contained) deter cabbage moths and other brassica pests with their strong scents.
- Alliums — Onions, garlic, leeks, and chives mask the scent of collards and discourage aphids and caterpillars.
- Nasturtiums — A classic trap crop; aphids and caterpillars often flock to them instead of your greens.
- Marigolds — Help deter a range of soil and foliar pests and draw in beneficial insects.
- Beets, celery, and potatoes — Compatible neighbors that don't compete heavily for the same nutrients.
Avoid crowding collards next to other brassicas — cabbage, broccoli, kale — which compete for the same nutrients and share the same pests and diseases. Traditional lore also keeps strawberries and pole beans away from the brassica bed.
Watering Collard Greens Organically
Steady moisture is the secret to tender, mild leaves. Collards that dry out repeatedly turn tough, stringy, and bitter, and stress makes them far more prone to bolting and pests.
Best Practices
Aim for about 1 to 1.5 inches of water per week, adjusting for rain and heat. Water deeply and less often rather than in shallow daily sips — deep watering pushes roots down and makes plants more drought-resilient. Water at the base with a soaker hose or drip line whenever possible; keeping the broad leaves dry sharply reduces downy mildew and bacterial leaf diseases. A 2- to 3-inch layer of organic mulch (straw, shredded leaves, or compost) conserves moisture, moderates soil temperature, and feeds soil life as it breaks down.
Signs of Problems
Wilting in the day's heat that recovers by evening is normal; wilting that persists into the cool morning signals drought or, if soil is soggy, root trouble from overwatering. Because collards transpire heavily, check soil moisture a couple of inches down and water before plants show stress.
Organic Fertilizing Schedule for Collard Greens
Collards are leafy heavy feeders that want a steady supply of nitrogen. In an organic system, feed the soil biology consistently rather than dumping a single big dose. Here's a stage-by-stage plan using the Growganica system. You don't need all of these — Microbes, Veg, and Bloom are the core system; the rest are optional boosters for specific goals.
At Planting — Establish the Living Foundation
When you transplant or thin your seedlings, inoculate the root zone with Microbes. How to use: mix into water and drench the planting hole or soak roots at transplant so beneficial fungi and bacteria colonize the roots from day one and keep nutrients flowing all season. This is the highest-leverage step in organic collard growing. At the same time, work King Krustacean into the bed. How to use: blend the chitin-and-calcium meal into the top few inches of soil before planting to strengthen cell walls, support steady leaf growth, and prime the soil's natural pest defenses.
Establishment (First 2–3 Weeks) — Reduce Transplant Stress
As young plants settle in, support them with Kelp It Real. How to use: mix into water and apply as a light foliar spray or soil drench every 10 to 14 days — its natural growth compounds ease transplant shock, spur fast leafy growth, and build resilience to cold snaps and heat.
Active Growth (The Main Feeding Phase) — Fuel the Leaves
Once plants are established and putting on size, Veg is the workhorse for collards. How to use: feed every 2 weeks through the growing season to supply the nitrogen that drives lush, dark-green leaves. Keep it up as long as you're harvesting — collards produce for months and reward consistent feeding. Continue Kelp It Real on the same cadence for extra vigor and stress protection, especially heading into cold weather.
Cool-Season and Overwintering — Root Strength and Resilience
Even a leafy crop benefits from balanced phosphorus and potassium for strong roots and stress tolerance. As temperatures drop or if you're overwintering plants, a dose of Bloom supports root development and helps plants weather frost. How to use: apply as a soil drench every 2 to 3 weeks in the cool season — optional, but it toughens plants for winter and keeps them productive when other crops have quit.
Organic Pest Control
As brassicas, collards attract a familiar roster of pests, but healthy, well-fed plants in biologically active soil resist damage far better, and most problems are manageable without synthetic chemicals. Prevention starts with floating row cover — draping lightweight fabric over plants keeps egg-laying moths and beetles off entirely.
- Imported cabbageworms and cabbage loopers — Velvety green caterpillars that chew ragged holes in leaves. Hand-pick them and spray Bacillus thuringiensis (Bt), a naturally occurring soil bacterium that targets caterpillars while sparing beneficial insects. Watch for white cabbage moths fluttering over the bed as an early warning.
- Diamondback moth larvae — Small, wriggling green caterpillars that skeletonize leaves. Bt and row cover control them; encourage parasitic wasps by letting a few herbs flower nearby.
- Cabbage aphids — Gray-green clusters on undersides and growing tips. Blast them off with a stream of water, apply insecticidal soap or neem, and support the ladybugs and lacewings that devour them.
- Harlequin bugs — Striking black-and-orange shield bugs, a major collard pest in warm regions, sucking sap until leaves wilt and blotch. Hand-pick adults and crush the barrel-shaped egg clusters; a fall cleanup of crop debris cuts their numbers dramatically.
- Flea beetles — Tiny beetles that riddle leaves with pinprick "shot holes," worst on young plants. Row cover during establishment is the best defense; kaolin clay and neem also help.
- Slugs and snails — Chew large holes and hide in mulch during damp weather. Trap them with boards or shallow beer traps, and ring plants with iron-phosphate bait, which is approved for organic gardens.
Building strong plants is itself pest control — the calcium and chitin in King Krustacean help toughen leaf tissue and stimulate a plant's natural defenses.
Common Diseases and Organic Solutions
Most collard diseases are prevented by the same practices that grow a great crop: healthy soil biology, good spacing for airflow, dry foliage, and crop rotation away from where brassicas grew in the last two to three years.
- Black rot — A bacterial disease showing as yellow, V-shaped lesions at leaf edges with blackened veins. Use disease-free seed, avoid working among wet plants, rotate crops, and remove infected leaves promptly.
- Downy mildew — Yellow blotches on top of leaves with grayish fuzz beneath, favored by cool, damp, crowded conditions. Improve air circulation, water at the base only, and space plants generously.
- Alternaria leaf spot — Dark concentric "target" spots on leaves. Remove affected foliage, avoid overhead watering, and rotate. A copper-based fungicide (approved for organic use) can slow severe outbreaks.
- Clubroot — A soil disease that swells and distorts roots, stunting plants. It's worst in acidic, poorly drained soil, so keep pH toward the upper end of the range (near 6.8), improve drainage, and practice long rotations; there's no cure once soil is infested.
- White rust — Raised white pustules on leaf undersides. Manage with airflow, sanitation, and rotation.
- Damping-off — Seedlings collapse at the soil line. Prevent it with sterile seed-starting mix, good air movement, and by not overwatering young plants.
A soil rich in beneficial microbes is your best insurance — a diverse root-zone community competes with and suppresses many disease organisms before they take hold.
Harvesting Collard Greens
A single collard plant feeds you for months when you harvest it right.
When to Harvest
Start picking as soon as leaves are big enough to use, but the sweet spot is when outer leaves reach about 8 to 10 inches long — substantial yet still tender. Harvest the lower, outer leaves first by snapping or cutting them at the base of the stem, always leaving the central growing point and top rosette intact. This "cut-and-come-again" approach lets the plant keep producing from the center for weeks or months; avoid stripping more than a third at once. And remember: collards picked after a light frost taste noticeably sweeter, so don't rush to pull plants when cold arrives.
Storage and Extending the Season
Fresh-picked collards keep in the refrigerator for about 5 to 7 days in a loose bag or with stems in water. For the long term, wash, chop, blanch briefly, cool in ice water, and freeze — they hold for many months. To extend the harvest, protect plants with row cover or a cold frame; in mild-winter areas collards keep yielding all winter, and in colder regions the hardy Vates and Champion types survive impressive freezes.
Common Problems and Troubleshooting
Why are my collard leaves turning yellow?
The most common cause is nitrogen shortage — collards are hungry, leafy feeders, and pale, yellowing lower leaves usually mean it's time to feed, so step up your Veg schedule. If yellowing comes with soggy soil, the culprit is overwatering suffocating the roots. A few yellow bottom leaves on a thriving plant is just natural aging — remove them.
Why are my collards tough and bitter?
Bitterness and toughness almost always trace to stress — usually heat and inconsistent watering, which is why summer-grown collards can disappoint. Keep soil evenly moist, mulch well, harvest leaves young, and let a light frost sweeten them.
Why are my collards bolting (going to seed)?
Collards are biennials that normally flower in their second year, but heat, long days, and stress can trigger premature bolting in the first season. Once a plant sends up a flower stalk, its leaves turn bitter and it stops producing well. Prevent it by planting in the cool shoulders of the season, keeping plants watered, and choosing bolt-resistant varieties like Vates or Champion.
Frequently Asked Questions
How long do collard greens take to grow?
Most varieties are ready to start harvesting about 60 to 80 days from transplanting, though fast hybrids like Flash can be picked in as little as 55 days. And because collards keep producing from the center, a single planting feeds you for months.
Can collard greens survive frost and winter?
Yes — collards are among the most cold-hardy vegetables you can grow. They tolerate hard frosts and, once established, can survive temperatures down into the teens (°F), especially with a little protection. Frost doesn't just spare them; it improves their flavor, making the leaves sweeter and more tender.
How many times can you harvest collards?
Repeatedly. By picking only the outer leaves and leaving the growing crown intact, you can harvest from the same plant every week or two for months — the cut-and-come-again habit that makes collards so efficient in a small garden.
Do collards need full sun?
Collards grow best in full sun — at least 6 hours a day — for the biggest, most robust plants. They tolerate partial shade, and in hot climates a little afternoon shade helps by reducing heat stress and slowing bolting.
Can you grow collards in containers?
Absolutely. Choose a container at least 12 inches deep and wide per plant, use a rich organic potting mix, and keep it consistently moist since pots dry out faster than beds. Feed regularly with Veg because container plants exhaust their nutrients quickly, and you'll pull a steady supply of greens from a patio or balcony.