Few vegetables reward patience like the parsnip — a creamy, nutty, frost-sweetened root that turns your winter kitchen into something special while its deep taproot quietly builds better soil below. Growing them organically means richer flavor, no synthetic residues on a root you'll roast whole, and a garden bed that's healthier at the end of the season than it was at the start.
Parsnips have a reputation for being fussy — slow to sprout, slow to mature, and unforgiving of rocky ground. But the truth is that once you understand what they actually need, they're one of the most low-maintenance crops you can grow. This guide walks you through every stage, from choosing the right seed to pulling sweet, tender roots out of frozen ground in the dead of winter.
Choosing the Right Parsnip Varieties
Parsnips are a biennial grown as an annual — you harvest the fleshy root in its first season before it ever tries to flower. Because the whole crop is that root, variety choice comes down to root shape, sweetness, and disease resistance. The biggest practical decision is matching root length to your soil depth.
Root Types by Shape
Long, tapering varieties like the heirloom 'Hollow Crown' produce classic 10-to-12-inch roots but demand deep, stone-free soil to grow straight. Wedge or bayonet-shaped types such as 'Harris Model' and 'Gladiator' are broad at the shoulder and finish faster, forgiving shallower beds. If you garden on heavy clay or rocky ground, shorter bulbous types will fork less and are the smarter choice than fighting a foot-long taproot through compaction.
Best Varieties for Organic Growing
- 'Gladiator' F1 — A vigorous hybrid prized for smooth, uniform white roots and strong resistance to parsnip canker, the disease most likely to ruin an organic crop. An excellent first-choice for reliability.
- 'Harris Model' — A dependable open-pollinated standard with sweet, tender, smooth-skinned roots. Widely available and forgiving for beginners.
- 'Hollow Crown' — The classic long-rooted heirloom. Superb flavor and seed-saving potential if you can give it deep, loose soil.
- 'Cobham Improved Marrow' — Notably sweet with good canker resistance and a shorter, easier-to-lift root.
- 'Javelin' F1 — Uniform, canker-tolerant, and slow to bolt, a good pick where springs run warm.
- 'The Student' — A tender, richly flavored heirloom bred from wild parsnip stock, beloved by flavor-focused gardeners.
One critical rule for any variety: buy fresh seed every year. Parsnip seed loses viability faster than almost any other vegetable, and old seed is the number-one reason gardeners think they "can't grow parsnips." Last year's leftover packet is the enemy.
Soil Preparation
If you get the soil right, parsnips practically grow themselves. The single most important factor is depth and looseness — this is a root that wants to drive straight down 8 to 12 inches without hitting a stone, a clod, or a compaction layer.
Ideal Soil Conditions
Aim for a deep, loose, well-drained sandy loam with a pH between 6.0 and 7.0, though parsnips tolerate slightly alkaline ground better than most vegetables. Before sowing, loosen the bed to at least 12 inches with a broadfork or digging fork and remove stones as you go — every rock is a future forked or split root. Avoid fresh manure and heavy nitrogen: rich, "hot" soil produces lush tops and hairy, forked, or split roots instead of the smooth single taproot you're after. Well-finished compost worked in the season before is ideal.
Building Living Soil
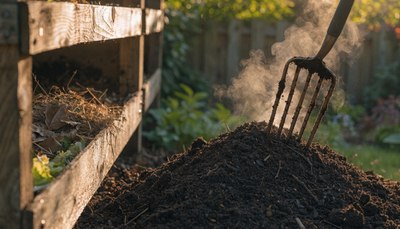
Parsnips reward a biology-first approach. Rather than force-feeding the plant, you're building a living soil food web that delivers nutrients steadily over a long season. Fold in a couple of inches of mature compost to feed soil microbes, then inoculate the root zone at sowing with Microbes. Those beneficial bacteria and mycorrhizal fungi colonize the developing taproot, extend its effective reach for water and phosphorus, and unlock nutrients already present in your soil. For a crop that spends four to five months in the ground, that slow, biological drip-feed is exactly what produces dense, sweet, well-formed roots — and it leaves your bed more fertile than you found it.
Planting: Timing and Technique
Because parsnips are grown as an annual for a single-season root, everything is framed by your frost dates and the long season the crop needs — most varieties take 100 to 120 days, and many reward you for leaving them in the ground even longer.
When to Sow
Direct sow in spring once the soil has warmed to about 50°F, which is usually two to four weeks before your last expected frost through a few weeks after it. Cold, wet soil rots seed and germinates it painfully slowly. In regions with long growing seasons and mild winters, a mid-to-late summer sowing works too, timed so roots mature into the cold for a winter harvest. Count backward from your first fall frost and give the crop its full 100-plus days of runway.
Direct Sowing, Not Transplanting
This is the golden rule: parsnips resent transplanting. Disturbing the taproot causes forking and stunting, so starting seed indoors in trays and moving seedlings out — the norm for tomatoes or peppers — backfires here. Always sow directly where the plants will grow. If you absolutely must start early in a short season, use deep individual cells or soil blocks and transplant before the taproot reaches the bottom, but direct sowing is far more reliable.
Sow seed about half an inch deep. Germination is famously slow and erratic — anywhere from 14 to 28 days — so keep the surface consistently moist the entire time and never let it crust over or dry out. A classic trick is to mix in a few fast-sprouting radish seeds as a "marker crop": the radishes come up in days, mark the row so you don't accidentally hoe it, and are pulled long before the parsnips need the space.
Spacing
Sow seed thickly to hedge against poor germination, then thin ruthlessly once seedlings are a couple of inches tall. Space final plants 3 to 4 inches apart in rows 12 to 18 inches apart. Crowded parsnips produce thin, disappointing roots, so don't skip thinning — snip the extras at soil level rather than pulling, to avoid disturbing the keepers.
Companion Planting
Parsnips are members of the carrot family (Apiaceae), and their best companions play to their slow, deep-rooted growth habit.
- Radishes — The marker-crop workhorse; they break the soil surface, flag the row, and are harvested before parsnips need room.
- Onions, garlic, and leeks — Their scent helps deter carrot rust fly, one of the parsnip's main pests.
- Lettuce and other fast greens — Use the open ground above the slow-developing roots before the parsnip canopy fills in.
- Peas and beans — Nitrogen-fixers that gently enrich the bed without the excess that forks roots.
Avoid planting parsnips next to carrots, celery, celeriac, dill, or fennel — as fellow Apiaceae they share the same pests and diseases, and concentrating them makes an easy target for carrot rust fly. Rotate parsnips so they don't follow other carrot-family crops in the same bed.
Watering Parsnips Organically
Parsnips want steady, even moisture — the enemy is the boom-and-bust cycle of a bed that dries hard and then gets flooded.
Best Practices
Provide roughly 1 inch of water per week, more in hot, dry spells, and water deeply and less often to encourage the taproot to chase moisture downward. During the long germination window, gentle, frequent surface watering is essential to keep the seedbed from crusting. Once plants are established, a 2-to-3-inch mulch of straw or shredded leaves conserves moisture, moderates soil temperature, and suppresses weeds — and weed control matters, because parsnip seedlings are easily outcompeted early on. Drip irrigation or a soaker hose keeps foliage dry and reduces leaf disease.
Signs of Problems
Erratic watering is the leading cause of split and cracked roots: a dry spell followed by heavy rain makes the root swell too fast for its skin. Wilting, yellowing lower leaves can signal drought stress, while consistently soggy, poorly drained soil invites root rot and canker. If your roots come up forked or hairy, suspect stones, fresh manure, or over-rich nitrogen rather than water.
Organic Fertilizing Schedule for Parsnips
Parsnips are light-to-moderate feeders, and the biggest mistake is overfeeding — especially with nitrogen, which grows leaves at the expense of the root and causes forking. The goal is a steady, biology-driven supply that emphasizes root development over top growth. You don't need all of these — Microbes, Veg, and Bloom are the core system; the rest are optional boosters for specific goals.
At Sowing — Establish the Living Soil
Inoculate the seed row with Microbes to colonize the young taproot and set up the season-long nutrient pipeline. How to use: apply into the furrow at sowing and again as a soil drench a few weeks after germination.
Seedling and Early Growth — Gentle Root Support
Once seedlings are established and thinned, support early root and top development with a light feeding of Veg. How to use: apply at a modest rate every 3 to 4 weeks through the leafy growth phase — go easy, since too much nitrogen here forks the root. Pair with Kelp It Real for a natural boost to root formation and stress resilience. How to use: foliar spray or soil drench every 2 to 3 weeks, and again ahead of any heat stress.
Mid-Season Root Bulking — Shift to Roots
As the plant transitions from making leaves to swelling its root, switch the emphasis to potassium and phosphorus with Bloom. How to use: apply every 3 to 4 weeks from midsummer onward to drive dense, sweet root development. For an extra push on root structure, add Phishy. How to use: dilute and drench around the root zone every few weeks to condition the soil and strengthen the taproot.
Late Season — Ease Off
In the final weeks before harvest, taper feeding and let cold weather do the finishing work. Continued light Kelp It Real applications help the plant shrug off early frosts, but heavy feeding this late does more harm than good.
Organic Pest Control
Prevention is your best strategy — healthy plants in living soil, good rotation, and a physical barrier stop most problems before they start.
- Carrot rust fly — The top threat. Larvae tunnel rusty-brown channels through the roots. The most effective organic defense is floating row cover or fine insect mesh laid at sowing and sealed at the edges, keeping the low-flying adults from laying eggs. Interplanting alliums and rotating beds also help.
- Parsnip webworm — Caterpillars that web together and feed on the flower heads and foliage, mostly a concern for seed-savers letting plants bolt. Hand-pick and remove affected umbels.
- Aphids — Cluster on new growth; blast off with water, encourage ladybugs and lacewings, and treat heavy infestations with insecticidal soap.
- Cutworms and wireworms — Soil-dwelling larvae that sever seedlings or bore into roots. Keep beds weed-free, and use cardboard collars for young plants where cutworms are a known problem.
An important safety note: parsnip foliage contains natural compounds (furanocoumarins) that can cause a blistering skin reaction when sap contacts skin in bright sun. Wear gloves and long sleeves when handling the tops, especially on hot, sunny days, and be cautious not to confuse cultivated plants with toxic wild parsnip.
Common Diseases and Organic Solutions
- Parsnip canker — The most serious disease, showing as reddish-brown or black rot at the shoulder of the root. It's worsened by wet soil, root damage, and excess nitrogen. Defend against it by choosing resistant varieties like 'Gladiator', ensuring good drainage, avoiding root wounds, earthing up the shoulders, and rotating crops.
- Leaf spot (Cercospora and Ramularia) — Brown or tan spots on the foliage in wet weather. Improve airflow with proper spacing, water at the base, and remove badly affected leaves.
- Powdery mildew — A white dusty coating on leaves in late season; usually cosmetic but reduce it with good spacing and morning watering.
- Damping off — Rots seedlings at the soil line in cold, wet conditions. Sow into warm enough soil, avoid overwatering, and don't sow too thickly.
Across the board, the organic playbook is the same: living soil, good drainage, sensible spacing, dry foliage, and a solid crop rotation that keeps carrot-family plants out of the same bed for three or four years.
Harvesting Parsnips
Here's the payoff that makes the long wait worth it: parsnips get better the longer you leave them, and frost is your friend.
When to Harvest
Roots are technically ready at 100 to 120 days, but flavor transforms after the first hard frosts, when the plant converts stored starch into sugar as a natural antifreeze. Wait until a couple of frosts have passed before you start pulling — the difference between a September parsnip and a post-frost one is night and day. Loosen the soil alongside each root with a fork before lifting; parsnips grip hard, and yanking a long root often snaps it.
Storage and Extending the Harvest
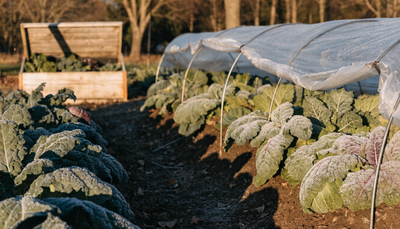
The best "storage" is often the ground itself. In most climates you can leave parsnips in place through winter under a thick mulch of straw or leaves and dig them as needed — they'll keep sweetening. Just harvest the last of them before spring growth resumes, or the roots turn woody and bitter as the plant bolts. For lifted roots, trim the tops, leave the soil on, and store in damp sand or sawdust in a root cellar or fridge at 32 to 40°F, where they'll keep for several months.
Common Problems and Troubleshooting
Why did my parsnip seeds never come up?
Almost always one of two things: old seed or a dried-out seedbed. Parsnip seed is short-lived, so use a fresh packet each year, and keep the surface constantly moist through the full three-to-four-week germination window. Cold, waterlogged soil also rots seed — wait until it reaches about 50°F.
Why are my parsnip roots forked and hairy?
Forking is a soil problem, not a watering one. Stones, clods, a compaction layer, fresh manure, or too much nitrogen all cause the taproot to split or grow side roots. Fix it by digging deep and loosening the bed, removing stones, and skipping the heavy fertilizer — compost and biology, not nitrogen.
Why are my roots small and spindly?
Usually overcrowding. Parsnips sown thickly and never thinned compete for space and light and stay pencil-thin. Thin to 3 to 4 inches apart, keep weeds down, and be patient — they do most of their bulking in the second half of the season.
Frequently Asked Questions
How long do parsnips take to grow?
Plan on 100 to 120 days from sowing to a usable root, plus the germination window of up to a month. It's a long-season crop, and leaving roots in the ground past the first frosts only improves them.
Can I grow parsnips in containers?
Yes, if the container is deep — at least 12 to 15 inches for full-length roots, or choose a short, stumpy variety for shallower pots. Use a loose, stone-free potting mix and keep moisture even, since containers dry out faster than beds.
Do parsnips really taste better after frost?
They genuinely do. Cold weather triggers the plant to convert starches into sugars, giving frost-touched parsnips their signature sweet, nutty flavor. It's the one vegetable where waiting through a freeze is the whole point.
Why shouldn't I start parsnips indoors like tomatoes?
Because disturbing the taproot when transplanting causes forking and stunting. Parsnips are best direct-sown where they'll grow. If your season is very short, use deep cells or soil blocks and move them out while young, but direct sowing is far more reliable.
Can I leave parsnips in the ground over winter?
Absolutely — in most regions it's the preferred way to store them. Cover the bed with a thick mulch and dig roots as you need them all winter. Just be sure to harvest the last of them before spring, or they'll turn woody and bolt.