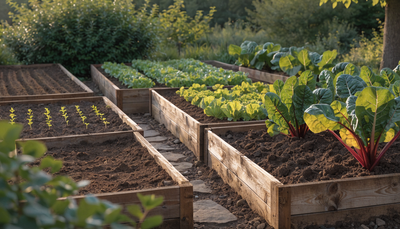
Growing turnips organically rewards you twice over: once with crisp, peppery-sweet roots and tender, mineral-rich greens, and again with living soil that gets healthier every season. Few crops give a new gardener a faster, more forgiving win — turnips can go from seed to harvest in as little as five to six weeks, without a single synthetic input.
Whether you're squeezing a fast fall crop into a raised bed or interplanting salad turnips between slower vegetables, this guide covers everything you need to grow them the organic way: choosing varieties, building living soil, timing sowings around frost dates, feeding by growth stage, and dodging the handful of pests and diseases that trouble the cabbage family. Turnips are a cool-season root crop, so most of your success comes down to timing and soil — get those right and the plants nearly grow themselves.
Choosing the Right Turnip Varieties
Turnips (Brassica rapa) come in two broad styles: fast, mild "salad" or "Tokyo" types you eat raw and skin-on, and classic storage turnips with a stronger, earthier bite that shine when cooked or held through winter. Some cultivars are grown mainly for their greens. Deciding what you want on the plate narrows the field fast.
Salad Turnips vs. Storage Turnips
Salad turnips mature quickly (roughly 35–45 days), stay tender at small sizes, and taste sweet and crisp enough to eat like an apple. Storage turnips take a little longer, size up larger, and develop the dense flesh and pungency that holds up in soups, roasts, and a root cellar. If you're impatient or gardening in a short shoulder season, lean salad; if you want winter keepers, lean storage.
Best Varieties for Organic Growing
- Hakurei — the gold-standard white salad turnip. Smooth, sweet, and ready in about 38 days; superb raw.
- Purple Top White Globe — the reliable heirloom storage turnip, purple-shouldered and white-bottomed, great cooked and for keeping.
- Golden Ball (Orange Jelly) — yellow-fleshed, nutty, and mild; holds sweetness well into storage.
- Scarlet Queen — red-skinned, crisp, and slow to turn pithy, so it forgives a late harvest.
- White Egg — quick, smooth, mild-flavored heirloom that's easy for beginners.
- Seven Top — grown for abundant, tender greens rather than roots; a good pick if you love turnip greens.
Look for untreated, organic seed when you can. Turnips grow true and are inexpensive, so it's worth trying two or three cultivars in a single bed to learn what your soil and palate prefer.
Soil Preparation
Roots take the shape of the soil they grow in, so the single biggest thing you can do for good turnips is give them loose, even, biologically active ground. Compacted, rocky, or freshly manured soil produces the forked, hairy, split roots that make people think they "can't grow turnips."
Ideal Soil Conditions
Turnips want a loose, well-drained loam worked to a depth of at least 8–10 inches, free of rocks and clods. Aim for a soil pH between 6.0 and 6.8 — slightly acidic to neutral. Two rules matter most for root quality: don't add fresh manure or heavy nitrogen right before planting (it drives leafy tops at the expense of roots and can cause forking), and make sure phosphorus and potassium are available, since those build dense, sweet roots. A shovelful of finished compost worked into each planting area is usually all the fertility a turnip bed needs to start.
Building Living Soil
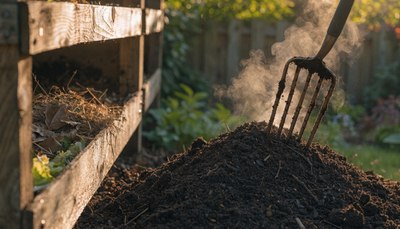
Organic growing is really soil growing. Instead of feeding the plant directly, you feed the web of bacteria, fungi, and other microbes that make nutrients available to roots on demand. Work 1–2 inches of finished compost into the top few inches of the bed, keep the surface mulched, and disturb it as little as possible so fungal networks can establish. A biologically alive soil holds moisture more evenly (preventing cracked, woody roots), buffers pH, and suppresses many soil-borne diseases on its own. To jump-start that biology in a new or tired bed, inoculate at sowing with Microbes — more on that in the feeding section below.
Planting: Timing & Technique
Turnips are a cool-season annual and taste best when they mature in cool weather, so timing revolves around your average last spring frost and average first fall frost, not hardiness zones. They germinate in soil as cool as 45°F and grow well between 45°F and 75°F. Hot weather makes roots woody, bitter, and prone to bolting, which is why fall is the premium turnip season across most of the country.
Direct Sowing (the Right Way)
Turnips form a taproot and resent transplanting, so skip the seed trays and sow directly where they'll grow. For a spring crop, sow as soon as the soil can be worked — about 2–3 weeks before your last frost — and make succession sowings every 10–14 days until temperatures climb into the 70s. For a fall crop (the sweeter one), count back 8–10 weeks from your first fall frost and sow then; a light frost at harvest actually improves flavor by converting starches to sugar.
Depth, Spacing & Thinning
Sow seeds ¼ to ½ inch deep in rows 12–18 inches apart, or broadcast lightly in a wide band. Seedlings emerge in 5–10 days. Once they're a couple inches tall, thin ruthlessly to 3–4 inches apart for good root types (crowded turnips make all tops and no bottoms). Don't waste the thinnings — the tender young greens are excellent in salads or sautéed. If you're growing a variety purely for greens, you can leave plants closer together.
Companion Planting
Turnips play well with plenty of neighbors and benefit from a few strategic ones:
- Peas and bush beans — legumes fix nitrogen and gently feed nearby turnips without overdoing it.
- Lettuce and other quick greens — shallow-rooted and harvested before turnips size up, they use space efficiently.
- Onions, garlic, and chives — their aroma helps mask turnips from pests that hunt by smell.
- Aromatic herbs like dill, mint, and rosemary — reputed to deter flea beetles and cabbage-family pests.
- Radishes — fast to mature and can act as a decoy for flea beetles.
Keep turnips away from tight plantings of other brassicas (cabbage, broccoli, kale) so you're not concentrating shared pests and diseases in one spot, and give heavy feeders like potatoes their own bed.
Watering Turnips Organically
Turnips are mostly water, and they want that water delivered steadily. Feast-or-famine moisture is the number-one cause of cracked, woody, and bitter roots.
Best Practices
Aim for about 1 inch of water per week, more in hot or windy weather, delivered deeply rather than in frequent shallow sprinkles. Water at the base of the plants — a drip line or soaker hose is ideal — to keep foliage dry and reduce leaf disease. A 2–3 inch layer of straw or shredded-leaf mulch is your best friend here: it evens out soil moisture, keeps roots cool, and cuts back on weeding.
Signs of Problems
Wilting in the heat of the day that recovers by evening is normal; wilting that persists means the bed is too dry. Cracked or split roots usually mean a heavy soaking followed a dry spell — the root grew faster than its skin could stretch. Woody, pithy, or overly pungent roots point to heat stress, drought, or simply leaving them in the ground too long. Consistent watering plus a timely harvest fixes nearly all of these.
Organic Fertilizing Schedule for Turnips
Turnips are light-to-moderate feeders, and the goal is balance: enough nitrogen early to build a healthy leaf canopy, then a shift toward phosphorus and potassium to bulk sweet, dense roots. Overfeeding nitrogen is the classic beginner mistake — you get a jungle of greens and marble-sized roots. Feed the soil biology and match the nutrients to the growth stage.
You don't need all of these — Microbes, Veg, and Bloom are the core system; the rest are optional boosters for specific goals.
At Sowing — Establish the Soil
Work compost into the bed and inoculate the root zone with Microbes to colonize the soil with beneficial bacteria and fungi before the seeds even sprout — water it in along the seed rows so roots meet biology immediately. To condition that root zone further, drench with Phishy, a fish hydrolysate that feeds microbes and encourages fine feeder-root development in the first weeks.
Seedling & Leaf Stage (Weeks 1–3 after thinning)
Once seedlings are thinned and putting out true leaves, give a light feeding of Veg to build a strong photosynthetic canopy — that leaf area is the engine that will fill the root. Keep it modest; you want healthy green tops, not lush overgrowth. Apply as a soil drench every 10–14 days through this stage.
Root-Bulking Stage (Roughly Week 3 to Harvest)
When you can feel roots beginning to swell at the soil line, transition to Bloom. Despite the name, its phosphorus-and-potassium emphasis is exactly what root and bulb crops need to size up and sweeten — apply every 10–14 days until about a week before harvest. This is where firm, flavorful turnips are made.
Throughout — Stress Resilience
Every couple of weeks across the whole cycle, add Kelp It Real as a soil drench. Seaweed extract supports vigorous root development and helps turnips shrug off the heat spells, cold snaps, and thinning stress that would otherwise stall growth. It pairs well with either Veg or Bloom in the same watering.
Organic Pest Control
Turnips share the cabbage family's pest list, but healthy soil, row cover, and quick action handle nearly all of it without sprays.
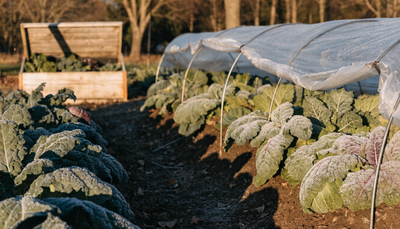
- Flea beetles — the most common turnip pest, chewing tiny "shotgun" holes in leaves. Cover young plants with floating row cover, keep beds weeded, and dust foliage with kaolin clay if pressure is heavy.
- Cabbage root maggot — larvae tunnel into roots. Prevent with row cover at sowing and by rotating brassicas to a new bed each year; avoid fresh manure, which attracts the flies.
- Aphids (cabbage aphid) — cluster on the undersides of leaves. Blast them off with water, encourage ladybugs and lacewings, and treat stubborn colonies with insecticidal soap.
- Imported cabbageworms and loopers — green caterpillars on the greens. Handpick, or use the organic bacterial spray Bacillus thuringiensis (Bt).
- Harlequin bugs — shield-shaped black-and-orange bugs that suck sap. Handpick adults and egg clusters; row cover keeps them off.
Prevention beats treatment: rotate where you plant brassicas, keep the garden clear of debris, and support beneficial insects with flowering companions.
Common Diseases and Organic Solutions
Most turnip diseases are prevented by rotation, good drainage, and keeping foliage dry.
- Clubroot — a soil-borne organism that causes swollen, distorted roots and stunted plants. It thrives in acidic, waterlogged soil, so improve drainage, keep pH near neutral, and rotate brassicas on a 3–4 year cycle. There is no organic cure once soil is infected — prevention is everything.
- Downy mildew — yellow patches with fuzzy gray growth underneath in cool, damp weather. Improve airflow with proper spacing, water at the base, and remove affected leaves.
- White rust — raised white pustules on leaf undersides. Remove infected foliage and avoid overhead watering.
- Alternaria and Cercospora leaf spots — dark or tan spots that can defoliate plants. Clean up crop debris, rotate, and don't work among wet plants.
- Black rot — a bacterial disease showing V-shaped yellow lesions from the leaf edges inward. Use clean seed, rotate, and pull and destroy infected plants.
A living, well-drained soil is your best disease defense — the same biology you build with compost and inoculants outcompetes many pathogens.
Harvesting Turnips
Harvest timing is where flavor is won or lost, and turnips give you two harvests: greens and roots.
When to Harvest
Pick a few outer greens once leaves reach 4–6 inches, taking no more than a third of the plant so the root keeps growing. Pull roots young and tender — salad types at 1–2 inches across, storage types at 2–3 inches. Bigger is not better: turnips left to grow past about 3 inches turn woody and sharp. Loosen the soil with a fork and lift by the tops. For fall crops, let a light frost or two touch the plants first — the cold noticeably sweetens the roots.
Storage and Extending the Harvest
For anything you won't eat within a few days, cut the greens off about an inch above the root (leaving them on wicks moisture away) and store roots unwashed in a cold, humid place at 32–38°F — a refrigerator crisper, or a root cellar with roots packed in damp sand. Good storage turnips keep for two to four months. Greens are best used within a few days but freeze well after a quick blanch. In mild-winter areas you can leave a fall crop in the ground under a thick straw mulch and dig roots as needed.
Common Problems and Troubleshooting
Why is my turnip all leaves and no root?
Too much nitrogen, too little thinning, or too little sun. Ease off nitrogen-rich feeds, thin plants to a full 3–4 inches apart, and make sure the bed gets at least six hours of direct sun. Shift feeding toward Bloom to redirect energy into the root.
Why are my turnips woody and bitter?
Usually heat, drought stress, or over-mature roots. Turnips grown into hot weather or left in the ground too long toughen up. Water consistently, mulch to keep roots cool, harvest on the young side, and favor a fall crop for the sweetest results.
Why did my turnip roots crack or fork?
Cracking comes from uneven watering — a heavy soak after a dry spell splits the skin. Forked or hairy roots come from rocky soil or fresh manure. Keep moisture steady and grow in loose, stone-free soil enriched with finished compost rather than raw manure.
Frequently Asked Questions
Can I grow turnips in containers?
Yes. Choose a pot at least 8–10 inches deep, use a loose compost-rich potting mix, and thin to give each root room. Salad types like Hakurei do especially well in containers because they mature fast and stay small.
How long do turnips take to grow?
Fast salad varieties are ready in about 35–45 days; storage types take 50–60 days. Greens can be picked even sooner. This speed makes turnips ideal for succession planting and filling gaps between slower crops.
Do turnips need full sun?
They grow best in full sun (six or more hours) but tolerate partial shade, which can actually help in warmer regions by keeping the soil cooler. In too much shade, expect leafy tops and undersized roots.
Are turnip greens edible?
Absolutely — they're one of the crop's best features, rich in vitamins and delicious sautéed or in soups. Harvest young outer leaves and leave the growing center intact, or grow a greens-specific variety like Seven Top.
Should I plant turnips in spring or fall?
Both work, but fall is superior in most climates. Roots maturing in cool autumn weather (and touched by light frost) are sweeter and less prone to bolting and bitterness than a spring crop racing the summer heat.