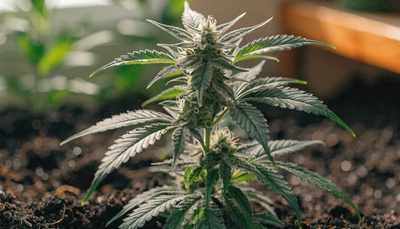
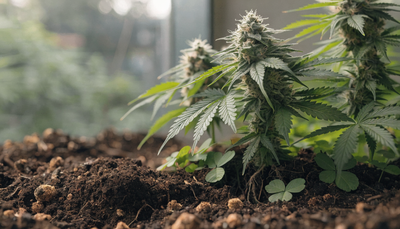
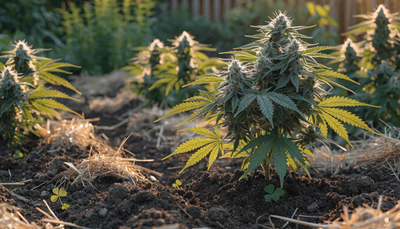
This guide is written for adults growing cannabis where it is legal to do so. Know your state and local laws before you start — plant counts, canopy limits, and home-grow rules vary widely, and staying inside them is your responsibility. What follows is organic horticulture: how to build living soil and grow a healthy plant. Nothing here covers sourcing genetics or anything illicit.
Growing cannabis indoors in living soil is the closest you can get to how the plant evolved to grow — a diverse web of microbes, fungi, and organic matter feeding the roots on demand, instead of a fixed diet of synthetic salts. Done right, it is more forgiving than bottled nutrients, nearly impossible to "burn," and it rewards you with denser terpene profiles and a smoother smoke. It is also genuinely low-effort once the soil is alive. This is the full walkthrough: setup, soil, light and climate, the stage-by-stage organic feeding plan, pest and disease defense, and harvest.
Skip straight to the feeding schedule →
Genetics and Setup
Your genetics set the ceiling; everything else just protects the potential in the seed. For a first indoor living-soil run, lean toward resilient, mold-resistant cultivars that don't stretch uncontrollably in a tent. Reliable, widely grown options include Northern Lights (short, fast, forgiving), Blue Dream (vigorous and high-yielding), White Widow (tough and resinous), and Wedding Cake or Gorilla Glue #4 if you want dense, terpene-heavy flower and don't mind a little more feeding. Sativa-dominant lines like Durban Poison stretch tall and suit growers with headroom; indica-leaning lines like Granddaddy Purple stay compact.
You are choosing between photoperiod plants (which flower when you shorten the light cycle to 12 hours) and autoflowers (which flower on an internal clock regardless of light). Photoperiods give you full control over plant size and let you keep mother plants; autoflowers are faster and simpler but can't be held in veg. This guide covers a standard photoperiod grow.
The room
- Grow tent: A 2 ft × 2 ft tent holds one plant; a 4 ft × 4 ft comfortably runs 2–4. Reflective walls, a sturdy frame for hanging your light, and vents for ducting.
- Light: A quality full-spectrum LED is the standard now — it runs cooler than old HID lamps and pairs well with a living-soil tent that you don't want overheating. Match wattage to your footprint (roughly 30–40 watts per square foot of canopy for flower).
- Air: An inline exhaust fan pulling through a carbon filter (odor control plus fresh-air exchange), and at least one oscillating clip fan to keep air moving across leaves.
- Containers: This is where living soil differs. Go big — 7- to 15-gallon fabric pots, or a raised bed. More soil volume means a larger, more stable microbial population and a bigger nutrient buffer, which is the entire point of the method. Fabric pots air-prune roots and drain well.
- Monitoring: A combined thermometer/hygrometer, and a simple timer or smart plug for the light cycle.
Soil Preparation and Living Soil
Living soil is not "dirt with fertilizer in it." It's a complete ecosystem you build once and then feed forever, the same way a healthy forest floor never gets a bag of Miracle-Gro. The microbes do the work of converting raw organic matter into plant-available nutrients exactly when and where the roots ask for it, through root exudates. Your job is to build the habitat and keep it alive.
A solid living-soil mix is roughly equal parts of three things:
- A base — peat moss or coco coir for structure and water retention.
- Aeration — perlite, pumice, lava rock, or rice hulls, so roots and microbes get oxygen and the mix never compacts.
- Compost and worm castings — the living, nutrient-rich heart of the soil. This is where your biology comes from.
To that base you mix in slow-release organic amendments (things like kelp meal, crab meal, neem, gypsum, and a rock-dust mineral source) and then let the whole batch "cook" — sit moist and warm for 2–4 weeks so the microbes wake up and start breaking amendments down before a plant ever goes in. Homemade compost and worm castings are the best possible inputs here, and they're where your living biology comes from. For the deeper story on the soil life driving all of this, see our guide on building living soil that feeds itself. A no-till approach — where you leave the root ball in place after harvest, top-dress fresh amendments, and replant — means the soil actually gets better every cycle instead of being thrown out.
Two rules protect the biology you just built:
- Never use chlorinated tap water straight from the faucet. Chlorine and chloramine are designed to kill microbes — including yours. Let water sit out uncovered for 24 hours to off-gas chlorine, or run it through a carbon filter.
- Stop chasing pH. In hydro and bottled-salt grows you constantly correct pH; healthy living soil self-buffers into the sweet spot (about 6.2–6.8) on its own. Feed the soil, keep it moist, and let it regulate itself.
The Indoor Organic Grow, Lighting, and Environment
With soil built and cooked, the grow itself moves through four stages. The climate targets below are what keep a plant transpiring happily and out of pest and mold trouble.
Germination and seedling (weeks 1–2)
Pop your seed (paper-towel or straight into a small amount of moist soil) and plant the taproot down. Keep seedlings warm at 72–78°F and humid at 65–70% — a humidity dome helps for the first several days. Light demand is low; keep an LED dimmed or well back (often 24–36 inches above the seedling) so you don't fry it. Living soil already carries enough gentle nutrition for a seedling, so go easy — plain dechlorinated water and your microbes are plenty.
Vegetative growth (weeks 3–8, your call)
Run the light on an 18 hours on / 6 hours off cycle. This is when the plant builds its frame — stems, leaves, and root mass. Targets: 70–80°F during lights-on, humidity 55–65%. Lower the light gradually as the plant grows; most LEDs sit around 18–24 inches above the canopy in veg (follow your fixture's chart). This is the window to train — topping, or low-stress training (gently tying branches down) to spread the canopy flat and even. Keep that clip fan moving air so stems thicken and mold never gets a foothold. You stay in veg as long as you want more size; a plant roughly doubles in height once you flip to flower, so flip when it's about half your target finished height.
Transition and flower (12/12)
Switch the light to 12 hours on / 12 hours off and the plant reads it as fall — it stops stretching and starts building flowers. Drop humidity as buds form: 40–50% through most of flower, easing toward 40% in the final weeks to protect dense colas from bud rot. Temperatures of 65–80°F with a 10°F drop at night in late flower can coax out deeper purple and pink colors in cultivars that carry them. Keep airflow strong but don't blast the buds directly.
Organic Fertilizing Schedule
Here's the part living-soil growers love: because the soil does most of the feeding, your job is mostly to keep the microbes fed and add targeted support at each stage. Serious cannabis growers tend to run the full Growganica lineup because cannabis is a heavy, fast feeder that rewards precision — but read this first:
You do not need all of these. A living-soil grow will produce excellent flower on just the Essentials. The power-ups are exactly that — additions for growers chasing maximum density, terpenes, and resilience. Build up as you learn your garden; don't feel you have to buy the whole shelf on day one.
How to mix a feed: start with dechlorinated water, add your liquids first — Microbes go in before anything else — then stir in the powders until dissolved. (Water → Microbes → powders. This order keeps the biology happy.)
The Essentials (your foundation)
- Microbes — the living heart of the whole system, with over a billion microorganisms per drop. These are the root partners that unlock nutrients and fix nitrogen from the air. Add 1–3 ml per gallon at almost every watering, from seedling through late flower. This is the one product a living-soil grow should never skip.
- Veg (0.5-0-3) — your vegetative-stage feed. Use ¼ tbsp per gallon through the 18/6 stage. Note the deliberately low nitrogen number: Veg is designed as microbe food, not a synthetic N dump. It relies on your Microbes (or established living soil) to fix the rest of the nitrogen — so pair the two.
- Bloom (0-6-4) — swap Veg out for Bloom once you flip to 12/12. Use ¼ tbsp per gallon. Like Veg, it's built to work with your soil biology, feeding flower development without salt buildup.
The Power-Ups (select as your garden calls for them)
- Incredible Bulk (0-10-25) — the late-stage hammer for size and density. Bring it in around week 4 of flower at ¼ tbsp per gallon and ramp it up as buds swell, climbing to as much as 4 tbsp per gallon by week 9 on hungry cultivars. This is the single biggest lever on final bud weight and hardness.
- Kelp It Real (0-0-14) — soluble seaweed at ¼ tsp per gallon. A workhorse from seedling to finish: natural growth hormones for root and shoot development, high potassium for terpene and resin quality, and real stress resistance through heat spikes and transplants.
- King Krustacean — crab meal at ¼ tbsp per gallon (or top-dressed into the soil). Slow-release nitrogen plus calcium, but the real story is chitin: it primes the plant's own defenses and feeds chitin-eating microbes that go after pests and root disease. Best used in veg and early flower.
- Vitamin Sea — a foliar micronutrient spray, 5 ml per gallon, misted on the leaves. Magnesium and trace minerals delivered fast, straight through the leaf — the quickest fix when you see the early magnesium fade (yellowing between the veins on lower leaves) that fast-growing cannabis is prone to. Spray during veg and early flower, lights-off, never on open buds.
- Phishy (1.7-7-0) — cold-processed fish hydrolysate, your everyday liquid bloom workhorse at 1–5 ml per gallon. Amino acids for the plant and a feast for your soil microbes — it keeps the biology thriving right through flower. Use it as a drench through veg and the first half of bloom.
No flush needed — just ease off
Here is where organic parts ways with synthetic growing. Salt-based growers "flush" with plain water for the last week or two to strip built-up salts out of the medium. Living soil has no salt buildup to flush — the nutrients are held in organic matter and biology, not floating as excess salts. So there is nothing to rinse out and forcing a flush just starves the plant early. Instead, in the final 1–2 weeks simply ease off feeding: drop the boosters, water with plain dechlorinated water plus a little Microbes, and let the soil life finish the plant naturally. You get a clean, smooth ash without sacrificing weight or terpenes.
Organic Pest and Disease Defense
The best pest control is a strong, well-ventilated plant and a clean room — most infestations start with poor airflow, high humidity, or something you carried in. Scout the undersides of leaves every few days so you catch problems while they're small. Here's what specifically shows up indoors on cannabis, and how to handle each one organically.
Pests
- Spider mites — the classic indoor scourge. Tiny specks and fine webbing on leaf undersides, thriving in hot, dry, stagnant air. Knock down populations with insecticidal soap or a neem-oil spray (veg only, never on flowering buds), and raise humidity and airflow, which they hate.
- Fungus gnats — little black flies over the soil; the larvae chew roots. A sign the topsoil is staying too wet. Let the top inch dry between waterings, add a layer of coarse mulch or sand, and hang yellow sticky traps.
- Thrips — silvery, stippled scars on leaves. Sticky traps plus neem or insecticidal soap.
- Aphids — clusters on new growth and stems. Wipe or spray them off; a healthy living-soil garden with predatory insects rarely lets them build.
- Broad and russet mites — nearly microscopic and nasty, showing up as twisted, glossy new growth before you ever see the bug. These need aggressive, fast intervention and strict sanitation; isolate affected plants immediately.
Diseases
- Powdery mildew — white, talcum-powder patches on leaves. Loves high humidity and poor airflow. Prevent it with strong ventilation and by keeping flowering humidity down; remove affected leaves early.
- Bud rot (botrytis) — gray mold that hollows out dense colas from the inside, often in the final weeks. Devastating and fast. Prevention is everything: low humidity in late flower, airflow through the canopy, and not letting buds get so dense and wet they can't breathe. Cut out any infected bud immediately and well past the visible rot.
- Root rot (pythium) — brown, mushy, foul-smelling roots from overwatering or dead soil. This is exactly what a thriving Microbes population prevents — beneficial organisms outcompete the pathogens. Water on a wet-dry cycle, never leave pots sitting in runoff.
Notice the theme: a living, biologically diverse soil and a well-ventilated room prevent most of this before it starts. That's a real advantage of the organic method, not marketing.
Harvest and Trichomes
Timing the harvest is what separates good flower from great flower — and the answer is on the buds themselves, not the calendar. Look at the trichomes, the tiny mushroom-shaped resin glands, under a jeweler's loupe or a cheap USB microscope (30–60×).
- Clear — not ready. Potency hasn't peaked.
- Cloudy / milky — peak THC, the most energetic, "up" effect. Most growers harvest when the majority have gone cloudy.
- Amber — the cannabinoids are degrading toward a heavier, more sedative, body-focused effect. A window of roughly 10–30% amber is where most people aim, depending on the effect they want.
Harvest in the last hours of the dark cycle if you can. Then comes the step that makes or breaks quality:
Dry and cure
Hang whole branches or trimmed buds in a dark space and dry slow — the classic target is around 60°F and 60% humidity ("60/60") for 7–14 days. Rushing the dry with heat or dry air locks in a harsh, grassy taste. Buds are ready to jar when small stems snap rather than bend.
Then cure: seal the dried buds in glass jars at about 60–65% humidity (a small humidity pack helps). "Burp" the jars — open them for a few minutes daily the first week or two — to release moisture and let harshness break down. A proper 2–4 week cure is where the smoothest smoke and the fullest terpene aroma actually develop. Patience here pays off more than almost anything else.
Troubleshooting
Living soil is forgiving, but a few issues come up. Most of the time the answer is to do less, not more.
- Drooping, puffy leaves. Almost always overwatering, the number-one beginner mistake. Living soil should go through a real wet-to-dry cycle. Lift the pot — light means water, heavy means wait. Let the top inch or two dry out.
- Leaf tips bleaching or curling upward under the light. Light burn — the fixture is too close or too intense. Raise it a few inches or dim it.
- Yellowing between the veins on lower leaves. Early magnesium fade, common on fast cannabis. A foliar shot of Vitamin Sea corrects it quickly.
- Overall pale, slow, hungry look in veg. Your biology may be underfed or missing. Confirm you're dosing Microbes — remember Veg and Bloom are intentionally low-nitrogen and depend on microbes to fix the rest. Without living biology, they underperform.
- Chasing pH problems. If you're fighting pH swings, you're likely thinking like a bottled-nutrient grower. In healthy living soil, stop adjusting and let the soil buffer itself; also double-check you're not killing microbes with chlorinated water.
- Heat stress (tacoing, upward-curling leaf edges) in a hot tent. Improve exhaust and airflow and get temps back under 80°F.
When in doubt: check watering first, check the light distance second, and resist the urge to add more product. A living-soil garden mostly wants to be left alone to do its job.
Continue Growing
Ready to go deeper? These two guides pick up where this one leaves off:
- How to Grow Photoperiod Cannabis Organically — the full deep-dive on training, canopy management, and running photoperiod plants for maximum yield.
- What Are Autoflowers? — the faster, simpler path: how autoflowering genetics work and how to feed them on their own compressed clock.