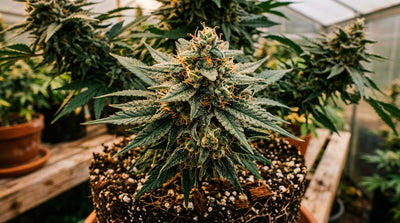
Photoperiod cannabis is the original form of cultivation — the plants that respond to the shift from long days to short days by triggering flower, the way cannabis has always grown in the wild. Unlike autoflowering varieties, photoperiod plants give you complete control: you decide when vegetative growth ends and flowering begins by changing the light schedule. That control is both the appeal and the responsibility. Get the timing, training, and nutrition right, and you can produce harvests of remarkable size and quality. Miss those variables, and the same plant that could have been exceptional will disappoint.
Growganica already has a guide for autoflower cultivation. This one is specifically for photoperiod growing — the sativa and indica genetics that require a deliberate light-cycle flip, that benefit from extended vegetative periods, and that reward the grower who puts serious effort into soil biology and organic nutrition. We'll cover light cycles, training techniques, the veg-to-bloom nutrition transition, and why organic living soil doesn't just produce cleaner cannabis — it produces better cannabis.
Whether you're growing indoors under controlled conditions or outdoors following the natural season, everything in this guide applies. The fundamentals are the same: healthy living soil, the right nutrients at the right stage, and enough patience to read what the plant is telling you.
Choosing the Right Genetics
Variety selection has outsized influence on your grow before you ever plant a seed. Indica-dominant varieties typically grow shorter and bushier, finish faster (8–9 weeks of flower), and produce dense, resinous buds. They're easier to manage in small spaces and respond well to training. Sativa-dominant varieties grow tall with longer internodal spacing, take 10–14 weeks or more to finish, and can double or triple in height during the first two weeks of flowering — a phenomenon called the "stretch" that catches indoor growers off guard. Hybrid genetics are the most common and offer a range of growth patterns depending on the specific lineage.
For outdoor growing in temperate climates, sativa-dominant genetics that finish late — October or November — can be risky if your season shortens before the plant fully matures. Choose varieties with a confirmed finish time appropriate for your latitude. Indica and early-finishing hybrids are safer bets for regions with early autumn frosts.
High-quality seeds from reputable breeders matter. Genetics with known cannabinoid and terpene profiles, stable phenotype expression, and a track record of performing in the growing environment you're targeting will produce more consistent results than unknown or mystery genetics. If you're growing for terpene complexity — which is where organic growing genuinely excels — look for cultivars bred specifically for aromatic richness rather than maximum yield.
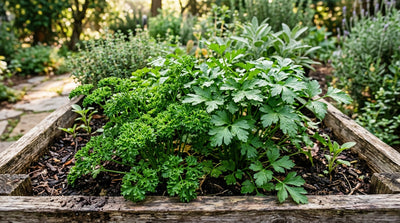
Soil Preparation for Organic Cannabis
The Case for Living Soil
The strongest argument for growing cannabis organically isn't philosophical — it's chemical. The terpene compounds that define a cultivar's aroma and flavor profile are synthesized by the plant in response to its environment, stress signals, and available precursors in the soil. A living soil rich in diverse microbial activity releases a slow, complex stream of nutrients that supports secondary metabolite production in ways that synthetic salt-based feeding simply cannot replicate. Growers who've run the same genetics in synthetic and organic systems consistently report deeper, more complex terpene profiles from organic runs — and trichome density that photographs better and performs better.
The no-till, ROLS (Recycled Organic Living Soil) approach takes this further. Instead of replacing your medium between grows, you top-dress and water in amendments, allow the soil food web to process them, and let the microbial ecosystem mature over multiple cycles. By the third or fourth run in the same soil, the microbial diversity is deep enough that many growers find they need very little added nutrition at all. This is what "living soil" means in practice — not just compost mixed into a bed, but a self-sustaining ecosystem that grows more effective over time.
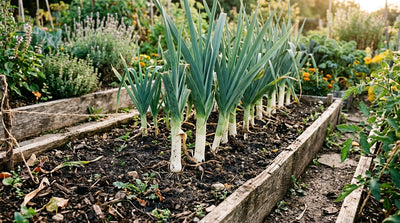
Building Your Base Mix
For a strong organic cannabis substrate, start with a high-quality compost base (30–40%), aerated coco or perlite for drainage (20–30%), and amended topsoil or aged forest products for structure (30–40%). Cannabis roots need excellent drainage — waterlogged roots are one of the most common preventable causes of poor performance in organic grows. Aim for a pH of 6.0–7.0 in soil; the wider range is acceptable because healthy microbial activity in living soil acts as a buffer.
Work your base amendments into the soil 2–4 weeks before planting to allow them to "cook" — the microbial activity needs time to break down amendments into plant-available forms. Growganica MICROBES is one of the most impactful additions you can make at soil preparation. The beneficial bacteria and mycorrhizal fungi in MICROBES colonize the rhizosphere and dramatically extend the root system's effective surface area, improving both water and nutrient uptake from the first week of growth. Apply to the base mix when building the soil, and water in again at transplant to ensure robust early colonization.
Growganica KING KRUSTACEAN — a chitin-rich crustacean meal amendment — is another must-have at soil prep. Chitin stimulates the plant's natural defense responses and feeds the microbial community that processes nitrogen. Work it into the top 4–6 inches of your bed or pot. Its slow-release nitrogen profile supports structural stem and canopy development throughout veg without the excess that causes soft, stretchy growth.
For SIPS (Sub-Irrigated Planters) and no-till beds, consider adding a cover crop layer of clover or buckwheat on the soil surface. Cover crops fix nitrogen, protect the soil microbiome from UV damage, and serve as a living mulch that you chop and drop periodically as top-dressing.
Germination and the Seedling Stage
Soak seeds in room-temperature water for 12–18 hours until the seed coat cracks and a tap root emerges. Transfer to a moist paper towel in a warm location (75–80°F) until the tap root reaches ¼–½ inch, then plant root-down in a small container or seedling plug. Keep the environment warm and humid — seedlings need 65–75% relative humidity in the first week.
Avoid overwatering seedlings. The most common seedling mistake in organic systems is waterlogging a small container before the roots have expanded enough to take up moisture efficiently. Water in a ring around the seedling rather than directly on it, encouraging the roots to spread outward. Under mild LED or fluorescent light (18 hours on / 6 hours off) at this stage, most seedlings are ready for their first transplant within 2–3 weeks, when roots begin to circle the base of the container.
Transplant shock is minimized by ensuring the new container's soil is pre-moistened and that you maintain the same 18/6 light schedule throughout veg. Do not flip to 12/12 until the plant has the canopy and root mass you want to carry into flower — you cannot add more vegetative growth after the flip.
Watering Organic Cannabis
In living soil, the watering approach is different from synthetic cultivation. You're not just delivering nutrients dissolved in water — you're maintaining the moisture level that the soil microbial ecosystem needs to stay active. Beneficial bacteria and fungi operate in a specific moisture window. Too wet and the soil becomes anaerobic; too dry and microbial activity slows significantly, reducing nutrient availability even if the amendments are present.
Water when the top 1–2 inches of soil feel dry. Lift the pot — when it feels significantly lighter than when freshly watered, it's time. Water thoroughly to runoff, then allow to partially dry before the next watering cycle. This wet-dry cycle drives root development: roots follow the moisture gradient downward into the container, building the deep root mass that supports large canopies and heavy yields.
pH your water to 6.3–6.8 for soil grows. Even in living soil, water pH outside this range can inhibit microbial activity and create nutrient lockout over time. Use a reliable pH meter and calibrate it regularly.
The Light Cycle: Vegetative and Flowering Phases
Photoperiod cannabis requires more than 12 hours of uninterrupted darkness to trigger and sustain flowering. The standard indoor veg schedule is 18 hours light / 6 hours dark, which keeps the plant in a perpetual vegetative state. To trigger flower, you shift to 12 hours light / 12 hours dark and maintain that schedule until harvest.
Outdoors, the natural light cycle handles this automatically. As summer days shorten past the 12/12 threshold — typically late July to mid-August depending on latitude — photoperiod plants will begin flowering on their own. This means outdoor growers manage the vegetative period from spring planting through midsummer, then observe as the plant naturally shifts gears.
Indoors, you control the flip. Most growers veg their plants for 4–8 weeks before flipping, depending on the size of their space and the genetics involved. A plant flipped at 12 inches in an indica-dominant strain will finish at roughly 18–24 inches. A sativa flipped at the same height may reach 36–48 inches before the stretch stabilizes. Know your strain's stretch behavior before you flip, or you'll be managing a canopy that outgrows your space.
Light leak is a serious issue in photoperiod cultivation. Any light entering the grow space during the 12-hour dark period — even briefly — can interrupt the flowering signal, cause herming (hermaphroditism), or revert the plant to vegetative growth. Seal all light sources during the dark period.
Training Techniques for Photoperiod Cannabis
Photoperiod plants have an extended vegetative period that allows for serious training — something autoflowers don't offer to the same degree. Training maximizes yield by creating an even canopy where all bud sites receive equal light intensity.
LST (Low Stress Training) involves tying branches down and outward to break apical dominance and encourage lateral branching. Start LST early, at 3–5 nodes, and continue throughout veg. The goal is a flat, wide canopy with multiple colas at roughly equal heights rather than a single tall main stem.
Topping removes the main growing tip, forcing the plant to develop two equal colas from the next node down. Top once the plant has 4–6 nodes, then allow the two new tops to develop before topping again. Each topping doubles the number of main colas. Combined with LST, topping creates a multi-cola structure that fills a canopy efficiently.
SCROG (Screen of Green) is the natural progression of LST for indoor grows. Stretch a horizontal screen (typically 4–6 inches of mesh) above your canopy at 12–18 inches above the pot. As the plant grows, tuck new growth under the screen, training horizontal shoots to fill every available square. When the screen is 70–80% filled, flip to 12/12. The screen supports the colas as they develop and ensures even light distribution across the entire canopy.
Stop all training at least one week before the flip — you want the plant to stabilize before the hormonal transition to flowering begins.
Organic Fertilizing Schedule for Photoperiod Cannabis
Organic cannabis nutrition follows the plant's biological phases: building structure in veg, transitioning at the flip, loading buds in mid-flower, and ripening in late flower. Each phase has a specific nutritional focus.
Phase 1: Vegetative Growth (Weeks 1–8 of Veg)
Vegetative growth demands nitrogen-forward nutrition to support rapid leaf and stem production. Growganica GOLD VEG is formulated specifically for this phase — its balanced NPK with emphasis on nitrogen and supporting trace minerals drives robust canopy development, strong internodal spacing, and the dark green foliage that signals a plant operating at full capacity. Apply at every other watering, following label rates. In a well-amended living soil, you'll often find that GOLD VEG augments rather than replaces what the soil is already providing, which is exactly how it should work.
Supplement with Growganica KELP IT REAL as a biweekly foliar spray during veg. Cold-pressed kelp contains natural cytokinins that drive cell division and lateral branching — exactly what you want to amplify during training. Foliar kelp also provides the full spectrum of trace minerals that support enzyme function and stress response. Apply in the lights-off period or in low-light conditions to avoid leaf burn.
Phase 2: Transition and Early Flower (Weeks 1–3 of Flower)
The first two to three weeks after the light flip are a critical transition. The plant is simultaneously stretching, reorganizing its hormonal profile, and forming pre-flower sites. Nutritional demands shift from nitrogen to phosphorus and potassium. Begin introducing Growganica GOLD BLOOM alongside GOLD VEG during transition, gradually increasing the GOLD BLOOM ratio and reducing GOLD VEG over 2 weeks until you've fully transitioned to GOLD BLOOM by week 3. This mirrors the plant's shifting nutritional requirements and prevents the abrupt nitrogen drop that can cause yellowing in early flower.
Continue KELP IT REAL foliar applications through week 2 of flower, then discontinue foliar feeding as bud sites develop — wet flowers are vulnerable to botrytis (bud rot) and other fungal issues.
Phase 3: Mid-to-Late Flower and Bulk Development (Weeks 3–7 of Flower)
This is where buds develop their density, resin production, and terpene expression. GOLD BLOOM should be the foundation of every feeding through this phase. Its phosphorus and potassium profile directly supports bud cell development, trichome formation, and the dense structure that distinguishes a properly fed organic plant from an underfed one.
Add Growganica INCREDIBLE BULK from week 3 of flower through week 6. INCREDIBLE BULK is a phosphorus and potassium-forward bloom booster that drives bud swelling, increases calyx density, and enhances resin production during the period of peak bulk development. It's specifically designed to complement an organic bloom program — not replace it. Use in rotation with GOLD BLOOM per the feeding schedule, increasing dose through weeks 4–5 when bud swelling is most active.
Continue MICROBES as a periodic soil drench through flower to maintain rhizosphere health. A healthy root zone in mid-flower directly translates to better nutrient uptake and terpene development in the canopy above.
The Flushing Question — Organic Systems Don't Need It
The "flush" — running large volumes of plain water through the growing medium for the final 2 weeks before harvest to "remove salts" — is a practice developed for synthetic growing. In a salt-based nutrient system, accumulated mineral salts in the medium can affect flavor. In organic living soil, there are no accumulated synthetic salts. Your soil is breaking down organic matter; what the plant consumes comes from microbial processing, not dissolved salt concentration. There is nothing to flush. Running plain water through your living soil in the final weeks doesn't remove anything — it starves the plant of nutrition during a critical development phase and weakens the microbial community you've spent months building. Stop feeding naturally as the plant approaches visual ripeness, but don't flush.
Pest and Disease Management
Organic living soil gives you a significant head start on pest management. A diverse, healthy microbial community actively suppresses many soil-borne pathogens. KING KRUSTACEAN's chitin content further activates the plant's systemic defense pathways, making it more resistant to both insects and fungal pathogens before problems even begin. Prevention beats intervention every time.
Spider mites are the most common indoor pest and thrive in hot, dry, low-humidity conditions. Keep humidity above 45% in veg and manage temperature. Beneficial predatory insects — specifically Phytoseiulus persimilis — are highly effective against mite populations and compatible with organic systems. Neem oil and insecticidal soap are effective early interventions but should be discontinued well before flower to avoid residue issues.
Fungus gnats live in the top layer of soil and are rarely harmful as adults, but their larvae feed on roots and can damage young plants. Allow the top inch of soil to dry between waterings to break the gnat lifecycle. Beneficial nematodes (Steinernema feltiae) applied as a soil drench are highly effective at eliminating larvae organically.
Powdery mildew is the most dangerous disease threat in the flowering stage, particularly in humid climates or when airflow is poor. Maintain relative humidity below 50% in late flower, ensure strong airflow throughout the canopy, and remove any leaves showing white powdery patches immediately. Potassium bicarbonate sprays can treat early-stage PM but should not be applied to open buds.
Botrytis (bud rot) is the most devastating late-flower disease. It starts inside dense buds in humid, cool conditions and is often invisible until significant damage has occurred. Prevent by keeping late-flower humidity below 45%, maintaining airflow through the canopy, and removing any leaves buried inside bud sites that could trap moisture.
Harvest: Reading Trichome Ripeness
Package dates on seed packets are estimates. The only accurate way to determine harvest timing is to examine the trichomes — the resin glands — directly using a jeweler's loupe (30–60x) or a digital microscope (100x+). Strip away leaves to examine the trichomes on the calyx itself, not on sugar leaves, which may mature at a slightly different rate.
Clear trichomes indicate the plant is not yet ready. THC and terpene biosynthesis is still in progress. Harvesting now will produce a thin, less developed profile.
Cloudy (milky white) trichomes indicate the cannabinoid production has peaked. This is the harvest window for those who prefer an energetic, cerebral effect. Terpene expression is typically at or near maximum at this stage.
Amber trichomes indicate THC is beginning to degrade to CBN, which produces a heavier, more sedative effect. Most growers harvest at 10–30% amber depending on their target. Full amber means you've waited past peak.
Beyond trichomes, other ripeness indicators include: fading of fan leaves (normal late-flower nitrogen draw-down), pistil color change from white to orange/red (roughly 70–80% of pistils colored by harvest), and a reduction in the "reaching" posture of the plant — late-flower plants relax, buds compact, and the plant begins its natural senescence process.
Harvest in the dark period or just after lights-on for indoor grows. Cut the plant at the base or harvest branch by branch. Hang in a dark, well-ventilated space at 60–65°F and 55–60% humidity for 10–14 days. Slow drying preserves terpene content far better than fast, warm drying. After the initial dry, cure in sealed glass jars for a minimum of 2–4 weeks, burping daily for the first week to release excess moisture and CO2. A proper cure transforms a good dry into an excellent final product.
Common Problems and Troubleshooting
Yellowing leaves during veg: Likely nitrogen deficiency. Increase GOLD VEG frequency or check soil pH — nitrogen becomes unavailable above 7.0 and below 5.8. Verify MICROBES are active to ensure nitrogen is being processed from your soil amendments.
Purple stems and dark veins: Phosphorus deficiency, cold temperatures, or genetics. In living soil, check pH first — phosphorus lockout is the most common cause. Temperatures below 60°F can cause purple coloration that resolves when temperatures warm.
Light green new growth, slow development: Iron or sulfur deficiency, often caused by high pH. Adjust pH downward toward 6.2–6.5. Kelp foliar can address trace mineral shortfalls while you correct the underlying pH issue.
Loose, airy buds: Usually caused by insufficient light intensity, excessive heat, or a nutrition program that didn't support late-flower bulk development. INCREDIBLE BULK added from week 3 of flower prevents this when used alongside GOLD BLOOM.
Stretching during veg: Insufficient light — the plant is reaching for the source. Reduce the distance between canopy and light or increase intensity. In sativa-dominant genetics, some stretch is natural and unavoidable.
Herming (male flowers on female plants): Caused by light leak, heat stress, extreme pH, or genetics. Check for light leaks in the grow space immediately. Plants that herm once are likely to do so again — assess whether to continue or replace with verified feminized genetics.
Slow drying and hay smell: Dried too fast in warm conditions. Slow the process down to 10–14 days. Hay smell largely dissipates during a proper cure. If the smell persists after 3–4 weeks of curing, the dry was too fast to preserve terpene content adequately.