How to Grow Celery Organically — The Most Rewarding Difficult Vegetable
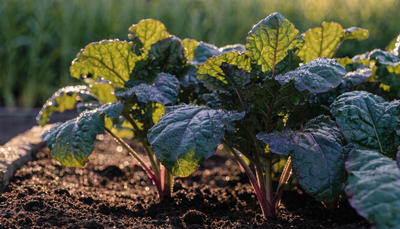
Celery has a reputation, and it's earned. Of all the vegetables a home gardener might attempt, it is consistently among the most demanding — not dramatically so, not in ways that require specialist equipment or rare inputs, but in its relentless need for consistency. It wants cool temperatures but not cold. Constant moisture but not waterlogging. A long growing season. Plenty of specific nutrients at the right times. Get any of these wrong for a sustained period and the plant either bolts, cracks, or produces the kind of tough, hollow, intensely bitter stalks that taste like a disappointment.
None of that is reason not to grow it. Freshly harvested celery — particularly from varieties you'll never find in a supermarket — is genuinely revelatory compared to the watery, flavor-lite bunches that dominate the produce aisle. The crunch is different, the flavor is complex, and the satisfaction of having pulled it off is disproportionately large for a vegetable. It's the kind of crop that, once you've grown it successfully, you grow every year.
This guide is honest about the difficulty while giving you every tool to overcome it. You'll learn about timing the long growing season, the techniques that actually produce pale, tender stalks, the soil building and feeding schedule that supports four months of steady growth, and what to do when things go sideways. If you're in a cooler climate or want a more forgiving alternative, there's a section on celeriac — root celery — which delivers much of the celery flavor in a crop that's significantly easier to manage.
Choosing the Right Varieties
Standard Celery Varieties
Tall Utah is the classic market celery — long, upright, thick-stalked, and reliable in most growing conditions. It's a strong choice for beginners who want to learn the crop's requirements on a proven variety.
Giant Pascal produces large, crisp stalks with good flavor and is particularly well-suited to earthing up (blanching by mounding soil around the stems). It's a traditional variety with a long track record in British kitchen gardens.
Tango is a self-blanching variety with naturally paler stems that require less work to achieve a mild flavor. It matures faster than many traditional types — around 100 days — making it useful in shorter growing seasons.
Pink Champagne and other colored varieties (including red and yellow types) are increasingly available and add ornamental interest. Their flavor is often more intense than green types, which can be an advantage or a drawback depending on what you're cooking.
Self-Blanching vs Standard Types
This distinction matters practically. Standard celery varieties produce green stalks unless you actively block light from reaching them — a process called blanching. Self-blanching varieties (Tango, Golden Self-Blanching, Victoria) naturally produce paler stems due to reduced chlorophyll development, though they still benefit from some light exclusion at the final stage. For most home gardeners, a self-blanching type is easier to manage; for those who want the most tender, mildest result or who are growing a traditional kitchen garden, an earthed-up standard variety is the classic approach.
Celeriac (Apium graveolens var. rapaceum)
Celeriac is botanically the same species as celery but grown for its swollen stem base rather than its stalks. It is significantly less demanding about consistent moisture, tolerates a wider temperature range, and is far more forgiving of imperfect growing conditions. The flavor — complex, earthy, distinctly celery-like — is excellent roasted, in soups, or as a remoulade. If your climate has short cool seasons, unpredictable rainfall, or you simply want to grow something with celery flavor without the attendant stress, celeriac is the wiser choice. Many of the growing principles in this guide apply to both, with celeriac being consistently more forgiving on every variable.
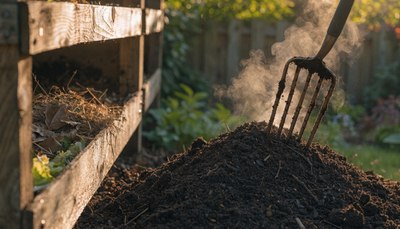
Soil Preparation
Celery is a heavy feeder that also demands excellent moisture retention. It is the opposite of a Mediterranean herb — it wants rich, moisture-retentive, deeply prepared soil with a consistent supply of nutrients throughout its entire four-month growing period. The target pH is 6.0–7.0, with 6.5 being ideal.
Prepare beds in autumn if possible, incorporating generous amounts of well-rotted compost or aged manure to a spade's depth. Celery has relatively shallow roots for such a large plant — most of the feeding root system sits in the top 8–12 inches — so the quality of the upper soil horizon matters more than deep tillage. If your soil is heavy clay, improve structure and drainage with grit or perlite; if it's sandy, the moisture-retention requirement becomes the dominant challenge and compost additions are essential.
Boron and calcium are specifically important for celery — deficiencies in either lead to hollow stalks, blackheart (a calcium deficiency causing brown discoloration in the inner stalks), and poor texture. Before planting, check that your soil isn't heavily deficient in these minerals; if you're working with sandy or very acidic soils that have been under cultivation for years, they are the most likely limiting factors.
Building Living Soil
With such a long growing season, the microbial community in celery's root zone has time to make a significant difference. Apply Growganica Gold Microbes when preparing the bed — both directly into the soil before transplanting and as a root zone drench after planting. Celery's fibrous root system benefits markedly from mycorrhizal associations that improve water uptake and mineral access, particularly in the trace elements that are critical for hollow-stalk prevention.
For celeriac specifically, root development is the central goal of the whole growing effort. Working SeaPhood into the bed before planting delivers the organic phosphorus and marine-derived minerals that support strong root initiation and swelling — the same principle that applies to other root vegetables. Apply at the recommended rate; combine with Gold Microbes for a root zone that actively supports the crop's specific needs from the start.
Planting: Timing and Technique
Celery needs a long growing season — a minimum of 120–150 days from transplanting for most standard varieties. Combined with the requirement to start indoors well ahead of outdoor conditions, this makes timing the most critical planning decision of the whole growing process.
Starting Indoors
Sow seed indoors 10–12 weeks before your last expected frost date. Celery seed is tiny and slow to germinate — it requires light (surface sow without covering), temperatures consistently between 65–70°F, and patience. Germination can take 2–3 weeks. Keep seedlings well-lit to prevent leggy growth; a bright windowsill or supplemental grow light for 14–16 hours per day produces much sturdier plants than a dim indoor space.
Prick seedlings out when they have two true leaves, potting on into individual cells or small pots. Celery seedlings are delicate and can be set back significantly by root disturbance — handle carefully and water from below when possible. By transplanting time the seedlings should be 4–6 inches tall with a good root system and stocky stems.
Transplanting Outdoors
Wait until nighttime temperatures are reliably above 50°F before transplanting — celery exposed to temperatures below 50°F for sustained periods (more than a week or so) can bolt, sending up a flower stalk prematurely and rendering the plant useless. This cold-induced bolting is a common frustration for growers who transplant too early in pursuit of the long growing season. Be patient.
Harden off seedlings over 7–10 days by gradually increasing exposure to outdoor conditions. Transplant on an overcast day or in the evening to reduce transplant shock. Space plants 10–12 inches apart in rows 18 inches apart. For self-blanching varieties, plant in a square block rather than rows — the plants shade each other naturally, aiding blanching.
Blanching Technique
For standard varieties requiring blanching, the two most practical approaches for home growers are earthing up and wrapping.
Earthing up: As plants reach full height (usually 4–6 weeks before your target harvest), gradually mound soil up around the outer stalks over two to three weeks, eventually covering most of the stem up to the foliage. This is the traditional method — effective but labor-intensive, and it can introduce soil-borne disease if the soil is wet.
Wrapping with cardboard or purpose-made collars: Tie the stalks loosely together and wrap with corrugated cardboard or black plastic. Leave the foliage exposed. This is faster to apply and reduces disease risk from soil contact. Commercial growers use elaborate mechanical methods; the home gardener's cardboard tube is a perfectly effective low-tech solution.
Begin blanching 2–4 weeks before intended harvest. The longer the blanching period, the paler and milder the result — though very long blanching (beyond 4–6 weeks) can cause the stalks to rot from the inside.
Watering
Consistent, thorough watering is non-negotiable for celery. It is a plant of fenland, riverbank, and marsh in its wild form — its entire physiology is adapted to high and reliable moisture. Inconsistent watering leads directly to the most common celery failures: bitter, stringy, or hollow stalks.
The target is to keep the soil consistently moist throughout the full growing season — not saturated, but never allowed to dry out. In practice, this means watering deeply two to three times per week in moderate conditions, and potentially daily during hot, dry spells. A thick mulch of straw or compost around the plants (keeping it away from the crown) significantly reduces moisture loss and the watering burden.
Drip irrigation is ideal for celery — it delivers moisture directly to the root zone without wetting the foliage, reducing the risk of foliar fungal diseases. If you're hand-watering, direct the water to the base of the plant rather than overhead.
In periods of heat stress (above 80°F), celery growth stalls, water requirements spike, and the risk of bolting increases. Shade cloth providing 30–40% shade can extend the productive season in warm climates; in very hot summers, timing the crop to mature before midsummer peak heat (or as an autumn crop started in midsummer) is a more effective strategy than fighting the heat directly.
Organic Fertilizing Schedule
Celery's four-month season requires a phased feeding approach that sustains steady growth from transplanting through to harvest. Unlike Mediterranean herbs, it responds well to consistent nutrient availability — the challenge is delivering the right nutrients at the right stages without encouraging the kind of excessive vegetative growth that leads to pithy, flavorless stalks.
Phase 1 — Root Establishment (Transplanting Through Weeks 1–4)
At planting, apply Gold Microbes as a root zone drench to establish the microbial community from the start. If growing celeriac, incorporate SeaPhood into the planting hole as a phosphorus-rich root-development support. For both celery and celeriac, the first month is about root establishment and steady upward growth — avoid heavy nitrogen applications that push rapid top growth before the root system is ready to support it.
Begin with a dilute foliar application of Vitamin Sea within the first two weeks of transplanting. The magnesium in this formula supports chlorophyll synthesis — celery is a crop where leaf color is a reliable early indicator of nutrient status, and maintaining rich, deep green foliage from the start signals that photosynthesis is running efficiently. Pale or yellowing new leaves in young plants often indicate early magnesium or iron deficiency, and addressing it promptly prevents the growth check that follows.
Phase 2 — Vegetative Growth (Weeks 4–10)
This is the longest and most critical phase — the plant is building the stalk mass you'll eventually harvest. Apply Gold Veg every two to three weeks throughout this period. Celery has a higher nitrogen requirement than most vegetables during this phase, and a balanced organic nitrogen source that also delivers phosphorus and potassium supports both stalk development and the strong root system needed to sustain the plant through the remainder of the season.
Continue Vitamin Sea foliar applications every two to three weeks through this phase, particularly if weather is variable or you've had periods of heavy rain that may have leached magnesium from the soil. Watch for the inner leaves — if they're lighter in color than the outer leaves, or have a yellowish tinge between the veins, apply Vitamin Sea promptly.
A supplemental Kelp It Real drench mid-season (around week 6–8) delivers trace minerals and growth hormones that support cell division and root uptake efficiency. Seaweed-derived inputs are particularly valuable for celery's boron and iodine requirements — both contribute to cellular integrity and help prevent the hollow stalk and blackheart issues that arise from trace mineral deficiencies.
Phase 3 — Final Bulking and Pre-Harvest (Weeks 10 Through Harvest)
Reduce nitrogen inputs in the final 3–4 weeks and allow the plant to consolidate growth rather than push new leafy material. A final application of Kelp It Real two weeks before intended harvest supports final stalk quality and maintains the micronutrient balance in the root zone. For celeriac, this is when the globe is swelling most rapidly — continue adequate watering and avoid any inputs that might disrupt the final fattening phase.
Pest and Disease Management
Celery is a reasonably attractive target for several pests and is susceptible to a handful of significant diseases. Managing these organically requires a combination of cultural practices and timely intervention.
Celery leaf miner (Euleia heraclei) is the most consistently damaging pest in UK and European gardens. The adult fly lays eggs on celery leaves; the larvae mine through the leaf tissue, creating pale, blistered tunnels. In heavy infestations the foliage looks blistered and growth is checked. Covering plants with fine insect mesh immediately after transplanting provides almost complete protection. Remove and destroy affected leaves at first sign; in severe cases, neem oil applied to the foliage is moderately effective.
Slugs and snails target young transplants aggressively. Organic control methods — copper tape around raised beds, beer traps, crushed eggshell or grit barriers, and evening inspection — work well. Biological controls (Phasmarhabditis nematodes) applied to the soil around plants are highly effective and safe for all other organisms.
Carrot fly (Psila rosae) occasionally affects celery, though it primarily targets carrots and parsnips. The larvae tunnel into the lower stalks and roots. Insect mesh again provides reliable protection.
Celery blight (early blight — Cercospora apii) produces circular yellow and brown spots on the foliage, spreading in warm, humid conditions. Ensure good plant spacing for airflow, avoid overhead watering, and remove affected foliage promptly. Copper-based organic sprays (Bordeaux mixture) can slow progression in severe cases but are not a cure; cultural prevention is more effective.
Blackheart — brown, rotting inner leaves — is a calcium deficiency disorder, not a pathogen. It's triggered by inconsistent watering that disrupts calcium uptake, and by high temperatures. The fix is consistent moisture and adequate calcium in the soil. If your soil tests low in calcium, apply ground limestone or calcium-rich amendments before sowing. A Kelp It Real drench mid-season helps maintain the trace mineral balance that supports calcium mobility.
Harvesting
Celery is typically ready to harvest 120–150 days from transplanting for standard varieties, or around 100–120 days for self-blanching types. The key indicator is not calendar days but stalk size and firmness — you're looking for stalks that are well-developed, firm, and have filled out to an appropriate diameter (typically 2–3 inches across the full bunch).
You can harvest the whole plant by cutting at the base just below soil level, or take outer stalks as needed while leaving the core of the plant to continue growing. The latter approach extends the harvest window significantly and works well for home kitchen use where you rarely need a whole bunch at once.
Harvest before the first hard frost, which will damage celery. Light frosts (below 28°F) can actually improve flavor slightly by converting starch to sugar, but harder frosts cause cellular damage and collapse of the stalks.
Celery stores well for 2–3 weeks in the refrigerator wrapped in damp paper towels or in a plastic bag to prevent moisture loss. For longer storage, the whole plant can be dug with roots attached and heeled into a cold frame or frost-free shed — it will stay usable for up to two months this way in cool, humid conditions.
Harvesting Celeriac
Celeriac is typically ready from October onward in the northern hemisphere — 120–150 days from transplanting. The globe should be 3–6 inches across. Unlike celery, celeriac is genuinely frost-hardy and can be left in the ground until needed, which makes it an excellent winter vegetable that stores itself in place. In USDA zones 7 and warmer, celeriac can typically overwinter in the ground under mulch; in colder zones, lift the crop before the ground freezes hard. In very cold climates, protect the crown with a mulch of straw once hard frosts begin. Alternatively, harvest before hard ground frost and store in boxes of barely damp sand in a cool, frost-free shed — it keeps for 4–6 months in these conditions.
Common Problems and Troubleshooting
Stalks are bitter and hollow. The most common result of inconsistent moisture. Celery that experiences drought stress at any point in the growing season develops the pithy, hollow, bitter stalks that characterize badly grown commercial celery. Review your watering regime and consider thick mulching to maintain soil moisture. Also check boron levels — boron deficiency specifically causes hollow stalks and cracked stems.
Plants are bolting — sending up a flower stalk. Caused by cold exposure (sustained temperatures below 50°F in the early growing phase) or extreme heat stress. Prevention is the only effective response: avoid transplanting too early, and in warm climates time your crop to avoid the hottest weeks. Once a plant bolts, the stalks become tough and bitter; harvest what you can immediately and use in cooking where texture matters less.
Leaves are pale yellow, especially inner leaves. Classic early sign of either magnesium or nitrogen deficiency. Apply Vitamin Sea foliar spray for magnesium-related yellowing (yellow between the veins with green veins remaining); apply a dilute Gold Veg drench for more generalized pale growth. If the soil pH is outside 6.0–7.0, nutrient uptake may be impaired regardless of soil content — test and adjust if needed.
Black spotting on inner leaves (blackheart). Calcium deficiency disorder, almost always triggered by irregular watering rather than true soil calcium shortage. Improve watering consistency — consider drip irrigation or a timer if this is a recurring problem. A Kelp It Real drench supports the trace mineral balance that helps calcium mobility within the plant.
Stalks are very thin and stringy. Usually a combination of insufficient nutrients during the vegetative growth phase and spacing that is too wide, reducing the competition-driven growth response. Ensure Gold Veg applications are on schedule during the Phase 2 feeding window, maintain consistent moisture, and try tighter spacing (10 inches) if your bed conditions allow it.
Celeriac globes are small and woody. Often caused by bolting (same triggers as celery) or by harvesting too early. Leave celeriac in the ground until the globe reaches a good size — don't be tempted to harvest at 2 inches when another four weeks would give you a 5 inch globe. If globes are consistently small despite adequate season length, review your phosphorus inputs and soil preparation.
Continue Growing
Celery and celeriac fit naturally into a kitchen garden plan alongside other long-season vegetables and root crops. If you're building confidence with more demanding crops, these guides cover plants with overlapping growing requirements or practical companion relationships:
- How to Grow Beets Organically — beets share celery's need for consistent moisture and a similar calcium/boron sensitivity profile. A good companion crop in a well-prepared bed.
- How to Grow Onions Organically — onions are traditional celery companions in the kitchen garden, deterring common celery pests and making efficient use of neighboring bed space.
- How to Grow Sweet Potatoes Organically — if you've grown celery successfully, sweet potatoes represent the opposite challenge: heat-loving, drought-tolerant, and deeply rewarding in the right conditions. A useful contrast crop for expanding your growing range.
- How to Grow Cantaloupe Organically — another long-season, moisture-sensitive crop where timing and consistent care make the difference between success and failure. The growing discipline developed with celery translates directly.