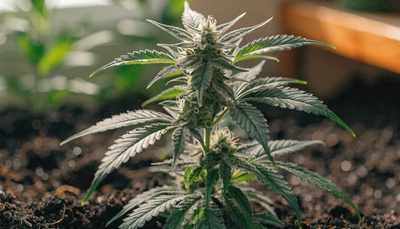
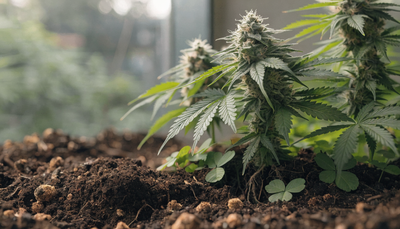
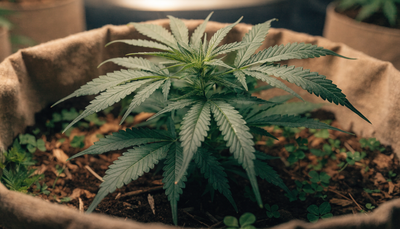
Most cannabis is grown the way a factory grows tomatoes: an inert medium, a jug of salts, and a spreadsheet telling you exactly how many parts-per-million to pour. It works, but it fights the plant's own biology every step of the way. Living-soil no-till does the opposite. You build one rich, biologically active bed, keep it alive, and let a whole underground ecosystem — bacteria, fungi, protozoa, and earthworms — do the feeding for you. The reward is cleaner smoke, deeper terpene expression, almost no runoff, and a bed you can reuse harvest after harvest instead of hauling out spent medium every cycle.
This is a complete walkthrough of the no-till method for cannabis: choosing genetics, building and cooking the soil, running and reusing the bed, feeding it by stage, keeping pests organic, and reading trichomes for the perfect harvest. It rewards patience over precision — and once the bed is dialed, it's genuinely less work than bottle-feeding.
Genetics & Setup
Living soil is forgiving, but it can't fix bad genetics or a bad room. Start with a stable, resilient cultivar and an environment you can actually hold steady.
Choosing a cultivar
For a first living-soil run, lean toward hardy, mold-resistant, well-documented genetics. Classic workhorses like Northern Lights, Blue Dream, White Widow, and Blueberry are beginner-friendly and vigorous. If you want heritage character, true landraces like Durban Poison (a clean South African sativa) and Hindu Kush (a classic Afghani indica), along with old-school hybrids like Granddaddy Purple, bring the kind of structure and terpenes that living soil tends to amplify. Dense, chunky indica colas are more prone to bud rot, so in a humid room favor airier sativa-leaning structures or plan for aggressive airflow and defoliation.
Photoperiod plants (which flip to flower when you cut light to 12 hours) reward the no-till approach because their longer vegetative window lets the soil biology fully colonize the roots. Autoflowers finish on their own internal clock and are a great fit for smaller beds — more on both in the guides linked at the end.
The environment
Cannabis wants warmth with a night dip. Aim for roughly 72–82°F during the day and a 5–10°F drop at night. Humidity comes down as the plant matures: about 60–70% for seedlings, 50–60% in veg, 40–50% in early flower, and under 45% in late flower to protect the buds. Give vegetative plants an 18-hours-on / 6-hours-off light cycle; flip photoperiod plants to 12/12 to trigger flowering. Moving air is non-negotiable — a gentle breeze over and under the canopy strengthens stems and denies mold a foothold.
Because the whole point of no-till is an undisturbed root zone, grow in something big. A living-soil bed should hold at least 15–25 gallons of soil per plant. A raised bed 3–4 feet wide, any length, and 12–16 inches deep is ideal; if you're in fabric pots, go 15 gallons or larger so the soil food web has room to establish. Depth matters more than growers expect — you want enough volume that the biology, moisture, and earthworms stay stable instead of swinging with every watering.
Soil Preparation & Living Soil
In a living-soil system, you are not feeding the plant — you're feeding the soil, and the soil feeds the plant. Understanding that shift is the whole game.
The soil food web
Healthy soil is a living network. Bacteria and fungi break down organic amendments and hold nutrients in their bodies; protozoa and nematodes eat those microbes and release plant-available nitrogen right in the root zone; mycorrhizal fungi physically extend the root system and trade phosphorus for plant sugars; and earthworms shred, aerate, and cast their way through the whole thing. When that web is intact, nutrients are delivered on demand, in the form and place the plant wants them, with none of the salt buildup or lockout you get from synthetic feeds.
The engine that starts and sustains that web is a good microbial inoculant. Microbes is a concentrated living inoculant — beneficial bacteria and fungi that colonize the root zone, partner with the roots, and unlock the phosphorus and micronutrients already in your soil. In a no-till bed it's the one input you never skip, because it keeps the biology topped up cycle after cycle.
Building your base mix
A classic living-soil recipe is roughly equal parts by volume:
- One-third moisture retention — sphagnum peat moss or coco coir, the sponge that holds water and air.
- One-third aeration — pumice, lava rock, or rice hulls, so roots and worms can breathe and the bed drains.
- One-third biology & nutrition — high-quality compost and earthworm castings, the living heart of the mix.
That compost is doing the heavy lifting, so its quality decides your whole grow. Use a finished, biologically diverse compost — homemade from a proper hot pile, or a reputable bagged living-soil compost — because it's what seeds the bed with the microbial life this method runs on. Our guide to building living soil that feeds itself digs into that biology and how to keep it thriving.
Into that base you'll mix slow-release amendments that become the bed's pantry: rock dust (basalt) for trace minerals, gypsum for calcium and sulfur, a nitrogen source, a phosphorus source, and kelp for potassium and growth hormones. Several of these roles are covered directly by the Growganica lineup — King Krustacean crab meal supplies slow-release nitrogen, calcium, and chitin (which primes the plant's own pest defenses), while Kelp It Real brings potassium and stress resilience. Mix your amendments in when you build the bed, then let it rest.
Cover crops & mulch
Bare soil is dead soil. Two habits keep a no-till bed alive between and during grows. First, a living mulch / cover crop — clover, vetch, fava beans, or buckwheat sown across the bed. These fix nitrogen, shade the surface, and feed the biology; you "chop and drop" the tops as green mulch. Second, a mulch layer of straw, shredded leaves, or the chopped cover crop itself. Mulch holds moisture, moderates soil temperature, protects the surface web from light, and gives your earthworms a buffet. A no-till bed should never sit naked.
Building & Reusing a No-Till Bed
Here's the core method — the part that separates no-till from just "growing in dirt." The rule underneath all of it: you do not disturb the root zone. Ever. No tilling, no turning, no ripping out root balls. Every cycle, the previous crop's roots stay in the ground to decompose and feed the next one.
Sizing and filling the bed
Build your bed at least 12 inches deep — 16 or more is better. Fill it with your base mix and amendments, water it to the consistency of a wrung-out sponge (moist, never soggy), and inoculate it heavily with Microbes. If you can, add a handful of live red wiggler earthworms; they'll take up permanent residence and turn your amendments into castings for you.
The first cook
Before anything goes in the ground, the bed needs to cook — sit warm and moist for 2 to 4 weeks so the microbes wake up, multiply, and start cycling those raw amendments into plant-available food. Keep it above 60°F, keep it damp, and keep it covered with mulch. Cooking prevents the "hot" nitrogen burn that raw amendments can cause and hands you a mellow, biologically balanced bed ready to plant. Sow your cover crop during the cook so it's established by transplant day.
Top-dressing instead of tilling
Once plants are in, you never dig amendments into the soil. Instead you top-dress: sprinkle dry amendments onto the soil surface, tuck them under the mulch, and let water, worms, and fungi carry them down to the roots. Liquid inputs like Microbes and Phishy go straight into your watering can. This keeps the delicate fungal networks and worm channels intact — the exact structures a tiller would shred. Top-dressing plus plain, dechlorinated water is the entire feeding routine most weeks (the stage-by-stage amounts are in the next section).
Reusing the bed, cycle after cycle
This is where no-till pays you back. When a plant finishes, cut it off at the base and leave the roots in the ground. Those roots become channels and food for the next crop's biology. Rake back the mulch, top-dress a fresh round of amendments to "recharge" the bed for the nutrients the last crop pulled out, re-inoculate with Microbes, re-sow your cover crop, replace the mulch, and let it cook for a couple of weeks. Then transplant your next round.
A well-run no-till bed doesn't degrade — it improves. The organic matter deepens, the microbial diversity compounds, the worm population grows, and each successive harvest tends to come in cleaner and more flavorful than the last. Growers run the same bed for years without ever replacing the soil.
Organic Fertilizing Schedule
In a properly built and cooked bed, the soil already holds most of what your plant needs. Feeding is about supplementing the biology at each stage, not force-feeding the plant. Everything below goes on top of plain water plus your always-on Microbes. Dry amendments (Veg, Bloom, Incredible Bulk, Kelp It Real, King Krustacean) are top-dressed under the mulch or dissolved into your water; liquids (Microbes, Phishy, Vitamin Sea) mix into the watering can.
You don't need all of these. Serious cannabis growers tend to run the full lineup because they're chasing maximum yield and terpene expression — but a healthy living-soil bed will grow excellent flower on just Microbes, Veg, and Bloom. Treat the power-ups as tools you reach for when a stage or a plant asks for them, not a shopping list you're obligated to complete.
Seedling & transplant
Go gentle. A cooked living-soil bed already has plenty for a young plant, so the only thing you're really adding is biology. Water with Microbes at 1–3 ml per gallon to colonize the young root zone and establish the mycorrhizal partnership early. Hold off on any heavy amendments until the plant is actively growing.
Vegetative stage
Now the plant is building stems, leaves, and root mass and wants nitrogen. Top-dress Veg (0.5-0-3) at about ¼ tablespoon per gallon of your bed's water volume, and keep Microbes in every watering. For vigorous growth and stress resilience, add Kelp It Real (0-0-14) at ¼ teaspoon per gallon — kelp's natural growth hormones drive lush, sturdy vegetative development. If you want an extra push, a light drench or foliar of Phishy fish hydrolysate feeds both the plant and the soil microbes with amino acids.
Early to mid flower
When photoperiod plants flip to 12/12 and flowers set, shift the diet toward phosphorus and potassium. Switch your top-dress to Bloom (0-6-4) at ¼ tablespoon per gallon to fuel flower initiation, still with Microbes in the can. This is calcium-hungry stretch-and-set territory, so a top-dress of King Krustacean at ¼ tablespoon per gallon supplies calcium and chitin, and Phishy makes a great everyday bloom workhorse through this window. If leaves show interveinal yellowing, a foliar of Vitamin Sea delivers magnesium and trace minerals fast.
Late flower
This is where you fatten and finish. Bring in Incredible Bulk (0-10-25), the late-stage bloom booster. Start it around week 4 of flower at ¼ tablespoon per gallon and ramp the dose up through peak bloom as the buds swell and harden. Keep Bloom and Kelp It Real in rotation — the extra potassium from Kelp It Real supports the terpene and resin production that defines a quality finish. Microbes stay in every watering right to the end.
The final stretch — no flush needed
Here's the biggest advantage organic living soil has over synthetic growing: there is no flush. Salt-based systems require a "flush" of plain water at the end to rinse harsh mineral residue out of the plant, or the smoke tastes chemical. In a living-soil bed there are no accumulated salts to rinse — the nutrients are held in organic, biological form and the plant takes only what it needs. So you don't flush; you simply ease off feeding in the last week or two, watering with plain water (Microbes only) and letting the plant finish naturally on the reserves in the soil. The result is smooth, clean-burning, full-flavored flower with nothing to strip out.
Organic Pest & Disease Management
A biologically alive bed is your first line of defense — vigorous plants and a competitive microbial community resist pests and pathogens far better than sterile media. But no room is immune, so scout constantly and act early.
Common pests
Spider mites are the cannabis grower's nemesis: tiny, they thrive in hot, dry air and stipple leaves with pale speckling before webbing the tops. Fungus gnats breed in overly wet surface soil and their larvae nibble roots. Thrips leave silvery scarring, aphids cluster on new growth, whiteflies flutter up when you disturb the canopy, and broad and russet mites distort new growth so subtly they often go unseen until damage is done. Your organic toolkit is integrated pest management: predatory insects (ladybugs, predatory mites, rove beetles), sticky traps for gnats and whiteflies, neem or horticultural soaps in veg, and the chitin in King Krustacean quietly priming the plant's own defenses from the soil up.
Common diseases
Powdery mildew is a white dusting on leaves that spreads in stagnant, humid air. Botrytis (bud rot) is the more dangerous one — it starts inside dense colas in high humidity and can collapse a bud overnight, which is exactly why airflow, defoliation, and sub-45% late-flower humidity matter so much. Root problems like pythium show up as wilting and are almost always a symptom of overwatering; a well-aerated no-till bed teeming with beneficial fungi rarely sees them. The organic playbook is the same across all of them: keep the environment dialed, scout daily, lead with beneficials and prevention, reach for organic sprays (neem, insecticidal soap, Bacillus thuringiensis) only when you have to, and cull a badly infected plant early to protect the rest of the room.
Harvest & Trichomes
Harvest timing is decided on the buds, not the calendar. The signal is in the trichomes — the tiny resin glands frosting the flowers — and you read them with a jeweler's loupe or a cheap 60x pocket microscope.
- Clear / translucent: too early. The plant is still packing on potency; harvesting now gives thin, harsh effect.
- Cloudy / milky: peak. When most trichome heads have turned milky white, THC is at its highest — this is the window most growers target for a bright, energetic harvest.
- Amber: later and heavier. As cloudy heads turn amber, effects shift more sedative and body-heavy. A mix of cloudy with some amber (say 10–30%) is the classic sweet spot; pull earlier for a heady finish, later for couch-lock.
Ignore the pistils (the orange hairs) as your primary gauge — they're a rough hint at best. The trichome heads are the truth.
Once you cut, the dry and cure makes or breaks all your hard work. Hang whole branches in a dark space with gentle airflow at roughly 60°F and 60% relative humidity and let them dry slowly for about 7 to 14 days — when small stems snap rather than bend, they're ready. Then trim and cure in sealed glass jars, filled about three-quarters full, opening ("burping") them daily for the first week or two to release moisture and swap the air. A proper cure of several weeks is what develops smooth smoke and full aroma; rushing it wastes the terpenes your living soil worked so hard to build.
Troubleshooting
Living soil self-corrects better than any other method, but here are the issues you're most likely to meet and how to read them.
- Dark green leaves with clawed, downturned tips: nitrogen excess, usually from over-eager top-dressing in veg. Ease off the Veg and water plain for a bit; the biology will rebalance.
- Interveinal yellowing or rusty spots (often mid-plant): magnesium or calcium demand, common in heavy flower. A foliar of Vitamin Sea corrects magnesium fast, and King Krustacean shores up calcium at the roots.
- Drooping, heavy, "wet" leaves: overwatering — the #1 mistake. In a no-till bed, let the top inch or two dry between waterings and make sure your aeration mix is draining. Chronically soggy surface soil also invites fungus gnats.
- Leaf edges curling up or "tacoing": heat stress, usually the room running above 85°F or lights too close. Cool the room and raise the fixture.
- Bleached, pale tops directly under the light: light burn. Dim the fixture or raise it; the affected tops won't recolor.
- Don't chase a pH pen. A balanced living-soil bed buffers its own pH through microbial activity — the constant pH-and-PPM adjusting that synthetic growers do is unnecessary and can actually disrupt the biology. Feed the soil, keep it moist and covered, and trust the web.
Continue Growing
Ready to go deeper? These companion guides pick up where this one leaves off:
- How to grow photoperiod cannabis organically — the full grower's guide to running light-cycle-triggered plants for maximum yield in living soil.
- What are autoflowers? — how automatic-flowering genetics work, why they suit smaller no-till beds, and how their faster timeline changes your feeding plan.