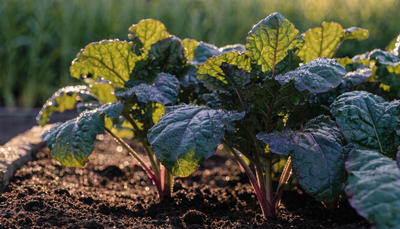
Sweet potatoes are one of the most rewarding root crops you can grow organically — nutrient-dense, surprisingly productive, and well-suited to a low-input, biology-driven garden. They're also one of the most misunderstood. Unlike regular potatoes, they're a tropical vining crop that demands heat, well-drained soil, and a growing season of at least 90 to 120 frost-free days. Get those fundamentals right, and sweet potatoes are remarkably forgiving.
The key to success is understanding what sweet potatoes actually want: warm soil, minimal nitrogen, excellent drainage, and a thriving microbial ecosystem to mobilize phosphorus for root development. This guide covers everything from creating your own slips through to curing your harvest for long-term storage — the organic way.
Choosing the Right Sweet Potato Varieties
Sweet potato varieties differ in flesh color, skin color, texture, and days to maturity. For most home growers, the choice comes down to your climate and what you want to eat.
Beauregard is the most widely grown commercial variety — reliable, fast-maturing (around 90 days), and consistently productive. Jewel offers similar reliability with deep orange flesh. Georgia Jet is an excellent choice for shorter seasons in cooler climates, maturing in as few as 80 days. For something different, Murasaki (purple skin, white flesh) and Stokes Purple (deep purple flesh) have gained popularity for their anthocyanin content and striking appearance. Covington is the current industry standard for uniformity and storage quality.
If you're in a short-season climate, prioritize fast-maturing varieties and start slips indoors early to gain time.
Soil Preparation for Organic Sweet Potatoes
Ideal Soil Conditions
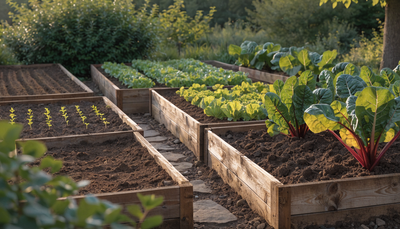
Sweet potatoes thrive in loose, well-drained, sandy loam soil with a pH between 5.8 and 6.2. Heavy clay soils produce misshapen, stunted roots — drainage and soil structure are non-negotiable. If your soil is clay-heavy, raised beds or deeply hilled rows are the practical solution.
The single most important thing to avoid is excess nitrogen. High nitrogen levels push the plant into aggressive vine and leaf production at the expense of root development. You'll end up with a lush green canopy and disappointingly small tubers. This means holding off on compost-heavy amendments unless your soil is genuinely depleted, and skipping high-nitrogen fertilizers entirely once slips are established.
Building Living Soil
Sweet potatoes are mycorrhizal-dependent crops. The mycorrhizal fungi in your soil form partnerships with sweet potato roots, dramatically expanding the plant's ability to access phosphorus and water from the soil matrix. This is one of the key reasons organic sweet potatoes outperform chemically-grown crops in terms of flavor and nutrient density — synthetic fertilizers suppress fungal activity, while organic systems cultivate it.
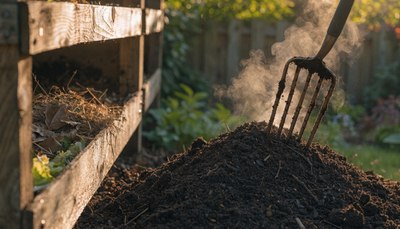
Prepare beds two to three weeks before planting. Work the soil to at least 10–12 inches deep, breaking up any compaction. Incorporate aged compost lightly — a one-inch layer worked in is enough for most soils. Avoid fresh manure. If you're establishing new beds, a cover crop the previous season followed by shallow tillage improves both structure and biology significantly.
Planting Sweet Potatoes: Timing and Technique
Sweet potatoes are grown from slips — rooted shoots sprouted from a mature sweet potato — not from seeds. You can purchase slips from a nursery, but growing your own is straightforward and gives you more control over variety selection.
How to grow slips: About 6–8 weeks before your last frost date, take a healthy sweet potato and suspend it halfway in a jar of water using toothpicks. Place it in a warm, bright location (70–80°F is ideal). Within 2–4 weeks, sprouts will emerge from the top. When each sprout reaches 6–8 inches with a few leaves, twist it off and place it in a glass of water. Roots will develop within a week, and your slip is ready to plant.
Timing: Plant slips outdoors only when soil temperature has consistently reached 60°F — ideally 65°F or above. Sweet potato roots stall in cold soil. In most temperate climates, this means late May to early June. In warm climates (USDA zones 9–11), you can plant as early as April.
Technique: Plant slips in hills or ridges spaced 12–18 inches apart in rows 3–4 feet apart. Set them deep, burying the stem up to the top two leaves — nodes buried underground will produce additional roots. Water in well, then back off. Overwatering during establishment encourages rot rather than rooting.
Watering Sweet Potatoes Organically
Sweet potatoes are more drought-tolerant than most root crops, but they have two critical water windows. The first is the first two to three weeks after transplanting — consistent moisture helps slips establish before heat sets in. The second is tuber bulking, which typically occurs in mid-to-late season (roughly 60–90 days after planting) when roots are actively expanding.
During tuber bulking, irregular watering (boom-and-bust cycles) causes cracking and forked roots. Aim for deep, infrequent watering — about 1 inch per week — rather than light daily irrigation. Stop watering entirely 2–3 weeks before harvest to allow skin to set and concentrate sugars.
Drip irrigation is ideal. It keeps foliage dry (reducing fungal pressure) and delivers water directly to the root zone where it matters.
Organic Fertilizing Schedule for Sweet Potatoes
The fertilizer program for sweet potatoes is deliberately light — the goal is to support root development and soil biology, not to push vegetative growth.
At planting: Inoculate your soil and slips with MICROBES. Sweet potatoes form deep mycorrhizal partnerships, and introducing diverse microbial life at planting pays dividends throughout the season. Mycorrhizal fungi are the primary mechanism by which sweet potato roots access phosphorus across a wide soil volume — no amount of phosphorus fertilizer replicates this.
Weeks 1–4 (vine establishment): Apply GOLD VEG at half the standard rate to support early foliage development without pushing excessive nitrogen. This is a transitional window — you want enough vegetative growth to shade the soil and establish canopy, but not so much that the plant prioritizes vines over roots.
Weeks 4–8 (root initiation and bulking): Shift to SEAPHOOD as your primary fertility input. SEAPHOOD's fish hydrolysate base provides phosphorus in highly bioavailable form alongside natural growth stimulants that directly encourage root mass development. This is exactly what sweet potatoes need during their critical root-bulking phase. Apply every 2–3 weeks through week 10, then stop feeding to allow the crop to mature.
Throughout the season, foliar applications of KELP IT REAL every 2–3 weeks support trace mineral uptake and general vine vigor. Kelp's natural cytokinins support cell division and stress tolerance — particularly useful during heat waves, which sweet potatoes often experience at peak summer.
Organic Pest and Disease Management
Sweet potatoes have relatively few serious pest and disease problems in organic systems, particularly when grown in well-drained, biologically active soil.
Sweet potato weevil is the most damaging pest in warm climates — a small black-and-red snout beetle whose larvae tunnel through roots and vines. Use certified disease-free slips, practice crop rotation, and destroy any infested plant material immediately. There is no organic spray solution once weevils are established.
Wireworms and soil grubs can damage tubers in poorly managed soils. Building microbial diversity (particularly entomopathogenic fungi) suppresses these populations naturally. Avoid planting sweet potatoes where grass was recently turned under.
Fusarium root rot occurs in waterlogged or compacted soils. Prevention is straightforward: drainage first, then a living soil rich in beneficial bacteria and fungi that outcompete pathogens. Once fusarium is present in soil, it's persistent — rotation and resistant varieties are the long-term solution.
Deer and voles are often more problematic than insects. Physical barriers are more reliable than deterrents once animals discover a crop.
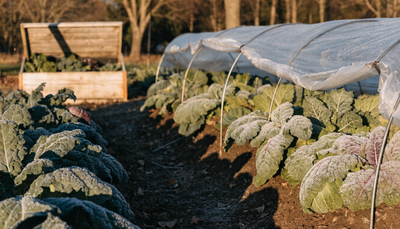
Harvesting Sweet Potatoes
Sweet potatoes are ready to harvest when vines begin to yellow naturally, or when you've reached the variety's stated days to maturity. Don't wait for frost — a frost will kill the vines and can damage tubers if they're not harvested promptly. Harvest before the first frost is forecast.
Use a garden fork inserted well away from the crown to avoid spearing roots. Loosen the soil in a wide circle before lifting. Sweet potatoes are easily damaged — cuts and bruises during harvest shorten storage life significantly. Handle them as you would eggs.
Curing is essential. Freshly harvested sweet potatoes are starchy and relatively bland. Curing converts starches to sugars and heals skin wounds, dramatically improving flavor and extending storage. Cure at 85–90°F with 85–90% relative humidity for 5–7 days. A closet with a space heater and pan of water, or a warm greenhouse, works well. After curing, store at 55–60°F in a dry, well-ventilated location. Properly cured sweet potatoes store for 6–12 months.
Common Problems and Troubleshooting
Lush vines, few or small roots: Excess nitrogen, waterlogged soil, or excessive shade. Cut back nitrogen inputs entirely and ensure good drainage. In future seasons, avoid heavy compost amendments.
Forked or misshapen roots: Caused by rocky or compacted soil, irregular watering, or nematode damage. Deep tillage before planting and consistent moisture during bulking prevents most cases.
Cracked roots: Irregular irrigation — typically heavy rain or watering after a dry spell during bulking. Consistent deep watering reduces this significantly.
Yellowing vines mid-season: Check for weevil damage at the crown. If the crown is clean, it may be heat stress or a micronutrient deficiency — a foliar application of KELP IT REAL can quickly address trace mineral gaps.
Slips failing to establish: Most commonly caused by cold soil, planting too deep, or letting slips dry out before planting. Plant only in warm soil, keep slips moist until planting, and water in well immediately after transplanting.
Frequently Asked Questions
Can I grow sweet potatoes in containers?
Yes. Use a large container — at least 15–20 gallons — with excellent drainage. Fabric pots work exceptionally well. The vines will sprawl, so plan for that. Container sweet potatoes tend to produce fewer, smaller roots than in-ground plants but are perfectly viable for small spaces.
How do I know when sweet potatoes are ready to harvest?
Yellowing and dying back of the vines is a natural signal. You can also do a test dig — carefully unearth one root and check its size. Most varieties are harvest-ready at 90–120 days from transplanting, regardless of vine appearance.
Do sweet potatoes need a trellis?
No. Sweet potato vines sprawl along the ground and do not climb. Some growers train them to keep paths clear, but trellising is not required or beneficial.
Can I save my own slips each year?
Yes — select firm, healthy roots from your best plants and store them through winter for the following season's slips. This is how generations of gardeners have maintained their sweet potato lines. Avoid saving slips from plants that showed disease symptoms.
Why does my sweet potato taste different from the store?
Flavor improves significantly with proper curing and storage. Fresh-dug sweet potatoes taste starchy and flat. After curing, starches convert to sugars and the characteristic sweetness develops. Organically grown sweet potatoes also tend to have more concentrated flavor than conventionally grown.