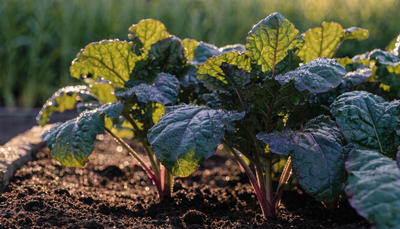
Onions are the foundation of almost every cuisine on earth, and growing your own organically is more satisfying than most vegetables. The flavor difference between a freshly cured homegrown onion and a supermarket bulb that's been in cold storage for six months is significant. Sulfur compounds developed in the field — not a warehouse — give homegrown onions their complexity and bite.
The main thing that trips up new onion growers is day-length sensitivity. Choose the wrong variety for your latitude and your onions will either bolt prematurely or never form a proper bulb at all. Get that right first, then the rest of the crop is straightforward. This guide covers everything from variety selection and planting methods to curing and storage — plus how to grow shallots alongside your onions with minimal extra effort.
Choosing the Right Onion Varieties
Onion bulb formation is triggered by day length, and varieties are bred for specific latitude ranges. This is the single most important decision you'll make.
Long-day varieties need 14–16 hours of daylight to initiate bulbing. They're suited to northern latitudes (above 37°N roughly): the northern US, Canada, UK, northern Europe. 'Walla Walla', 'Ailsa Craig', 'Yellow Sweet Spanish', and 'Copra' are reliable long-day types.
Short-day varieties need only 10–12 hours to trigger bulbing, making them suited to southern latitudes and mild climates where they're planted in autumn and harvested in spring. 'Georgia Sweet', 'Texas Super Sweet', and 'Red Creole' are common short-day varieties.
Day-neutral (intermediate) varieties bulb across a wider day-length range and work reasonably well across most of North America and Europe. 'Candy', 'Super Star', and 'Red Amposta' fall in this category. If you're unsure of your latitude zone, start here.
Shallots follow the same day-length principles as onions but form clusters of smaller, more intensely flavored bulbs. Most commercially available shallots are long-day types. Grow them identically to onions — they just need slightly more space between bulbs to allow cluster expansion.
Soil Preparation for Organic Onions
Ideal Soil Conditions
Onions are shallow-rooted and feed heavily from the top 12 inches of soil. They need:
- pH 6.0–7.0 — slightly acidic to neutral. Sulfur availability (which drives flavor) is best in this range.
- Loose, well-drained texture — compacted soil physically restricts bulb expansion and causes misshapen bulbs. Raised beds or deeply tilled ground both work well.
- High phosphorus availability — bulb formation is a phosphorus-intensive process. Soils deficient in phosphorus produce small, underdeveloped bulbs regardless of how well everything else is managed.
- Good drainage — onions tolerate moist soil but not waterlogging. Saturated conditions promote fungal neck rot, especially as bulbs size up.
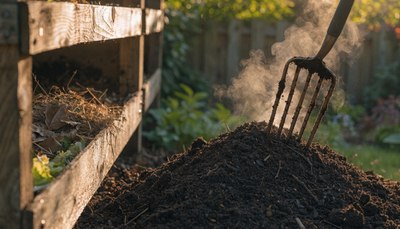
Work in well-finished compost 4–6 inches deep before planting. Unlike lavender, onions want a moderately fertile soil — but the emphasis should be on phosphorus and trace minerals, not nitrogen.
Building Living Soil
Onions have a surprisingly inefficient root system for phosphorus uptake. They're one of the crops that benefits most from mycorrhizal fungi — but ironically, onion family plants don't form mycorrhizal associations. Instead, phosphorus-solubilizing bacteria in the rhizosphere are the key.
Before planting, inoculate the bed with Growganica MICROBES. The phosphorus-solubilizing strains in this blend unlock bound phosphorus in the soil matrix, making it available to onion roots that would otherwise not access it. In beds where phosphorus has been applied in previous seasons but is pH-locked or bound to calcium, this microbial activation can have a dramatic effect on bulb size. Apply to the soil surface and work in lightly, or dissolve in water and drench the planting area before setting out transplants or sets.
Planting Onions: Timing and Technique
Onions can be started from three sources, each with tradeoffs:
Sets (small dormant bulbs) are the easiest starting point. Plant them 1 inch deep, 4–6 inches apart, with the pointed tip up. They establish quickly and are less vulnerable to early-season cold. The downside is they're more prone to bolting than transplants.
Transplants (young seedlings started 8–10 weeks before outdoor planting) give the most flexibility and control. Start indoors under lights, harden off for a week before transplanting, and set out at the same depth they were growing in their cell trays. Transplants generally produce larger, more uniform bulbs than sets.
Direct seeding works but requires the longest lead time. Sow ¼ inch deep, thin to 4–6 inch spacing once seedlings reach pencil thickness. Only practical in long-season climates where you can direct sow in late winter or very early spring.
Timing for long-day varieties: plant sets or transplants 4–6 weeks before last frost in spring. Onions are cold-hardy to about 20°F once established. For short-day varieties: plant in autumn, 4–6 weeks before first frost, for a spring harvest. Fall planting for overwintering works best in USDA zones 6 and warmer; in colder zones, plant in spring or protect overwintered onions with a thick mulch.
Shallots: plant individual cloves (like garlic) from sets in early spring, 6–8 inches apart, 1 inch deep. Each clove will multiply into a cluster of 6–10 daughter bulbs.
Watering Onions Organically
Consistent moisture drives bulb development — inconsistent watering causes split bulbs and cracking. Aim for 1 inch of water per week during the growing season, either from rain or supplemental irrigation.
As bulbs approach maturity (when the tops begin to yellow and fall over naturally), reduce watering significantly. Wet soil during the final ripening period promotes neck rot in storage. Stop irrigating entirely 1–2 weeks before anticipated harvest.
Drip irrigation is ideal: it keeps foliage dry (reducing disease risk) and delivers consistent soil moisture. If hand-watering, water at the base and avoid wetting the neck where leaves emerge from the bulb.
Organic Fertilizing Schedule for Onions
Onions need a front-loaded fertility program: most of the feeding should happen in the early growth phase when green tops are developing. Once bulbs start forming, nitrogen inputs should be reduced or stopped — late nitrogen pushes lush tops at the expense of bulb development and storage life.
During the green-top stage (from planting through midsummer for spring-planted crops), apply Growganica GOLD VEG every two to three weeks. This supports the vigorous canopy development that drives photosynthesis and carbohydrate loading into the developing bulb. Strong tops mean strong bulbs — the two are directly connected. A well-fed canopy during vegetative growth translates into higher sugars, better flavor, and better storage quality.
Throughout the growing season, use Growganica KELP IT REAL as a monthly foliar spray. Kelp delivers the trace minerals — including sulfur, zinc, and manganese — that directly support the synthesis of the volatile sulfur compounds responsible for onion flavor and pungency. This is particularly relevant if you're growing for storage or culinary quality rather than just yield. Kelp also improves stress resilience during temperature swings and drought periods that commonly occur in mid-growing-season.
At transplanting and again at bulb initiation (when you first notice swelling at the base), drench the root zone with Growganica SEAPHOOD. The high phosphorus availability in this blend feeds directly into bulb formation. Phosphorus drives the cell division and energy storage processes that size up the bulb. In phosphorus-responsive soils, a targeted application at bulbing onset can noticeably increase final bulb diameter.
Organic Pest and Disease Management
Onions have a moderate pest and disease profile. The main threats are worth knowing in advance.
Onion thrips are the most common pest. They rasp the leaf surface, leaving silver streaking, and can cause significant yield reduction in dry summers. Reflective mulch (silver or aluminum) physically confuses thrips. Neem oil or insecticidal soap applied in the evening controls populations without harming beneficial insects. Consistent moisture stress makes plants more vulnerable — another reason to maintain even irrigation.
Onion fly (Delia antiqua) larvae tunnel into bulbs and roots, causing wilting and rotting. Covering beds with insect-proof mesh from planting through early summer is the most effective organic control. Crop rotation is essential — never plant onions or their relatives in the same bed more than once every three years.
Downy mildew causes gray-purple fuzzy patches on leaves and is worst in cool, wet seasons. Improve air circulation by spacing plants appropriately. Copper-based sprays (copper hydroxide or copper sulfate) are approved for organic production and provide reasonable control.
Neck rot (caused by Botrytis allii) is a storage problem that begins in the field during wet ripening periods. The fix is cultural: ensure good drainage, reduce irrigation as plants mature, and cure bulbs thoroughly after harvest.
White rot is a devastating soilborne fungal disease with no practical cure once established. Sclerotia can survive in soil for 20+ years. Prevention is everything: don't bring infected soil or plant material onto your site, and practice strict crop rotation.
Harvesting Onions
Harvest timing and post-harvest handling are where most home growers leave yield on the table — or lose bulbs to rot in storage.
Onions are ready to harvest when approximately 50–75% of the tops have fallen over naturally. Don't force tops over by hand — this invites disease entry at the neck. When most tops have flopped, stop watering and allow the soil to dry for a few days before pulling.
Pull or gently lever bulbs from the ground on a dry day. Lay them in a single layer on wire mesh, slatted trays, or spread on dry ground in a shaded, well-ventilated location. This is the curing stage — and it's critical for storage quality.
Curing takes 2–4 weeks. During curing, the outer skins dry and tighten, the neck dries and closes, and the sugars and sulfur compounds that give onions their flavor and storage stability concentrate. Cure at ambient temperature in a dry, airy location — a covered porch, a barn, or under shade cloth all work. Avoid humidity above 70% during curing.
After curing, brush off loose soil, trim roots, and cut dried tops to 1 inch above the bulb. Store in mesh bags, wooden crates with gaps, or braided if tops were left intact for that purpose. Ideal storage conditions: 35–50°F with low humidity and good air circulation. Properly cured onions can store 3–6 months; sweet varieties store less well (2–4 months) due to higher water content.
Shallots cure and store identically to onions and typically last even longer — up to 6–8 months under ideal conditions.
Common Problems and Troubleshooting
Onions bolting (sending up a flower stalk): Usually caused by temperature fluctuations in early spring or planting oversized sets. Once a flower stalk forms, the bulb will not develop further — harvest and use these immediately rather than trying to store them.
Small bulbs despite good-looking tops: Either the wrong day-length variety for your latitude, late planting, or phosphorus deficiency. Verify variety selection first. For future plantings, ensure phosphorus availability at bulbing onset.
Split or doubled bulbs: Caused by inconsistent moisture, usually a dry period followed by heavy rain or irrigation. Maintain even moisture throughout the growing season.
Bulbs rotting in storage: Incomplete curing is the most common cause. If necks feel soft or wet at harvest, those bulbs won't store — use them first. Allow a full three to four weeks of proper curing before moving to long-term storage.
Yellowing leaves mid-season: Could be nitrogen deficiency, onion thrips damage, or the beginning of natural maturation. Check the neck — if bulbs are sizing and yellowing is from the tips down, this is natural. If yellowing is early and plants look stressed, check for pests and consider a GOLD VEG application.
Frequently Asked Questions
What's the difference between sets, transplants, and seeds for growing onions?
Sets are small dormant bulbs — easiest to establish, faster to plant, but more prone to bolting. Transplants are seedlings you start indoors 8–10 weeks before planting out — they produce more uniform bulbs and bolt less. Seeds give you maximum variety choice but require the most time and effort. For most home gardeners, sets or transplants are the practical choice.
How do I know when my onions are ready to harvest?
When 50–75% of the tops have naturally fallen over and begun to dry, the bulbs are ready. Don't force the tops down — let them fall on their own. Stop watering, let the soil dry for a few days, then pull on a dry day. Premature harvest means poor storage life.
Can I grow onions and shallots together in the same bed?
Yes. They have the same soil, water, and fertility requirements. Plant shallot sets slightly wider apart (6–8 inches vs 4–6 for onions) to allow room for cluster development. Harvest and cure at the same time.
Why do my stored onions go soft after a few weeks?
Almost always inadequate curing. Onions need 2–4 weeks of warm, dry, well-ventilated conditions to properly close the neck and dry the outer skins. Humid storage conditions also accelerate softening. Check that storage temperatures are below 50°F and humidity is low. Sweet onion varieties inherently store less well than pungent types — they're better eaten fresh.
Do onions need a lot of fertilizer?
Moderate fertility is the target — not high. Focus on phosphorus availability for bulb development and trace minerals (especially sulfur) for flavor. Avoid high-nitrogen inputs after bulbing begins; late nitrogen pushes leafy growth, reduces bulb quality, and shortens storage life.