Pumpkins are one of the most rewarding crops you can grow organically — and one of the most demanding. These are heavy feeders that sprawl across beds, pull enormous resources from the soil, and put everything into producing fruit that can weigh anywhere from two pounds to two hundred. Get the feeding program right and you'll harvest pumpkins with thick rinds, deep color, and exceptional shelf life. Get it wrong and you'll end up with vines that run out of energy before the fruit matures.
This guide covers organic pumpkin growing from seed selection through harvest — with specific attention to feeding, pollination, and the soil biology that separates mediocre yields from exceptional ones.
Choosing the Right Pumpkin Varieties
Pumpkin varieties split cleanly into a few categories: carving types, pie types, giant types, and mini types. Each has different growing requirements, space needs, and timelines.
Carving and display pumpkins — Howden, Connecticut Field, and Autumn Gold are reliable standards. They run 70–100 days to maturity and produce 10–20 lb fruit on 10–15 ft vines. These are the easiest to grow successfully in most climates.
Culinary pumpkins — Sugar Pie, Cinderella (Rouge Vif d'Etampes), and Long Island Cheese are the go-to choices for eating. Denser flesh, better sweetness, and a shorter vine habit make them more manageable in smaller gardens.
Giant types — Atlantic Giant and Dill's Atlantic Giant are for growers who want to push for maximum weight. These need exceptional soil fertility, consistent deep watering, and significantly more space — plan for 20+ ft vine spread per plant.
Mini pumpkins — Baby Boo, Jack Be Little, and Munchkin work well in tighter spaces, mature faster (70–80 days), and are ideal for growers who want volume over single-fruit size.
Check your frost-free window before choosing. Pumpkins need 75–120 days from transplant depending on variety — that timeline determines what you can realistically finish in your climate.
Soil Preparation for Organic Pumpkins
Ideal Soil Conditions
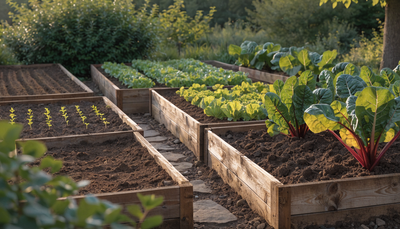
Pumpkins want loamy, well-draining soil with a pH of 6.0–6.8. They will not tolerate waterlogged roots — standing water causes root rot quickly and compromises fruit development even if the vine appears fine above ground. Raised beds or mounded rows are worth the extra setup work, especially in clay-heavy soils.
Drainage matters, but so does water retention. Pumpkins are deep-rooted plants that draw moisture from well below the surface — sandy soils that drain too fast will create drought stress even with regular irrigation. The ideal structure holds moisture while staying porous enough that air reaches the roots.
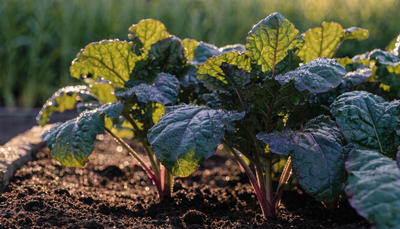
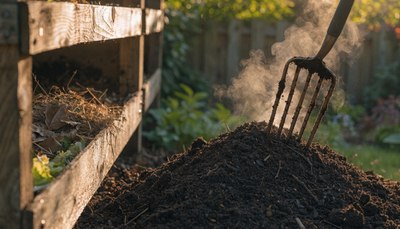
Building Living Soil
Compost is the foundation. Work 3–4 inches of finished compost into the top 12 inches of soil before planting. This improves structure, adds nutrition, and — critically — feeds the soil biology that pumpkins depend on.
Mycorrhizal fungi form a mutualistic relationship with pumpkin roots that dramatically improves both nutrient uptake and drought tolerance. In natural soil, this relationship develops over years. When you're planting in amended beds or any soil that's been disturbed or fumigated, inoculation gives plants that network immediately. Growganica's MICROBES delivers a concentrated blend of mycorrhizal fungi and beneficial bacteria specifically formulated for vegetable gardens — apply it at transplant time by working it into the planting hole so roots make contact immediately. The difference in vine vigor and fruit set in mycorrhizae-inoculated soil is consistently measurable.
Add KING KRUSTACEAN at soil prep time. This crab meal amendment is high in calcium and chitin — calcium strengthens cell walls in the rind (reducing soft spots and improving storage life), while chitin stimulates the beneficial microbial populations that suppress soil pathogens. For a crop where rind integrity and shelf life matter, calcium at the soil prep stage is not optional.
Planting Pumpkins: Timing and Technique
Start seeds indoors 2–3 weeks before your last frost date, or direct sow once soil temperatures reach 65°F consistently. Pumpkins don't handle transplant shock well — use biodegradable pots that go directly into the ground without disturbing roots.
Plant in hills: mound soil 6–8 inches high, 18–24 inches wide, spacing hills 4–6 feet apart in rows 8–10 feet apart. Hills improve drainage at the root zone and warm faster in spring. Sow 3–4 seeds per hill, 1 inch deep. Thin to the strongest two plants once seedlings are 3 inches tall.
In colder climates, black plastic mulch laid over the hill before planting accelerates soil warming by several weeks and can meaningfully extend your effective growing season. Organic mulch (straw, wood chips) applied around — not on top of — hills conserves moisture and suppresses weeds once plants are established.
Watering Pumpkins Organically
Pumpkins need consistent, deep watering — typically 1–2 inches per week. The emphasis is on deep: shallow, frequent watering encourages shallow root systems that are vulnerable to drought stress and heat. Water at the base of the plant, not overhead, to keep foliage dry and reduce powdery mildew pressure.
Drip irrigation or soaker hoses are the best option for organic pumpkin production. They deliver water directly to the root zone, minimize foliar moisture, and are consistent enough to prevent the wet-dry cycling that causes blossom end rot and irregular fruit development.
During active fruit development (after pollination, when fruit is sizing up rapidly), water demand increases significantly. Don't let plants wilt at this stage — stress during fruit fill directly reduces final weight and rind quality.
Organic Fertilizing Schedule for Pumpkins
Pumpkins have distinct nutritional needs across three growth phases: vine establishment, flowering and pollination, and fruit development. Matching your feeding to these phases prevents waste and maximizes yield.
Vine establishment (weeks 1–4 after transplant): Nitrogen drives early growth. Apply GOLD VEG every 7–10 days during this phase. The nitrogen-forward formula supports rapid leaf and vine expansion — which matters because more leaf area means more photosynthesis to fuel fruit development later. Don't rush past this phase; vines that have been pushed to produce larger canopy earlier consistently produce better in the fruit-fill phase.
Flowering and pollination (weeks 4–7): As flower buds form, shift feeding emphasis. Introduce KELP IT REAL at this stage. Kelp's natural cytokinins and auxins support flower development, improve pollen viability, and strengthen the hormonal signaling that drives successful fruit set. Organic growers consistently report better fruit-set rates and more uniform early fruit sizing when kelp is applied during the flowering window. Continue at 7–10 day intervals through active pollination.
Fruit development (weeks 7–12+): Once fruit is set and sizing, phosphorus and potassium become the priority nutrients. This is where INCREDIBLE BULK earns its place. The phosphorus-potassium formulation directly supports the energy transfer that drives cell division and fruit fill — the two processes that determine final fruit size and rind thickness. Apply every 7–10 days from fruit-set through the final two weeks before harvest.
Organic Pest and Disease Management
Pumpkins face a consistent cast of pests and diseases. Knowing what to watch for — and when — keeps problems manageable without synthetic inputs.
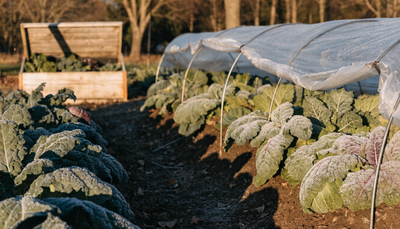
Squash vine borer: The most destructive pumpkin pest in many regions. Adult moths lay eggs at the base of vines in midsummer; larvae bore into stems and destroy vascular tissue. Monitor for eggs (small, flat, reddish-brown) on stem bases from late June through July. Row covers exclude adults if applied before laying season begins — remove covers when flowering starts to allow pollination. For established infestations, cut the borer out of the stem with a knife and bury the wound under moist soil so it can re-root.
Cucumber beetles: Both striped and spotted varieties spread bacterial wilt and feed on leaves and fruit. Kaolin clay, applied as a foliar spray, creates a physical barrier that discourages feeding. Companion planting with nasturtiums and marigolds provides some repellent effect.
Powdery mildew: Nearly universal in pumpkin production, especially late in the season. Baking soda spray (1 tablespoon per gallon water with a few drops of liquid soap) applied weekly is effective as a preventative. Improve air circulation by training vines to keep the canopy open. Remove severely infected leaves.
Squash bugs: Look for clusters of bronze-colored eggs on the undersides of leaves and remove them by hand. Neem oil applied early in the season disrupts nymph development.
Pollination: Organic gardens benefit from hand-pollination, especially when bee populations are low or weather limits pollinator activity. Female flowers have a small swollen base (the future fruit); male flowers are on plain stems. Using a small paintbrush or by removing a male flower and touching it directly to the center of an open female flower completes pollination effectively. Do this in the morning when flowers are fully open.
Harvesting Pumpkins
Timing harvest correctly has a significant impact on storage life and eating quality. Visual and tactile cues are more reliable than calendar dates alone.
A ripe pumpkin has a hardened rind that resists fingernail scratching, a fully dried and corky stem, and coloring that has deepened to the mature shade for that variety. The tendril closest to the fruit on the vine will be completely dry and brown at maturity on most varieties.
Harvest before hard frost. Cut from the vine with a sharp knife or pruning shears, leaving 3–4 inches of stem — never carry pumpkins by the stem, as breakage dramatically shortens storage life. Cure harvested pumpkins in a warm (80–85°F), dry location for 10–14 days before moving to long-term storage. Curing hardens the rind, heals surface scratches, and extends shelf life significantly.
Properly cured pumpkins store 2–6 months in a cool (50–60°F), dry location.
Common Problems and Troubleshooting
Flowers dropping without fruit setting: Usually indicates pollination failure. Check whether male and female flowers are opening simultaneously — male flowers typically appear 1–2 weeks before females. Introduce hand-pollination and evaluate whether bee activity is adequate.
Fruit rotting at the blossom end: Blossom end rot is calcium deficiency, typically triggered by irregular watering rather than absent calcium. Consistent soil moisture allows calcium uptake. KING KRUSTACEAN at soil prep addresses calcium supply long-term; consistent drip irrigation addresses uptake.
Pale, yellowing leaves on established vines: Interveinal yellowing points to magnesium deficiency. A foliar spray of Epsom salt (1 tablespoon per gallon) provides rapid uptake. In sandy soils where magnesium leaches out quickly, this is a recurring need.
Vines wilting suddenly despite adequate water: Suspect bacterial wilt transmitted by cucumber beetles. Cut a wilted stem and touch the cut ends together — stringy threads that pull apart when you slowly separate the ends confirm bacterial wilt. There is no organic cure for infected plants; remove and dispose of them to prevent spread.
Fruit failing to develop beyond golf-ball size: Usually a nutrition issue at fruit set. Confirm you've shifted from GOLD VEG to INCREDIBLE BULK at fruit set, and that plants are receiving adequate phosphorus and potassium for cell division.
Frequently Asked Questions
- How much space do pumpkins actually need?
- Standard carving and pie varieties need at least 50–100 square feet per plant when fully spread out. Compact or bush varieties exist (like Bush Sugar Pie) that work in tighter spaces and are worth selecting if space is limited. Giant varieties should not be grown in less than 150–200 square feet per plant.
- Can I grow pumpkins in containers?
- Not practically for most varieties. The vine length, root depth, and water/nutrient demand make container growing nearly impossible to sustain through harvest. Bush varieties in very large containers (30+ gallons) with obsessive watering and fertilizing are technically possible, but ground growing or raised beds are far more productive.
- Why are my pumpkins turning orange too early?
- Premature color change combined with small size usually indicates the plant has experienced significant stress — water stress, heat stress, or nutritional depletion. Once color change begins, the growth phase is largely over. Consistent watering and feeding through the entire season prevents early coloring.
- When do I stop watering pumpkins before harvest?
- Reduce watering in the final 7–10 days before harvest. This stresses the plant slightly in a way that encourages the vine to push remaining energy into the fruit and allows the rind to harden fully. Don't cut off water entirely — just reduce frequency.
- Do organic pumpkins taste different than conventionally grown ones?
- Many growers report noticeably richer flavor in organically grown culinary pumpkins, likely due to the microbial activity in living soil producing a broader nutrient profile. The difference is most pronounced in culinary varieties (Sugar Pie, Cinderella) where flavor complexity matters.